


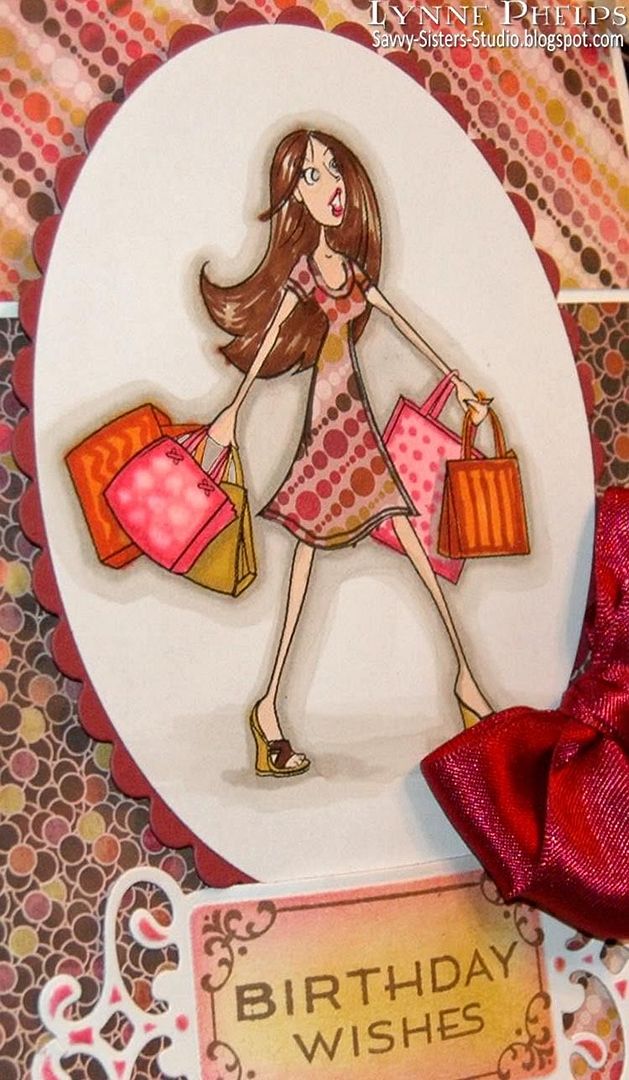
My neice Hannah just had her 19th birthday, and I thought this fun digi image from Amber Ink suited her perfectly! Hannah is very a very smart, stylish, funny young lady with loads of personality and I love her dearly!
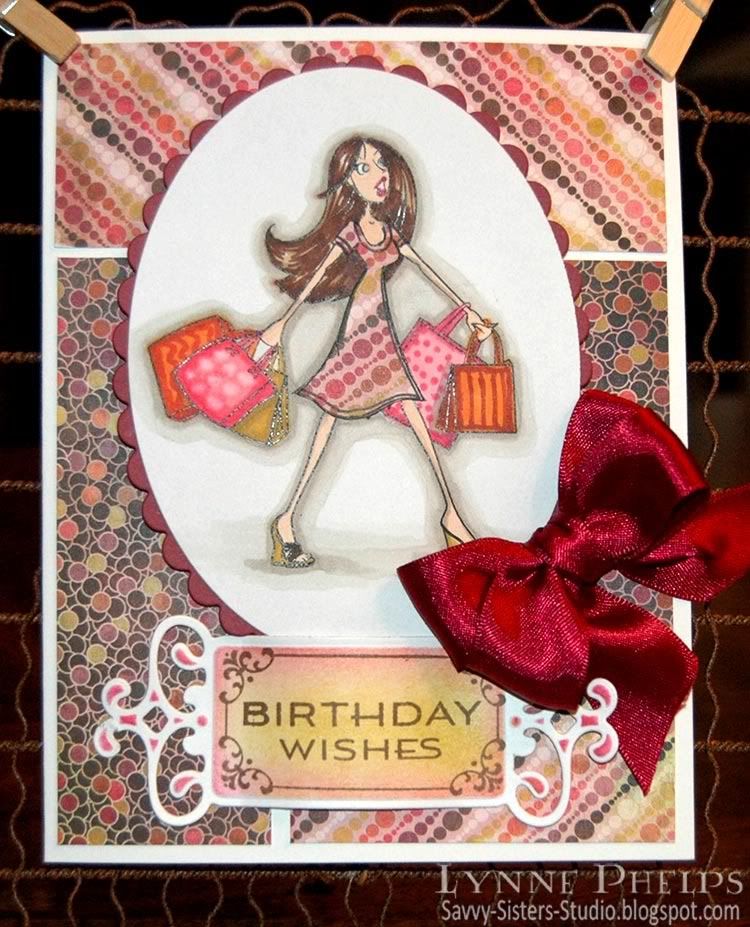
Have you heard about Amber Ink? The artist, Amber, and her mother have started up a new company. In the "Amber Girls" line, she is offering Digi sets - just like you might find in a clear stamp set. I only used the main image, but there are also shoes, purse, tote, etc. plus a sentiment: "But I need it. . . ." And for a limited time, several of the Amber Girl sets are FREE! They are just darling, and I can't wait to use the other sets. I also LOVE her Love Bunny stamps, they are so cute and expressive! She also has coordinating digi-paper, and clear stamps will be coming. Plus Amber Ink is perfect for me, because I'm brilliant, not patient!!!! ;-)
Back to my card. I knew I wanted to paper-piece her dress. In the normal way when you paper-piece with a rubber stamp, you stamp once on your base paper and color as usual, then you ink up just the part of the stamp with the item you want to paper-piece and stamp it on the patterned paper, then you cut it out and glue it over the corresponding spot on the base image.
There are some issues when you try to do this with a digital image:
- I was using Basic Gray "Indian Summer" paper which comes on 6 x 6 inch sheets, which would have been an awkward size to try and run through my printer.
- I did not want to print the whole image again which would have wasted the whole sheet of patterend paper.
- I would have to do some image editing to print only the area with her dress.
- It was too much of a hassle!
Unless you run your finger over the image, it is very difficult to tell that the patterned paper is behind instead of in front!
TIP: Try the new Fiskars Fingertip Craft Knife. The handle is a ring which goes around your index finger and the knife becomes an extension of your finger. I was very pleased at how much more dexterity and control I had when making intricut cuts - it was easy! Here is a short product demo I found on YouTube:
I hope you will go check out Amber Ink, and also consider getting the fingertip knife. They also have a version with the tiny swivel blade.
Stamps: Amber Ink - But I Need It digi set; Waltzingmouse Stamps - Fancy Phrases.
Paper: ValuePack - 5 x 6.5 inch white card & envelope; Basice Gray - Indian Summer 6 x 6 inch pad; Stampin' Up! - Bravo Burgundy card stock.
Ink: Copic - alcohol Sketch markers, 0.5 MultilinerSP; Ranger Distress - Worn Lipstick, Scattered Straw; Memento - Rich Cocoa.
Miscellaneous: Spellbinders - Fancy Tags die, Petite Ovals and Scalloped Petite Ovals; Ribbon; Fiskars Fingertip Craft Knife; Glue Stick; PopDots.


gorgeous coloring on your card!!
ReplyDeleteSooooooooo cool and mega-smart! I love how chic and sophisticated this card is while still being teenage savvy. Thanks for the awesome shout out! We tweeted you.
ReplyDeleteThis is so fun Lynne! And perfect for your niece! I bet she's thinking what a cool Aunt she has1
ReplyDeleteWell, how do you like that! Reverse paper piecing -- what a cool idea! Love your card. BTW, I'm a Twilight addict, too. Just had a Twilight party at my house -- food, drink, good friends, and the first two movies. Getting ready for the third soon!
ReplyDeleteFABULOUS, love her outfit.
ReplyDelete