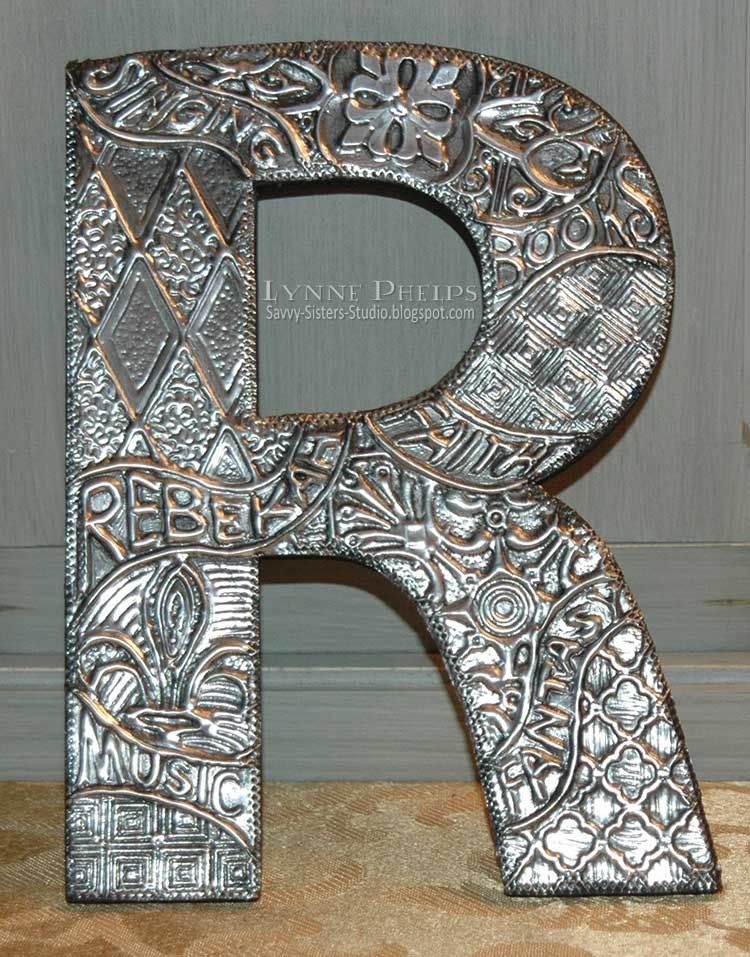
I have loved metal tooling for a long time, but it was a post on Hels Sheridan's Ink on my Fingers blog that sparked this particular project. I had not covered chipboard before, and I assure you I'll be doing it again! Such fun! Quick too - the whole project, start to finish, took less than two hours.
First, I drew in wavy lines and the words between them, embossing from the back and refining from the front. Then I used molds from Ten Seconds Studio (cool tools for cool people - hey, I'm cool!) for the areas of pattern between the words. I alternated big splashy patterns with smaller regular patterns. The teflon tools make it so easy to work on the metal - much less hand fatigue. You can teach yourself all you need to know by watching their Taco Tuesday videos - irreverent, super funny and always inspiring! I used the "Controlled Squish Technique" (we are very technical around here!) to avoid having high relief areas that would have needed to be filled with spackle on the backside for support. Love that!
After adhering the metal to the chipboard, I took a patterned wheel and rolled all around the edges, ala Hels Sheridan. It really gives it a finished look! Then I took a makeup sponge loaded with black acrylic paint and sponged the whole thing and the chipboard edges. I turned the sponge to a clean spot and carefully dabbed the paint off the raised areas. LOVE this look. It went from aluminum to instant pewter!
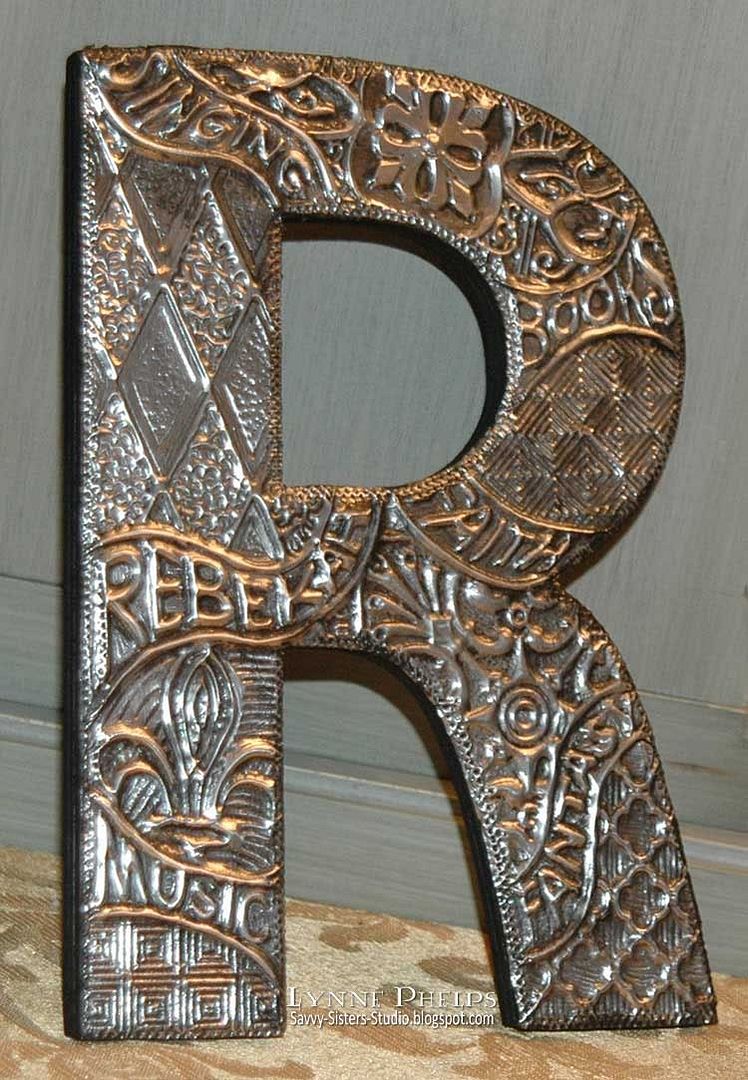
Here is a view at a different angle where you can see the relief better (click to embiggan):
Please leave a comment and let me know what you think - I LOVE hearing from you!













Wowzers Lynne This is TOTALLY stunning...and Rebekah is a very lucky lass to have such a talented aunty :O)) This is a piece to be treasured...and thank you...I am so chuffed that you were inspired by my piece of art...I want to see more of your fab TSS work now..you have a definite flair for it...did I say...this is STUNNING!!!!! Hels xx
ReplyDeleteWow, what a stunning piece you created. I just discovered Ten Second Studio this last week and can hardly wait for my new metal (toys) to arrive. Thanks for all the great info and tips. I hope my projects turn out half as great as yours. I am wanting to do some jewelry pieces with the metal tooling among many other things. Marita S.
ReplyDeleteThat is simply stunning. You did a beautiful job with the molds and the writing on metal. I love seeing what everyone does with our products and it always amazes me how creative our customers are. Keep up the great job and I hope you have fun metalizing your world. I've seen Hels' work and it's beautiful.
ReplyDeleteCheryl
Its Gorgeous. I watch the Taco tuesday gals every week and I see that Cherly even stopped by to see what you did. I'm sure your niece will Love it.
ReplyDeleteTFS
Lynn
OMG this is so fabulously gorgeous! I'm so glad you left a comment on my blog so I could find you! This is just stunning!
ReplyDeleteOh my gosh, you are reading my mind. I have had this chipboard K, in addition to several more K's, for so long and wondering what I would do with them. This is it, I want to do this. Must talk with you about it. It is absolutely gorgeous. Thanks so much for the light bulb moment!!!
ReplyDeleteThrough the wonder of Pinterest, I can see this stunning project for the first time, four years later. It's fabulous, and I will pin too.
ReplyDeleteWhat gauge metal did you use?
ReplyDelete