Showing posts with label Thinking of You/Just Because. Show all posts

Thursday, October 20, 2011

A Sad Farewell

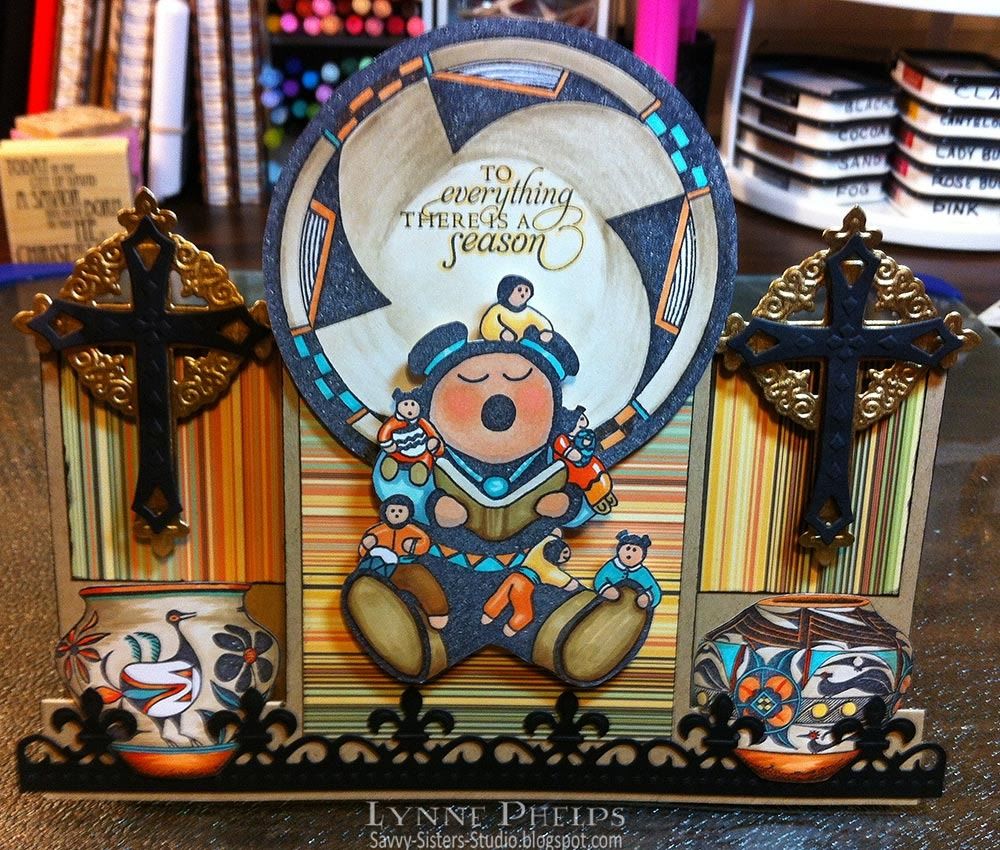
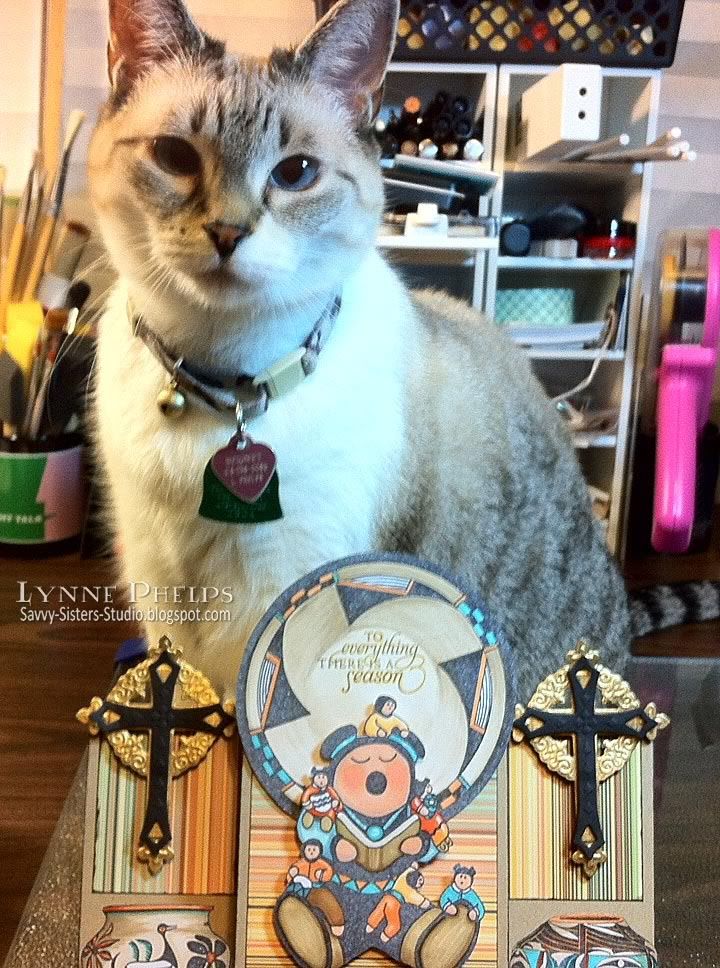
This card is inspired by the beautiful Southwest Indian art and mission churches of New Mexico. It was made for a very special purpose which I will share below. I promised you a super-duper card and I think this fits the bill!
Front - click to enlarge
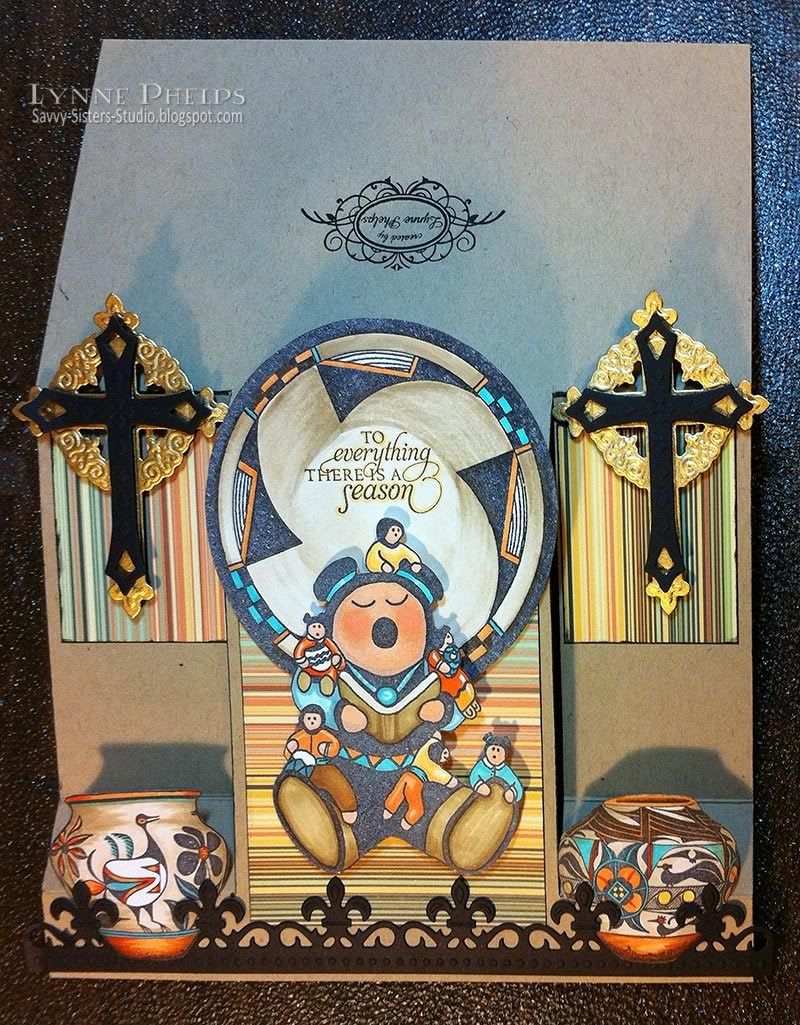
 It is a center-step card; two cuts and a couple simple folds result in a really neat structure of card! There are a lot of pictures to show you all the angles and how it is constructed. I was inspired by this lovely card by Beate, and the tutorial links for a center-step card are on the same post:

Here is a picture of my card flattened out. I started with a letter-sized piece of kraft card stock. The center fold is at the halfway mark as normal, which is hidden behind the large stamped pottery bowl. But the two side pieces are separated from the center panel by a cut that begins one inch above the bottom front and ends one inch beyond the center fold. Then some mountain and valley folds create the side panels.
Flattened card  - click to enlarge
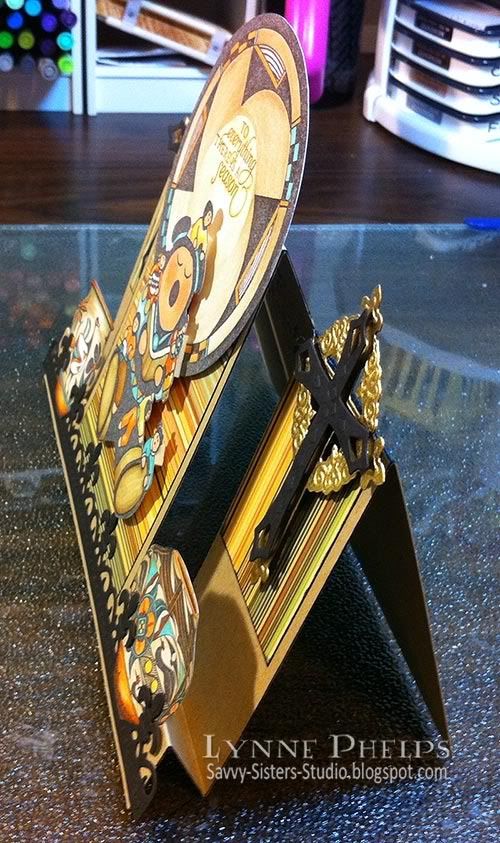
And here is a side view so you can see how the folds work:
Side - click to enlarge
And the back - from the front, the crosses and the pottery bowl hide the top folds so it is hard to see the true profile:
Back - click to enlarge
This special card is now on its way to a very special lady. My aunt has been diagnosed with stage 4 lung cancer and I fear that she is fading fast. Prayers for my aunt and especially for her family would be wonderful if you are so inclined, I'd be grateful. I don't think I am going to get to see her again, and in a way that's a blessing because my memories are of her beautiful and healthy, always so generous and kind. It took me a couple years after my mother passed to be able to remember her without the image of her illness superimposed over my every thought of her. I know my mother did not want all the visitors; she knew she was loved and wanted people to remember her as she was before the illness. She endured all the visits because she knew others had the need to say goodbye but it made her so sad.

This card, which says "To everything there is a season" is the vehicle for a heartfelt letter telling my aunt how much I love her, how grateful I am that she is a part of my life. Sharing some special memories and assuring her that she she is loved and I will always remember her, that she is constantly in my thoughts and prayers. Illness may take a life but it does not kill LOVE.
Front - click to enlarge
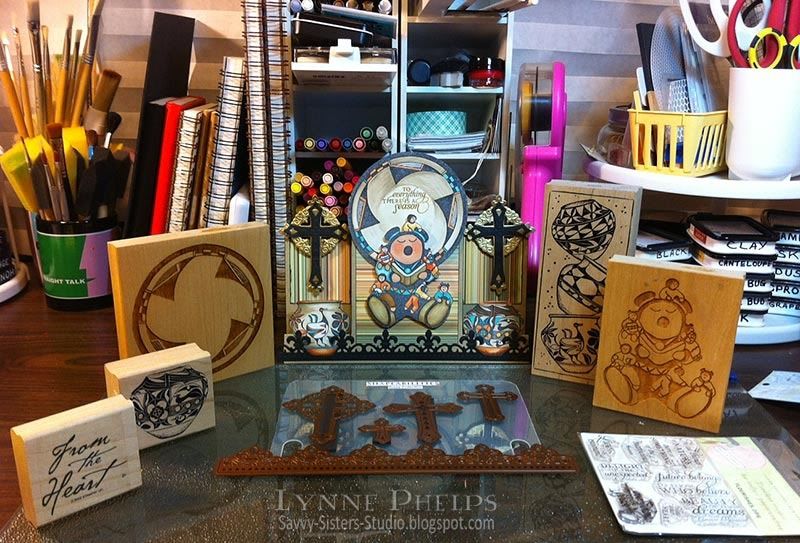
The storyteller and the large Mimbres pottery design are by Stamp-a-mania. When a storyteller's eyes are open, she is singing and when they are closed she is chanting. I thought this image was particularly suitable for my aunt! I colored it in Southwest shades with Copic Sketch markers. I shaded the large pottery to look like a bowl and give it some depth, then I added the sentiment from a set appropriately named "Life Lines" by Flourishes.  The two Indian pots on either side are Magenta images; the bird pot on the left was the bottom pot in a stack of three.
All the stuff - click to enlarge
I cut and embossed the crosses with a Spellbinders die set. The back crosses were colored with a Krylon gold leafing pen, I love how that turned out - my friend Terri's idea! The "wrought iron" railing across the front is cut and embossed with another Spellbinders die set: Fleur de Lis Accents.  The "From the Heart" stamp used inside the card is a retired Stampin' Up! image. The striped paper is from the Earth Love 6x6 paper pad by Cosmo Cricket.

On a lighter note, I had a heck of a time taking photos of this card as one of my cats, Beignet, was determined to help! Here is my photographer's assistant, you can see that she is taking her job very seriously, lol!
Click to enlarge
Please leave a comment! I am sure many of you are relieved to see a card again, thank you for sticking with me. I am afraid my foray into art journaling has driven away a lot of my long-time subscribers and I've gained some new ones. You have to follow your muse and I certainly understand that the change in my creative direction is not for everyone. But the main thing to remember is that Cancer can't kill LOVE.

Tuesday, May 10, 2011

Sunflower Happy Birthday for Janet


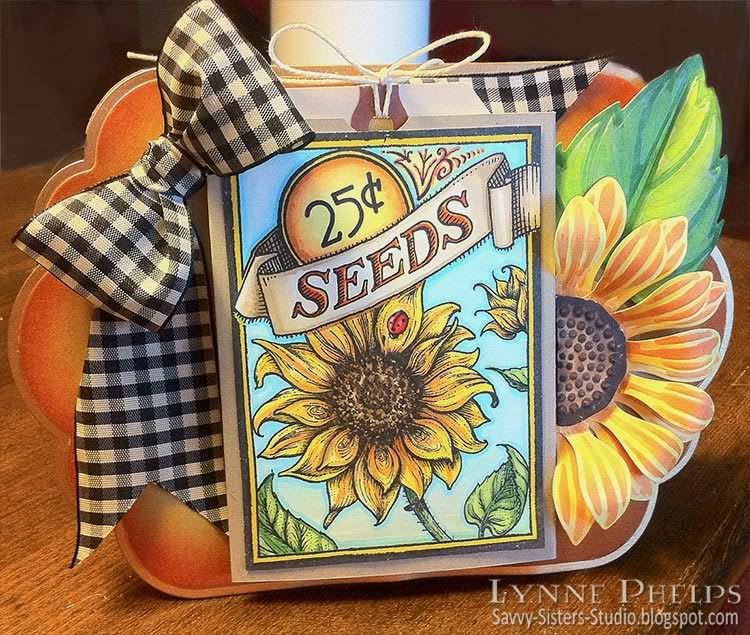
Happy birthday Janet!  My sister loves sunflowers and this is one of those "big" birthdays so I wanted to make her a really special card. I am so pleased with how it turned out!


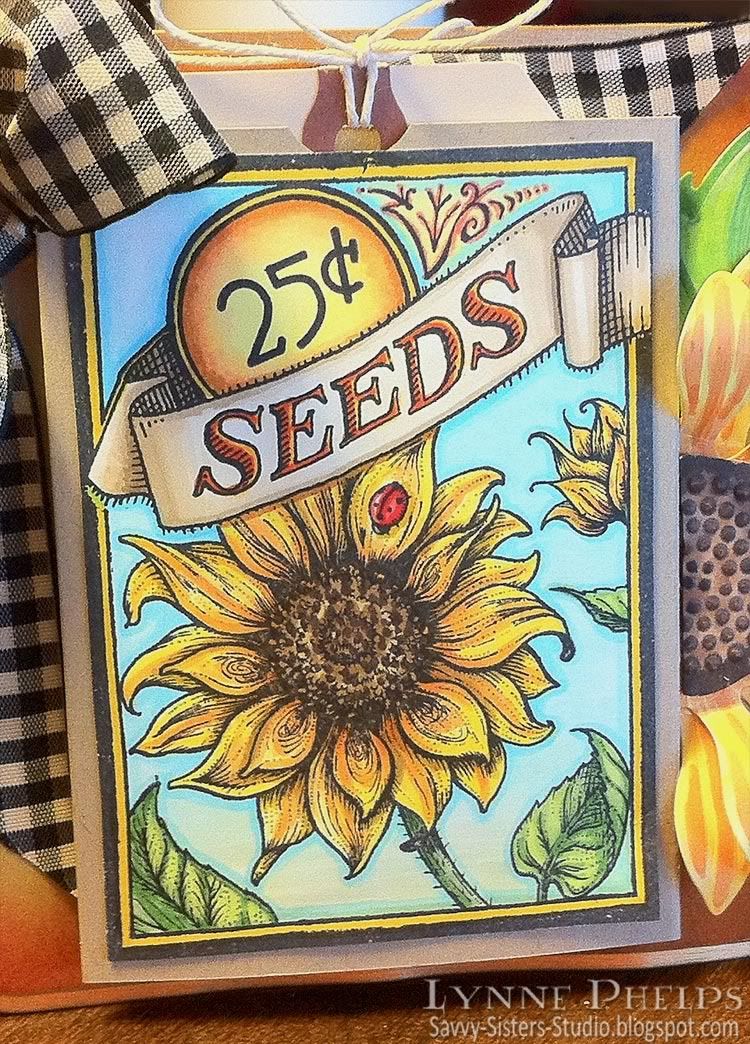
I *HAD* to have this Flourishes Sunflower set when it came out, and it had yet to see ink. I combined it with another of my favorite Flourishes stamp sets that needed to get inky - the seed packet set!  This set is so cool - you can use any fruit or floral set to fill the main area! Click on the images above for more details about the stamps.  I stamped the frame, first on my good card stock and again in the middle of a thin sheet of copy paper, which I used as a mask after I cut out the openings in the image. Then I stamped the large sunflow, leaf, and bud in the opening.

I had a wonderful time coloring in the combined image with Copic markers.  I folded a piece of kraft card stock to make a pocket and adhered the colored image to the front. Inside the pocket is a manilla shipping tag stamped with some birthday sentiments and a Michaels gift card stuck on to the back of the tag!

I knew I wanted to use the Spellbinders Sunflower 1, one of my favorite of their non-nestie dies! I cut one leaf, one center and two of the petals out of white card stock which I then colored with Copics. I did not stay precise with this, I wanted more of a sketchy watercolor look and I love how it turned out!  I curled the lower ring of petals slightly by wrapping the tips of each petal around the barrel of a pen. I curled each of the top petals all the way from tip to base so they really lift up! I curled each half of the leaf around the barrel of the pen also.  To assemble all the bits, I glued each ring of petals to a card stock circle with Aleene's Fast Grab Tacky Glue. The center is popped up with dimensional foam tape. 

Next, I knew I wanted to use this black and white gingham ribbon. I colored the ribbon with the same neutral Copics I used to color the banner on the seed packet, which toned it down to an ivory and black ribbon; perfect!  I tied the ribbon into a nice fat bow on the Bow-Easy and left nice long tails to frame the seed packet.


Now it was time to start assembling all these elements into a finished piece. I started by cutting two Labels Eleven Grand Nestabilities. The front one was cut out completely, and while it was still in the die, I sponged around the edges with Memento in Lady Bug Red and then Distress Ink in Wild Honey, then I edged it with a Krylon Leafing Pen in Pale Gold.  Before I cut the back piece, I had to include a folded area for the hinge. I trimmed the kraft card stock about an inch taller than it needed to be, and scored it and folded over the extra inch. When I placed it in the die, I put the fold line just inside the cutting edge on one side.  I adhered the folded over inch to the inside of the front cover, and this forms the hinge at the top of the card.


The bow was adhered first with Fast Grab Tacky Glue. The seed packet was adhered next with dimensional foam mounting tape. Then I glued the leaf and flower with Fast Grab Tacky Glue. I couldn't make my composition work with the whole sunflower, so I cut it in two and nudged the raw edge under the popped up seed packet. It turns out I liked it with the half-flower much better than with a whole one, and it allows the seed packet to stay at center stage. 

 My sister Janet LOVED the card. I am going to have to make something similar for myself because I had a REALLY hard time letting go of this one (see how much I love you Janet? *wink*).   And I've got a head start as the other half of that flower is still sitting on my work table! I'm going to add a twine loop through the fold of the card so Janet can use it as a little wall hanger or suspend it from a knob. The base is a just under 2/3 of a letter sized sheet of card stock, so it is a really nice size. LOVE the Grand Nestabilities, and I can't wait for them to release more of the label shapes in the larger size.

What do you think?  I'd love to hear from you!

Saturday, January 22, 2011

CHAPTER 47: Back Down the Rabbit Hole, Turning Left. . . Coming to a Fork in the Road....


Today is a BITTERSWEET...although MOSTLY sweet post for Oh, Alice.   It has been almost ONE YEAR since Jess got this crazy little idea one night to dedicate a blog, and a Saturday each week, to Alice in Wonderland because of her deep love of the characters, story, and mostly just Alice.  Over the weeks to follow, she was blessed with an AMAZING "Twisted Team" of sisters, some who've gone on to other things, some who've stayed since the beginning, and some who have been with us for a while now-ALL of whom I think the world of...and here Jess thought she was the "only" one who was THAT crazy about all things Alice until she found out that well, there are LOTS of you out there just the same.  How cool is THAT?!

All that considered, after careful deliberation many of the team decided that it was time to head back down the Rabbit hole; however, as some of us have done so, we found a lovely fork in the road!

Oh, Alice will be closing it's doors this week, but will return next week as The Altered Alice (an Alice in Wonderland artwork blog that I started a while ago) and the challenges will continue on from there. There is nothing to fear!  The Altered Alice will still be bringing you FABULOUS challenges, lovely excerpts from our beloved chapters that tell us so much about Alice's world! The sponsors have been alerted about the change in challenge location and format, so hopefully you'll see some familiar faces VERY soon!
This week's mission is to travel "Back down the Rabbit Hole" challenge-back to the beginning-Create a HELLO card (for OR a "Goodbye" card-it's all about what it looks like on the other side of that Looking Glass, right?
The DT has once again been blessed with a WONDERFUL assortment of Nikki Sivils papers and embellishments to work with (and Nikki has graciously supplied the DT with), as well as a WONDERFUL prize pack for ONE lucky winner (winner will be announced next week on the Altered Alice challenge Blog and also you must link your creations THERE.

In addition to creating a HELLO or GOODBYE card and entering it over at The Altered Alice, the NEW Alice in Wonderland Challenge Blog, don't forget to "FOLLOW" the new "Altered Alice" blog where next week's challenge AND the winner of the last Nikki giveaway will be drawn!

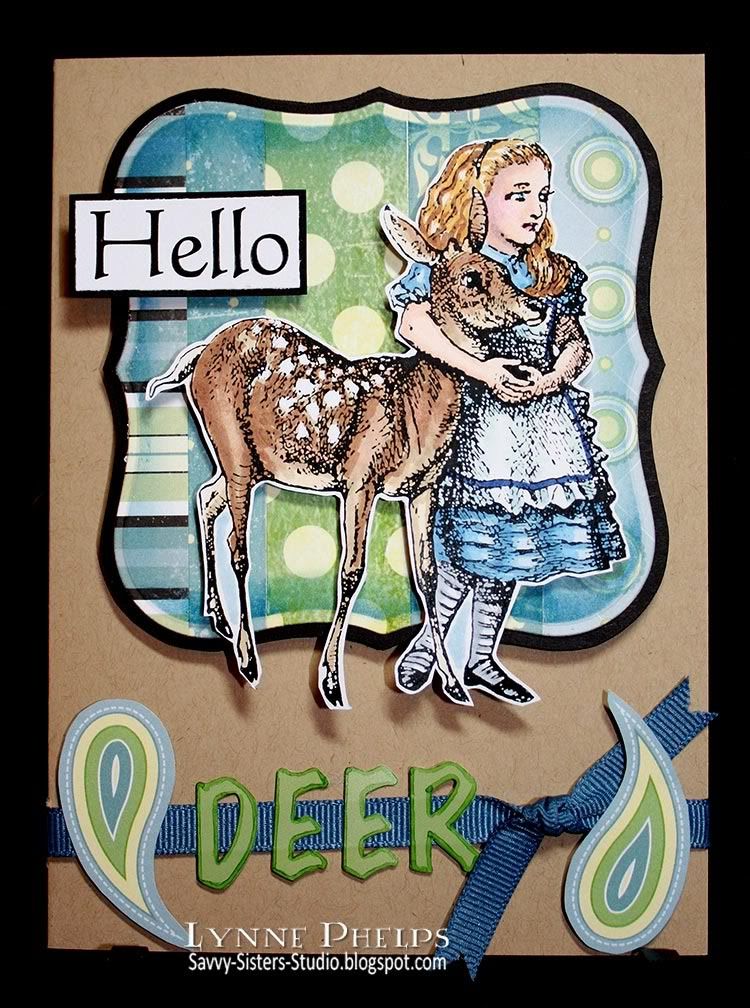
My Card: Hello Deer!

I have had such fun working with this fabulous Nikki Sivils paper and embellishments! The collection is called "Something for Everyone" and it delivers on its name! I printed a digi image, colored it in and cut it out. Then I cut strips of various widths from different patterns and glued them to a base piece of card stock. I cut this collection of strips with a Label One nestie and sponged some Faded Denim Distress Ink around the edges while it is still in the die. I then traced around the die itself on a piece of black card stock and cut it out with a scissors to create a 1/8th inch wide mat. The Hello was generated on the computer and matted on black card stock. All elements were adhered to the kraft card base with thick pop dots.

I cut a slit in the spine of the card to allow the grosgrain ribbon to pass though - it wraps all the way around the card front and is secured with a knot - no glue. This allowed me to slide it around until I decided where I wanted the knot. Then I used a darker green Copic to outline the green letter stickers that go with this collection and stuck "DEER" onto the ribbon. Then some paisley tear drops, trimmed from one of the lovely papers, were added at the bottom to act as quote marks around my pun - "Hello DEER!" Get it? ;-)

Credit goes to my friends Terri and Molly who really helped bring this card together. It turned into a joint effort and is the better for it!  And Terri took a lovely photo of the finished card that really shows all the dimension!

This is a special post - the last as a member of the Oh, Alice! design team. I am happy to be stepping up as the Mad Hatter in the next stage of the challenges and yet I am very sad to be leaving Oh, Alice! behind, and I know many of you will understand! Please leave a comment, this is a big day!

Then go meet the new Altered Alice Design Team!

Saturday, January 8, 2011

Oh, Alice! CHAPTER 45: Remembering Holiday Dreams


`Oh, I've had such a curious dream!' said Alice, and she told her sister, as well as she could remember them, all these strange Adventures of hers that you have just been reading about; and when she had finished, her sister kissed her, and said, `It WAS a curious dream, dear, certainly: but now run in to your tea; it's getting late.' So Alice got up and ran off, thinking while she ran, as well she might, what a wonderful dream it had been.
-- Chapter 12, Alice in Wonderland
I hope you have some wonderful holiday dreams to remember! We are still locked in winter in the northern hemisphere, and that makes me think of an icy blue color scheme. It is also time to start scrappng those Christmas and New Year memories!

Our generous sponsor, Nikki Sivils, is offering a huge prize to help you capture those memories! One randomly drawn winner will receive a 6x6 inch pad, 12x12 inch designer paper, and  burlap covered  buttons from the Happy Holly-Days Collection!

So the challenge this week, should you choose to accept it, is to share something that helps you capture your holiday memories, like a layout, mini-album or picture holder of some kind, OR to use an icy blue and white color scheme!

The design team this week will be showing off some fabulous paper from our generous sponsor, Nikki Sivils. They will be using the wonderful  "Something for Everyone" collection in beautiful Alice blue or the Happy Holly-Days collection.

My Card: An Alice Blue Hello!

I am NOT a scrapper, so when I came up with this challenge I cleverly gave myself an out with the icy blue color scheme! This "Something for Everyone collection has such fabulous blue designs and I started by cutting two-inch squares of htem and stitching them into a little quilt!  I also used this wonderful paper to create a rosette with the Tim Holtz die. I love the way the striped paper makes concentric circles! The center is one of the stickers from the matching sticker sheet. 

I saw a tip on SplitCoastStampers about adhering ribbon to cardstock and running it through your old crimper, and I love the way this looks with my silver moonlight colored satin ribbon. It is toped by another strip of the paper from Nikki. The edges of thie strip and the patchwork panel were flicked with a Faded Jeans Distress Ink pad.  The sentiment was created with letters from the sticker shieet, which were stuck to one of the fun oblong shapes which is then stuck to the hexagonal shaped sticker. The stacked stickers and the paper rosette are adhered with thick pop dots.

Alice (Stamp Francisco) was stamped on kraft paper with brown ink and clear embossed. Highlights were added with a white gel pan, and then color was added with Prismacolor pencils. Love how she turned out! I placed her to look like she is holding up the hello sentment, adhered with pop dots, and it was done!

Please go to Oh, Alice! to check out the rest of the design team efforts! 

You have until Friday, January 14th, 8 p.m. CST to submit your creations on Oh, Alice!. Remember you can either share a holiday memory or use an icy blue color scheme, so show us your stuff and one luck winner will walk away with the prize pack from Nikki Sivils!

Please leave me a comment here before you go - I love hearing from you!

Thursday, November 11, 2010

Please VOTE for my "Let's Communicate" RAKs!

It's that time of the month again - time to vote for your favorite entry in the Amber INK INKredible 21-day Challenge! There are only three days to vote, so please hop over there now and pick your favorite. Of course I am hoping it will be one of my two entries, either my thank you card to stamping buddy Patie, or my tribute to Jess Diedrich who is the "Mad Hatter" of my beloved Oh, Alice! design team!

Here are my two entries:


Voting just takes a couple clicks - Click HERE to go to the Amber INK challenge blog and then click VOTE underneath whichever project is your favorite! Done!

I am probably an idiot to enter two items and split my own voting block, but this set is just so much FUN to play with! I had to stop myself from entering twelve instead of two, LOL!  You can enter as many items as you want but you can only win one prize, so that's fair.

I hope some of you will consider entering next month's challenge - it is a fairly new challenge blog, so odds will never be better as the field is still small. You only need to use one Amber INK product and some of the digis are as low as 50 cents and iPaper is only $1. The top three selected by YOUR voting win a prize. The top winner out of the three is selected by the design team and gets a stamp set custom designed by Amber!  That is how this Let's Communicate set came to be, and I love it so much. I have more stamp set ideas so I am trying to win again, so I can design another set with Amber! The other two winners get a gift certificate to Amber's store so that's pretty nice too!

Thanks in advance for taking the time to vote. Even if you don't vote for me, I really appreciate your participation in this new kind of challenge blog!!!

Friday, October 22, 2010

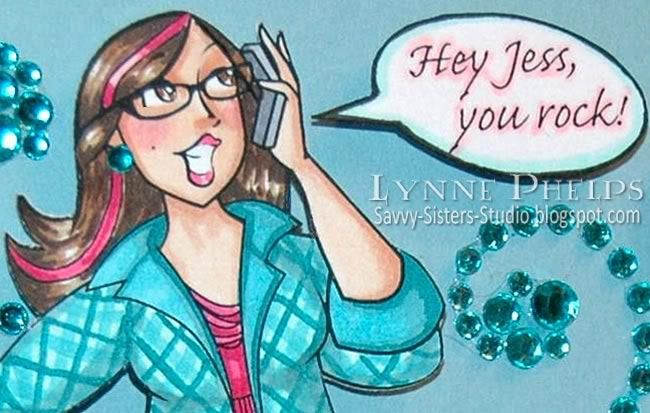
Hey Jess - You ROCK!


Jess Diedrich of The Whimsical Butterfly is the creator and coordinator of the Oh, Alice! challenge blog, where I am on the design team. She is also the Creative Coordinator for The Greeting Farm, which includes being editor of The Greeting Farm Newsletter and coordinator of their three (or four?) design teams. She's an Ippity Chick and a Unity DT gal. But most importantly, Jess is the mother of four children!  Jess rocks!

When I received my digital copy of the More to Love - Let's Communicate set, I thought I saw a resemblence!  I told Jess if I put glasses on her and put a pink streak in her hair, nobody would be able to tell the difference. So. . . whatcha think?
Click to enlarge

Yup, that's what I thought too! It looks just like Jess! Now you might think it is funny to have Jess saying that Jess rocks, but what is actually happening here is that Jess is listening to the phone and my voice is coming out of the phone saying that she rocks!

I thought I would make her a card, which is my second entry to the Amber INK INKredible 21 day challenge, where the theme this month is RAKs!  You need to use at least one Amber INK product to enter. Just think - you could download this AMAZING digi set, which includes the figure (without glasses and pink streak), two speech bubbles and TEN sentiments, for only $7, and then you could have fun coloring her too! And if you prefer clear stamps, that's an option too! Just think, if you win the challenge, you too could design a stamp set with Amber!!!

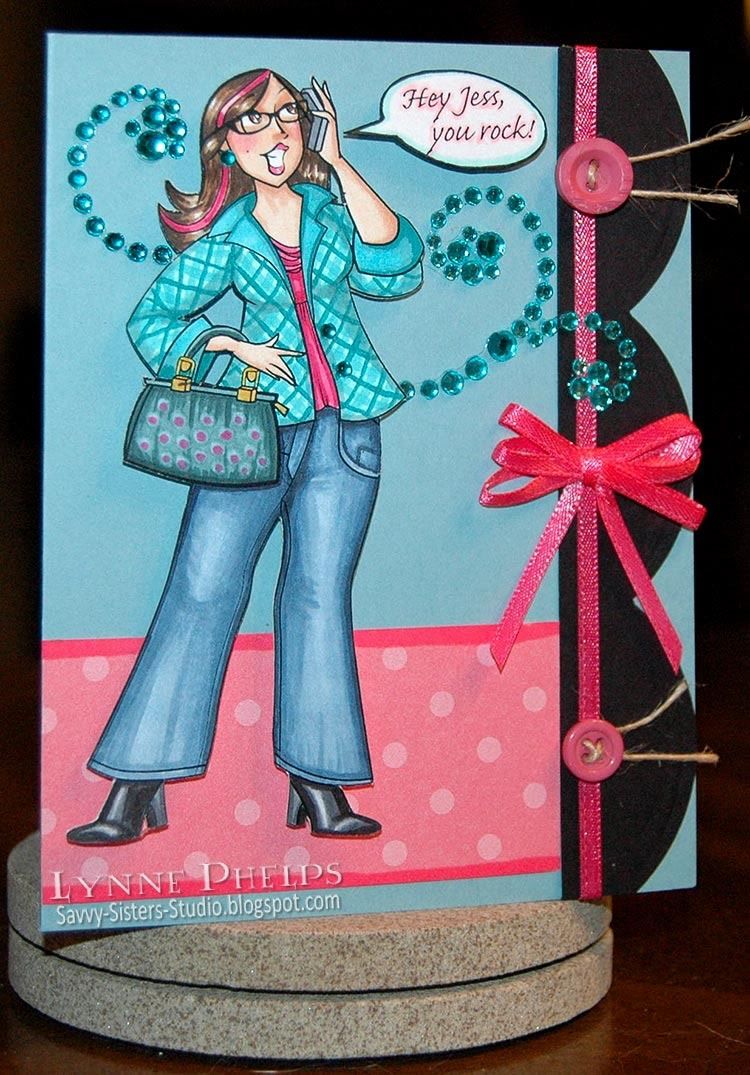
Let's take a look at the whole card:

Click to enlarge

Doesn't Jess look hot in her great jeans and those super cool leather boots! Gosh, I sure love boots and Amber drew my favorite style!  And I totally LOVE to color jeans - look at all the great details Amber drew , she even gave me a watch pocket, gotta love that!  Instead of smooth leather like the last card, I gave Jess a trendier bag, gathered into soft folds. I'm thinkin' this leather came from a psychadelic ostrich, know what I mean?  Last time I colored in a quick and easy flower pattern on her jacket. Today I went for plaid, which is so easy to draw and pretty forgiving - just curve the stripes a little, don't even try to make the plaid perfect and straight. (See another drawn plaid example on this card.) This is also an awesome set for paper piecing!

I punched a big scalloped border on the black card stock and wrapped a ribbon around it that I colored with Copics to match the pink streak in Jess' hair, adding a little triple loop bow, made on the Bow-Easy and adhered with Fast Grab Tacky Glue. I used the same pink marker to edge the polka dot paper. The twine-threaded buttons were attached with glue dots. Then I had to add the bling, because it is made up of "rocks" and hey, Jess ROCKS, right? We all agree that Jess ROCKS! These were sparkly clear crystals until I colored them with Copic markers to match the jacket. I had to cut one of the flourishes, so I used the leftover crystals for an earring and jacket buttons! The figure was cut out and adhered with thick foam tape so it has a lot of dimension, as does the speech bubble!

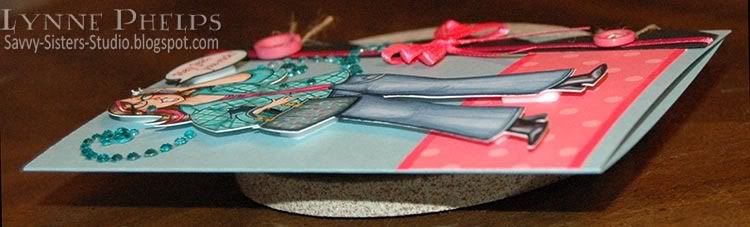
Click to enlarge

Lousy angle but you see how high she is popped up, which looks pretty cool when you see it head on. I thought I'd show this view as the flash destroys the shadows in  the normal views. 

Click to enlarge

Answering some questions about my last post:

While I had the camera out for today's card, I took a "dimensional view" of my previous card to try to explain about the ribbon treatment. I took an inch wide strip of scrap card stock and ran adhesive down both long edges. This adhesive was just used to position the ribbon, which I pinched up every so often as I stuck it down. I used my Sew Mini to stitch right down the middle, where there was NOT any adhesive, so as not to gunk up my machine.  You usually have to use a heavy duty super high-tack tape like ScorTape to get ribbon to stick securely to paper. The stitching is actually what is holding the ribbon to the strip of card stock - I don't need to worry that it will come off. In fact the ribbon has already lifted up from the adhesive at the edges, which gives it even more dimension. This allows me to use my normal (super inexpensive) Scotch ATG adhesive to stick the beribboned strip of card stock to the card front, because now I am making a paper-to-paper bond.  Hope this helps!

Someone else was astute enough to suck up comment on how incredible I am with my super jeans coloring skills and all, so I guess I'll reveal that I use B91-B95-B99 coz I like my jeans all comfy and broken in and faded. How about you?

So, are you loving my challenge winning stamp set as much as I am?  I hope it will be a huge hit for Amber INK! You can read more about it on my last blog post! :-)   I can't wait until Jess sees this - watch for her to comment, LOL! The hard part actually getting it in the mail as I'm out of stamps! I already owe two other RAKs that are just waiting for me to get to the post office before they close, as I live in a small town with really short Post Office hours! Please leave me a comment about the stamp set, my amazing jeans coloring skills, or how much Jess ROCKS, hahaha!

Wednesday, October 20, 2010

Say Hello to My New Stamp Set: More to Love - Let's Communicate!!!!

As you may remember, I WON the September Amber INK INKredible 21 Day Challenge and the grand prize was Amber designed my dream stamp set! So without further ado, welcome More to Love - Let's Communicate!!!

Click to enlarge

Isn't she fabuous!  I told Amber I wanted a full-figured, hip, sassy, fashionable Amber woman (NOT a skinny Amber Girl!) talking on the phone, with all kinds of sentiments for any occasion, and I wanted to call it "Let's Communicate!"  Well Amber did such a fantastic job and she liked the idea of more full-figured sets, so she is calling the series "More to Love!"  I wanted jeans, and just LOOK at that fantastic jeans detailing!! I wanted simple shapes on the purse and clothes so they would be perfect for coloring and paper piecing and LOOK at how great it turned out! I wanted chunky heeled boots because they are a lot of fun to color and so much easier to cut out than the original stiletto open toed pumps (and now with one curved line on each foot I can still have pumps, but that's our secret!) and look at those GREAT boots!  I am SO HAPPY!  The digi set is only $7 and includes this fabulous lady and  a great batch of sentiments and two sizes of empty speech bubbles, so you could easily add your own words!!!

As a bonus in the digi set, the sentiments come both solo and combined with the bubble. >>
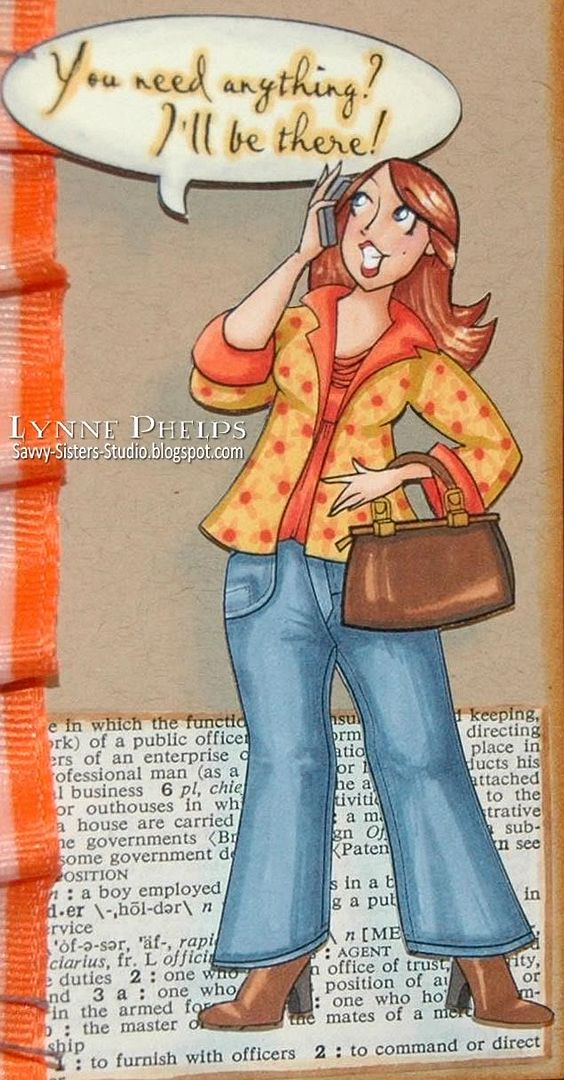
I even got to decide on what sentiments include, so I came up with a list sure to work for almost any occasion:
  • Coffee?
  • Howdy!
  • You rock!
  • Shopping?
  • You need anything?
  • I'll be there!
  • Happy Birthday!
  • Let's get together
  • Thanks, you're the best!
  • I've been thinkin' about you!

Now I mentioned paper piecing, and that is not so much fun with digi sets. Not all of Amber INK stamps are available in clear stamps but guess what? YES! More to Love - Let's Communicate is also available in a CLEAR SET for $14!!!!  Yippeeeee!!!
So please go buy this set in either digi or clear right now! I want this set to be a HUGE success for Amber INK, because it is my concept (brought to life by Amber's amazing talent!), and also because I have a plan! I have more ideas for some GREAT stamp sets, so I am going to try to win another challenge so I can do this again!

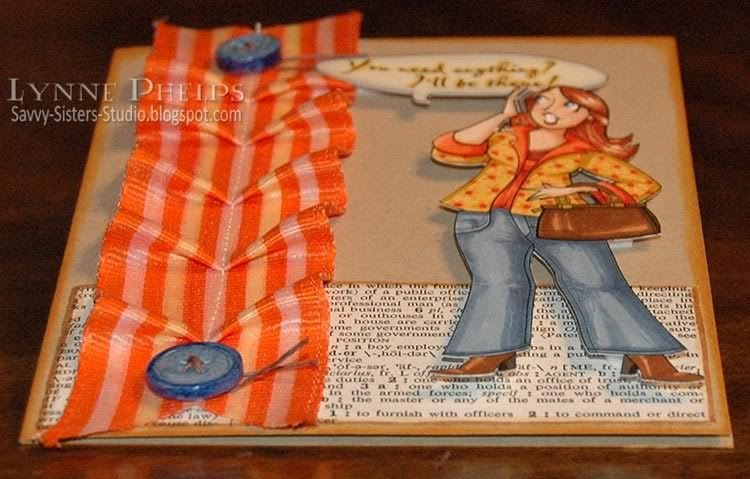
Let's take a closer look:

Click to enlarge

I colored the girl and the speech bubble with Copic markers and cut them out. It does not show in the photo, but they are popped up high on dimensional foam tape. Kraft card base sponged with Distress Ink in Marmalade around the edges, a piece of dictionary page rimmed with light brown Copic markers, and a bright orange and white striped grosgrain ribbon that I colored with yellow and pink Copics to better match my project. I stitched the ribbon to a strip of card stock and adhered it to the base - it is a LOT easier to adhere the card stock securely than to get the ribbon to stick with normal adhesives. Buttons were colored with Copics to match her jeans, threaded with twine, and stuck on with glue dots! 

You should enter the new challenge also, it is so much fun! I did not win the grand prize for the October Challenge, but my Creeptacular Witch won a prize for the Top Three, so I received a $15 gift certificate to the Amber INK store, how fab is that?

This month's challenge is to make a RAK for someone you don't know (random act of kindness) OR an AK for someone you DO know (act of kindness), use at least one Amber INK product, and tell about who the RAK or AK is for or why you are sending it!  FUN!

So this card is my first AK entry. You can enter more than once, but you can't win more than one prize. It is an Act of Kindness for a friend who has been having a rough time with her health - shingles topped by bursitis, OUCH, and yet she remains unfailingly cheerful and generous with her time and resources. I appreciate the effort she goes to in having get togethers for our little stamping group!

I have entered this card in the following challenges:
Please leave a comment and let me know what you think about my new set and/or my card! Would you like to see more sets in a "More to Love" line by Amber? Let me know!

Monday, August 30, 2010

Amber INK: From the Library of....


Photobucket
Click to enlarge

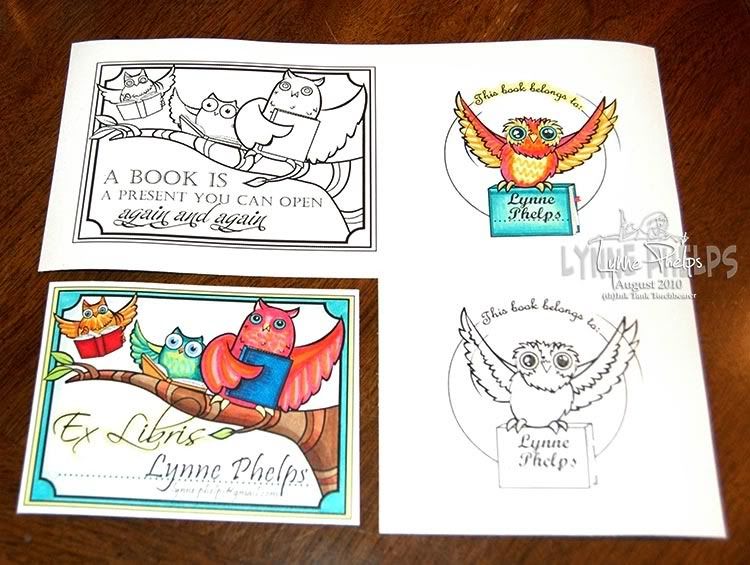
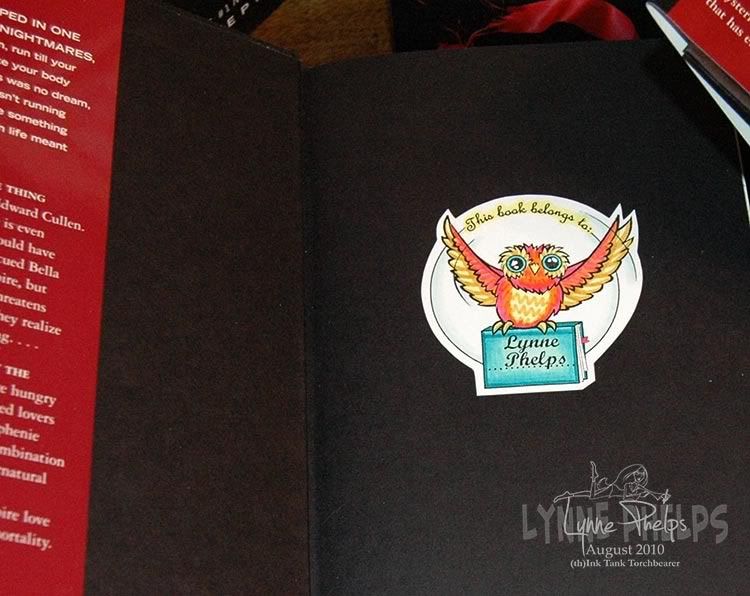
This set of bookplates is one of my favorite items in the August release from Amber INK. There are two bookplates featuring the cutest owls that were so much fun to color!  The round design says "From the Library of" and there is room on the book the owl is carrying to put a name. The larger rectangular design says "Ex Libris" which is Latin meaning "of the books" or in more modern terms, from the library of! There is a dotted line on which you can put your name. I thought it would be a good idea to have my name and email address.  Also, since I love reading fantasy and science fiction, I saw no reason why I needed to stick with reality when coloring these book loving owls! I was a girl in the 70's and part of me has retained that love of hot pink, orange, lime green and bright turquoise blue, colors that were so popular back in the day!

Photobucket
Click to enlarge

I really adore the owls on the branch and I wanted the versatility to use it for more than a book plate. I was working with the digital version of this set (it is also available in clear stamps) so I saved a copy of the file and ever so carefully erased the Ex Libris words and the dotted line. The only tricky part was where the loop of the B crossed the branch, and I just zoomed in close and went slow. This gave me a version I could add my own words to, such as the top image above where I put "A book is a present you can open again and again." I plan to use this version on a gift card holder for a bookstore gift card; how much more perfect can you get?  On the card below, I used the version I saved with no words at all - love that too!

Photobucket
Click to enlarge

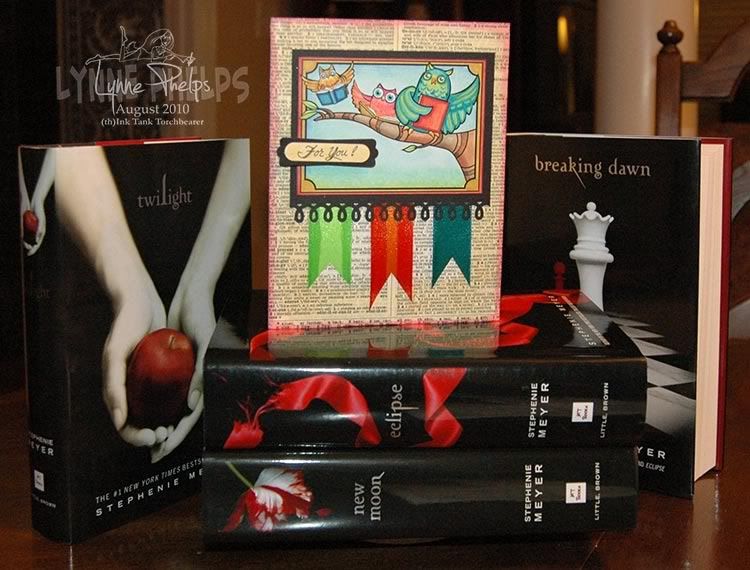
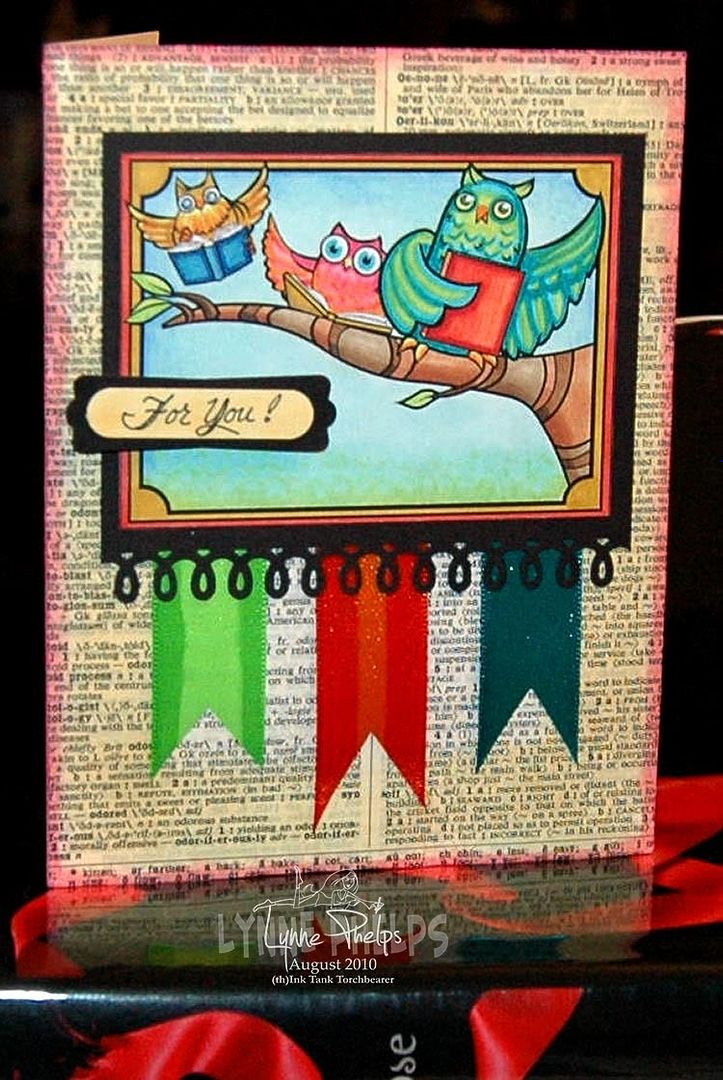
On the "For You!" card, I used my wonderful new pink ATG gun to adhere the page from an old dictionary to my card front. I then sponged around the very edges with Distress Ink in Worn Lipstick (pink) ink and in a bit more with Scattered Straw (pale gold). I then mounted my bright image, colored with Copic markers, to a piece of black card that I had decorated with a Martha Stewart border punch of loops. I cut three lengths of double-faced satin ribbon, and edged the orange with hot pink and the green with a deeper lime color. I love doing this with my Copic markers!

Photobucket
Click to enlarge

I had such fun coloring these whimsical owls! My favorite detail is the eyes of the middle owl, who is actually a much more vibrant hot pink and orange than it appears here! I wrote my sentiment on white card with a Multiliner pen, then colored the paper gold with a Copic marker before punching it out. I layered it on a black punch out and adhered it to the card with dimensional foam mounting tape.  This card makes me smile every time I look at it!

Photobucket
Click to enlarge

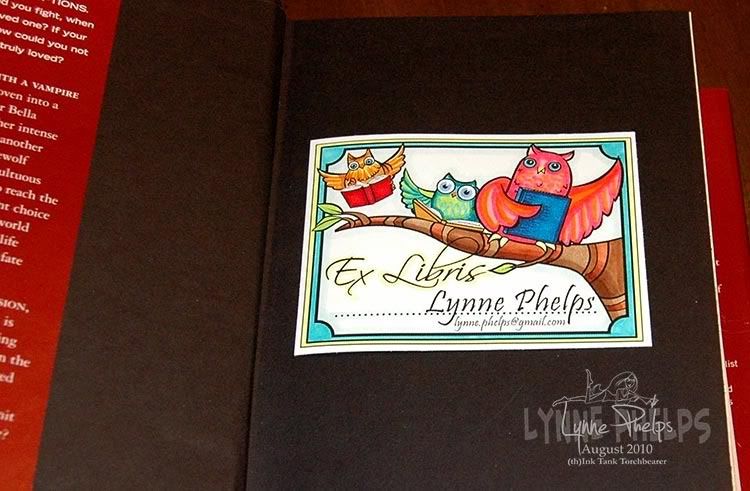
Here is a closeup of the rectangular bookplate. This is the image as you receive it from Amber INK. I just added my name above the dottted line and my email below it.

Photobucket
Click to enlarge

Here is the round bookplate with the flying owl.

I hope you enjoyed my various  bookplate projects! Of course I am going to enter it in the new Amber Ink 21-day INKredible challenge, as the theme for this month's challenge is BOOKS!

Please leave me a comment, I love hearing from you!
  

Saturday, August 28, 2010

Oh, Alice! CHAPTER 28: Child of the Pure Unclouded Brow...

Photobucket
Click to enlarge

Child of the pure unclouded brow
And dreaming eyes of wonder!
Though time be fleet, and I and thou
Are half a life asunder,
Thy loving smile will surely hail
The love-gift of a fairy-tale.

I have not seen thy sunny face,
Nor heard thy silver laughter;
No thought of me shall find a place
In thy young life's hereafter -
Enough that now thou wilt not fail
To listen to my fairy-tale.

Taken from "Child of the Pure Unclouded Brow:
preface to "Through the Looking Glass"

Hello everyone! We are celebrating the wonder of childhood today at Oh, Alice! and are thrilled to announce this week's sponsor, Paper Pretties Stamps! Are you all familiar with Paper Pretties? If you're new to them, check out their darling images! If it's been a while, Paper Pretties is PROUD to announce that they're under NEW ownership and is pleased to offer you faster, cheaper shipping, WAY more reliable service, and lots of new items in the store. We are thrilled to congratulate Heather Lee-Reppen on her new endeavor and are honored to have her sponsorship this week! Paper Pretties is offering a Prize package of rubber stamps this week to ONE lucky winner!

This week's theme is simply to make a card with a LITTLE GIRL theme. :) Alice is such a whimsical free spirit and we LOVE that about her! Channel your inner girlie this week with this great (and free-to-be-you!) challenge!

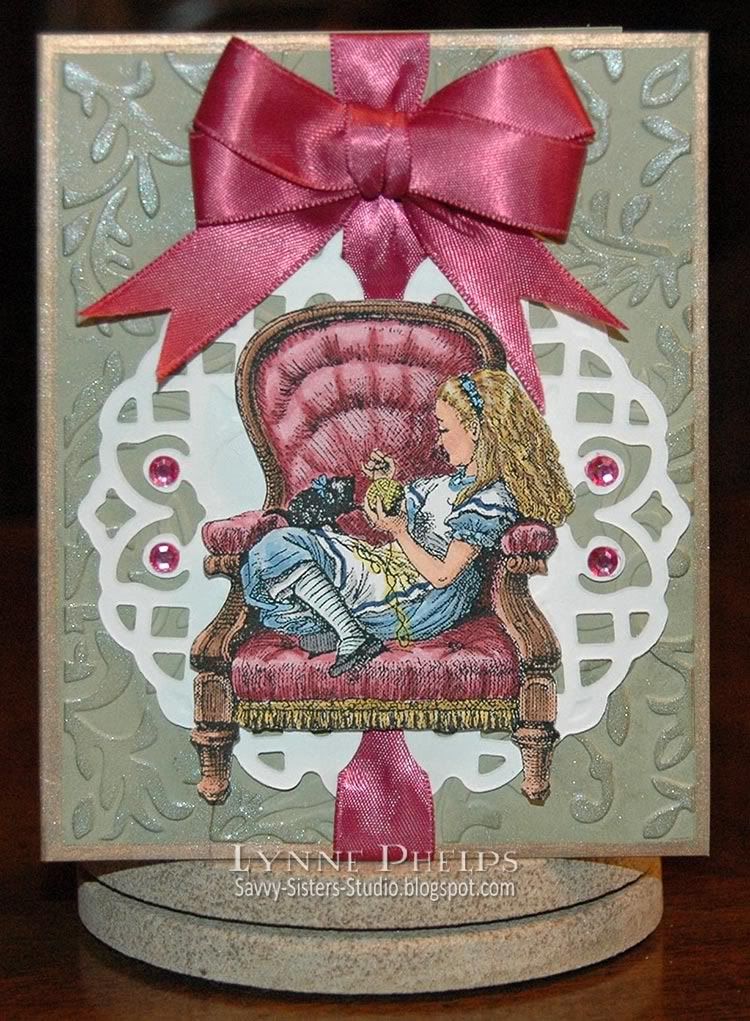
I was inspired to go Victorian, as Alice was a Victorian girl! I love this image of Alice tempting her little black kitten with a ball of yarn! I know other members of the design team will be more whimsical in their offerings, but I love this picture of Alice curled up in her chair. I was a great reader as a child and this big chair brings back many happy memories of curling up with a good book! The other thing I love about this image is that there is nothing more playful than a kitten!

Photobucket
Click to enlarge


I did some cleanup on this image from Through the Looking Glass to erase the background, then printed with my black and white laser printer on color laser printer paper. I then colored with Copic markers (love love love my Copics) and glue-sticked it to a piece of white cardstock, so it would be stiff enough to cut out and pop up on dimensional foam.  I cut a Lattice Pendant from the same white cardstock. I cut, scored, and folded my card base and ran it through the Cuttlebug with only the front panel inside an embossing folder, then edged the front with a gold leafing pen. I ran ribbon through the lattice, adhered it to the card front, and then swiped the exposed embossed areas with a Versamark Dazzle pad to highlight the raised areas.  I tied a bit of jute string around the ribbon about half an inch down from the top to pinch it in. I made a double looped bow and adhered it with glue to the pinched ribbon. The chair was adhered with pop-dots and I colored some bling to match and stuck it on the pendant on either side.
Here's your weekly inspiration from our Twisted Tea Party:
Thanks again to Paper Pretties for this great prize! You have until FRIDAY, September 3rd at 8pm CST to play along this week for the prize! Submit your entry on Oh, Alice! and the winner will be announced next week!

Enjoy being young at heart and we'll see you soon back in WONDERLAND! Please leave a comment, I really love hearing from you!

Stamps: Digital image from Lenny's Alice in Wonderland website.
Paper: Stampin' Up! - Mellow Moss card stock; Georgia Pacific - white card stock; HP - color laser printer paper.
Ink: Copic - Sketch markers; Versamark - Frost Dazzle pad; Krylon - Pale Gold Leafing Pen.
Miscellaneous: Ribbon; Paper Studios - clear self-adhesive flatback rhinestones.
Tools: Spellbinders - Lattice Pendant die; Cuttlebug - Victorian embossing folder, machine; Fast Grab Tacky Glue (for ribbon); ATG - gun and tape.
Related Posts with Thumbnails