I started with a page from an old book; I picked up a bunch of them at the library's old book sale. I like to set the stamp I am going to use right next to the page while I sponge on colors. This way I have an idea about where I want to place each color. Be sure the colors you select for sponging are medium tone or lighter - you will need a lot of contrast with the dark color used to cover the background. Remember that the colors will get a lot darker when they are clear embossed! I like Distress Inks best for sponging - they stay wet a little longer so you don't need as much ink.
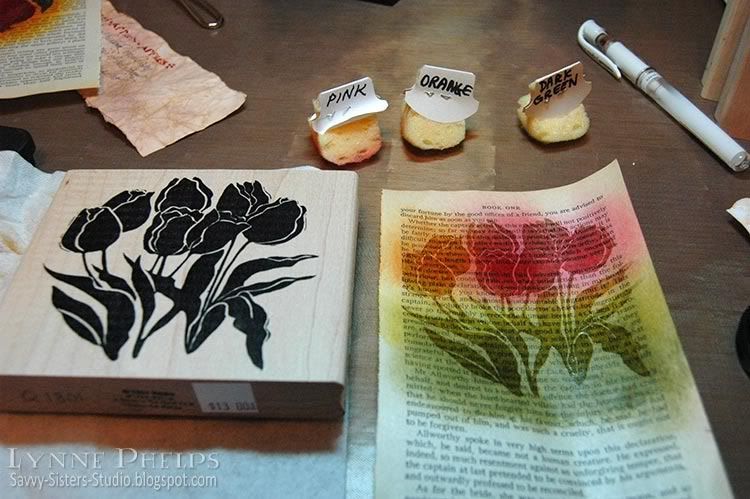
Dry your sponging with a heat tool, then stamp with Versamark and heat emboss with clear detail powder. If you don't dry the sponging completely before this step, the powder will cling to the page in all the wrong places, which would be a disaster during the next step. You need stamps with large areas of solid color - silhouette stamps are perfect for this technique. Note: If you were working on plain, unpatterned paper instead of a book page, you could probably get good results with a more detailed stamp, but it would still need bold thick lines.
Next, brayer a dark colored ink over everything - dark enough to cover up all the colors from the previous step. You could sponge it, but the book page may start to tear from the amount of rubbing it would take to put this much ink on with a sponge. If you don't have a brayer, a better alternative would be to swipe your inkpad across the page in a direct to paper technique.
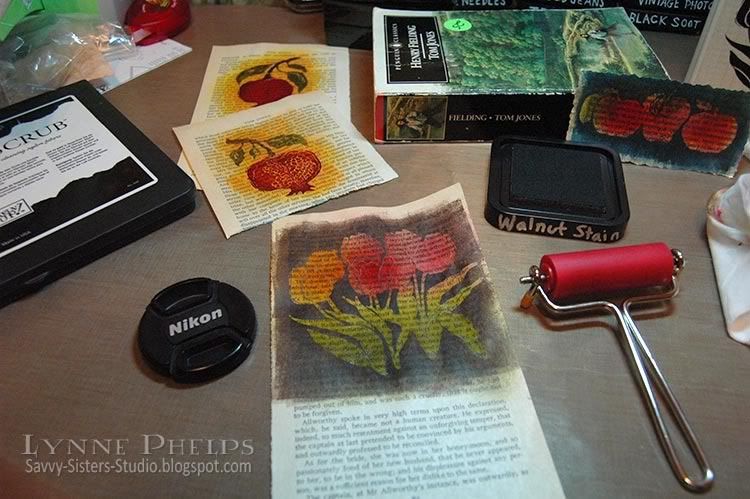
I have a tiny brayer from Ranger that is perfect for this technique, as I like to leave some of the book page un-inked around the edges. I think the irregularly inked edged give it more of a vintage look. The small size brayer is MUCH less expensive than the larger sizes, and you can get a pack of three or four additional rollers for when you are brayering with different colors, so you can switch without having to clean up. The small size roller also takes less ink to cover and is easier to clean up than the larger brayers.
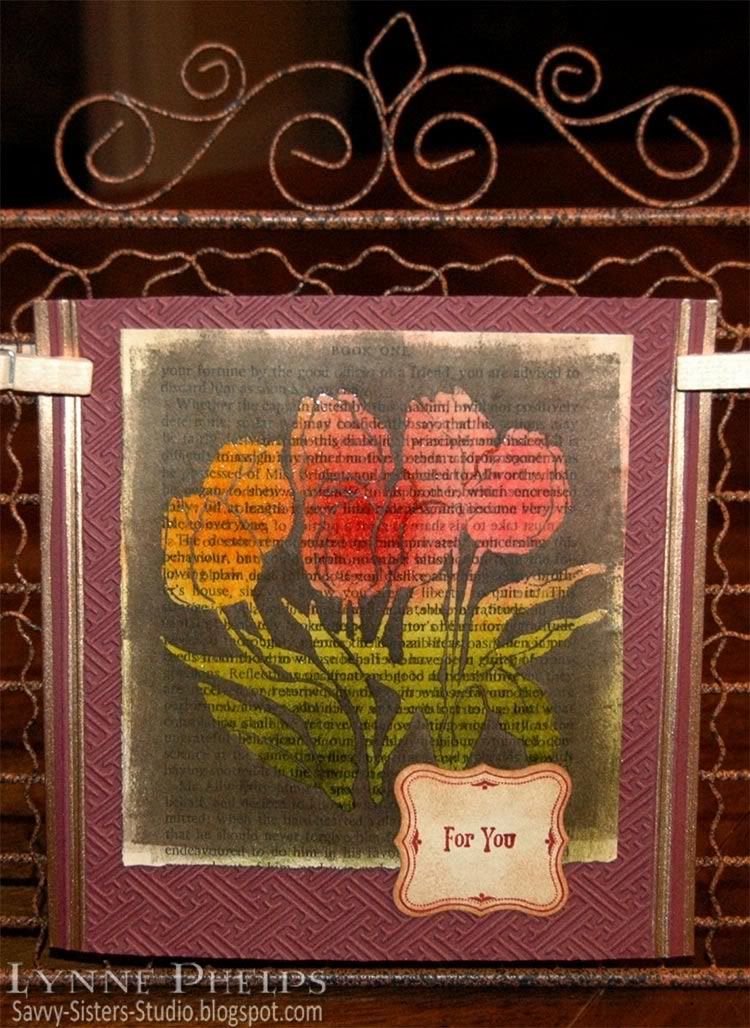
Take a slightly damp paper towel and wipe the ink off the embossed image and watch how it glows out of the dark background! Try to be careful and use your fingertip so as not to get the damp paper towel on the book page. You may want to use your heat tool again to dry the background if you are as impatient as I am!
Because I am using paperback book paper, it is very thin and the embossed area is somewhat translucent. To make sure the image stays vivid, I carefully glue the book page to a sheet of white cardstock. This keeps the embossed image bright even when you place it on a dark card. The paper may also be a bit rippled after being soaked with all that ink, and you can carfully smooth out the ripples without wrinkling if you go slowly as you glue the paper.
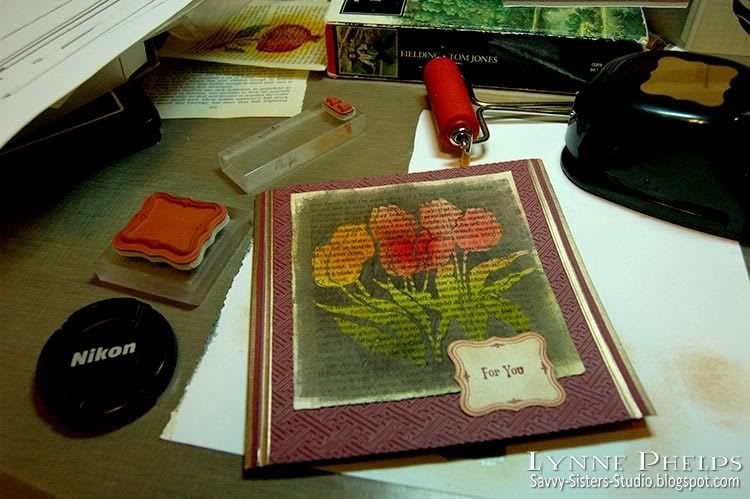
Then you make your card! I used an embossing folder from the Cuttlebug Asian set and some scoring and pale gold leafing pen. I stamped a label frame and sentiment and punched it out, sponging it to give it an aged paper look. On the inside, I inked the edges with gold and scored a square frame border near the edges. No sentiment stamped inside - I left it open to have room to write a little note to my sister. One more closeup look at the finished card:

Did this help you to understand the technique better? I hope it helped to see it before the dark ink covered it all up. Let me know if you try this technique, it is a lot of fun!

I am submitting this card for Hels Sheriden's Ink on My Fingers Sunday Stamper Challenge. The challenge for week 102 is "We are Golden" and I put the gold edges on my card both inside and out with Hels in mind! Not to mention there is some fabby classic Hels candy up for grabs - I love her style!
Stamps: Tulips: A Stamp in the Hand; Sentiment and frame: Stampin' Up! "Vintage Labels"
Paper: Book page; Stampin' Up! - Bravo Burgundy cardstock; Georgia Pacific - white cardstock
Ink: Versamark; Ranger Distress Ink - Peeled Paint, Mustard Seed, Spiced Marmalade, Fired Brick, Worn Lipstick, Antique Linen, Tea Dye, Mahogany; Krylon - Pale Gold Leafing Pen
Tools: Punch: Stampin' Up! - Curly Label punch; Embossing Folder: Cuttlebug - Asian; Score-Pal; Tack Sponges; Ranger Inkssentials Small Inky Roller (Brayer)