Showing posts with label Christmas. Show all posts

Saturday, December 17, 2011

A Lewis Christmas Caroll to you!

Calling all Alice fans - make a Wonderland holiday card and link it on The Altered Alice; there is a wonderful prize up for grabs!
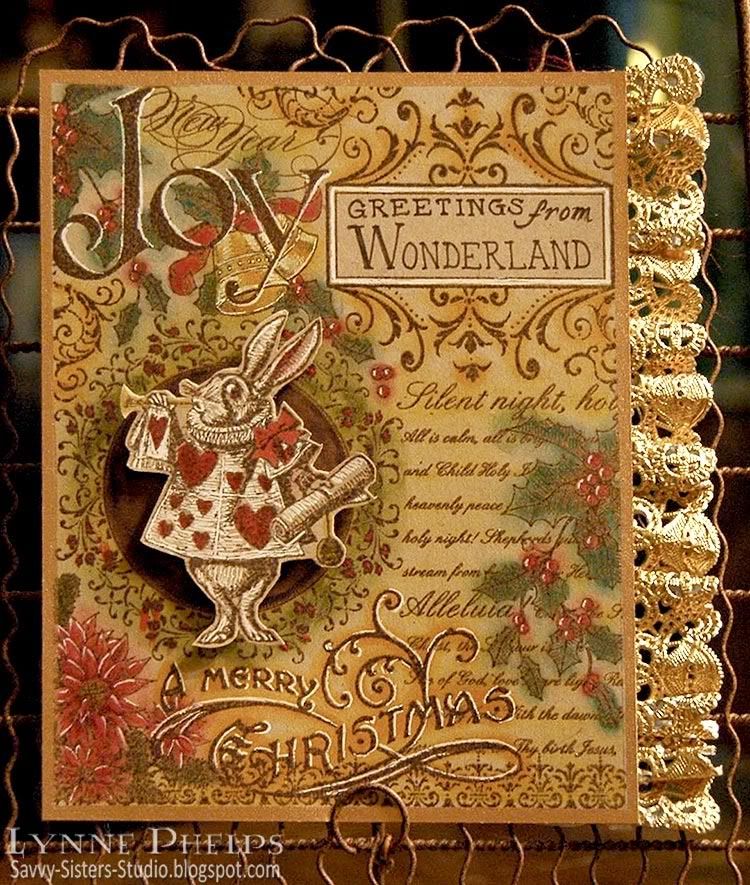
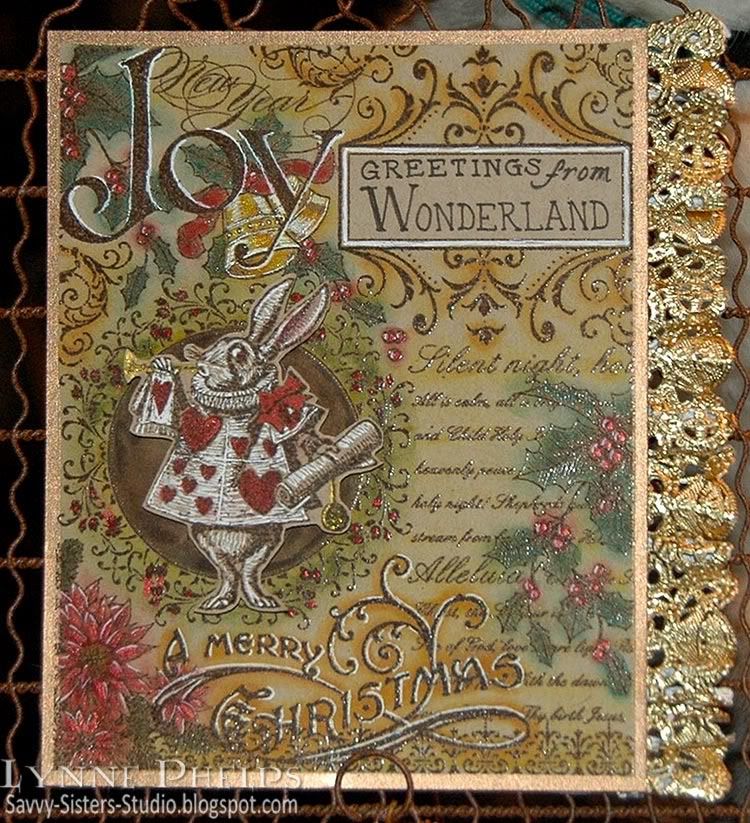
I have not had time to create anything this month, but I wanted to share a couple older Wonderland Christmas cards with you.  This first one is one of my top favorite cards ever! The background is a fabulous collage stamp by Stampin' Up! My sister is a hobby demo, so we'd be happy to help you get your own Christmas collage stamp if you need one.  I stamped it on Kraft card stock, double inking the rubber with brown dye ink and then Versamark before stamping, which allowed me to heat emboss with clear detail powder. Then I did detailed sponging, using the Tsukeniko Fantastix to rub in various colors of distress ink. I printed "Greetings from Wonderland" in the blank rectangle in the design using a brown pen.

Then I highlighted some areas of red and gold with Smooch, love that stuff. I added white gel pen highlights to give dimension to the letters and berries. The White Rabbit was also embossed on kraft and colored with a white gel pen, prismacolors, and Smooch. The gold ruffled lace is a doily from the baking aisle. I cut out the center of the doily, just leaving a thin strip intact right above the lacy edge. When I straightened it out to adhere it the the edge, it creates lovely flounces that I manipulated with my fingers to make pleasing ruffles.

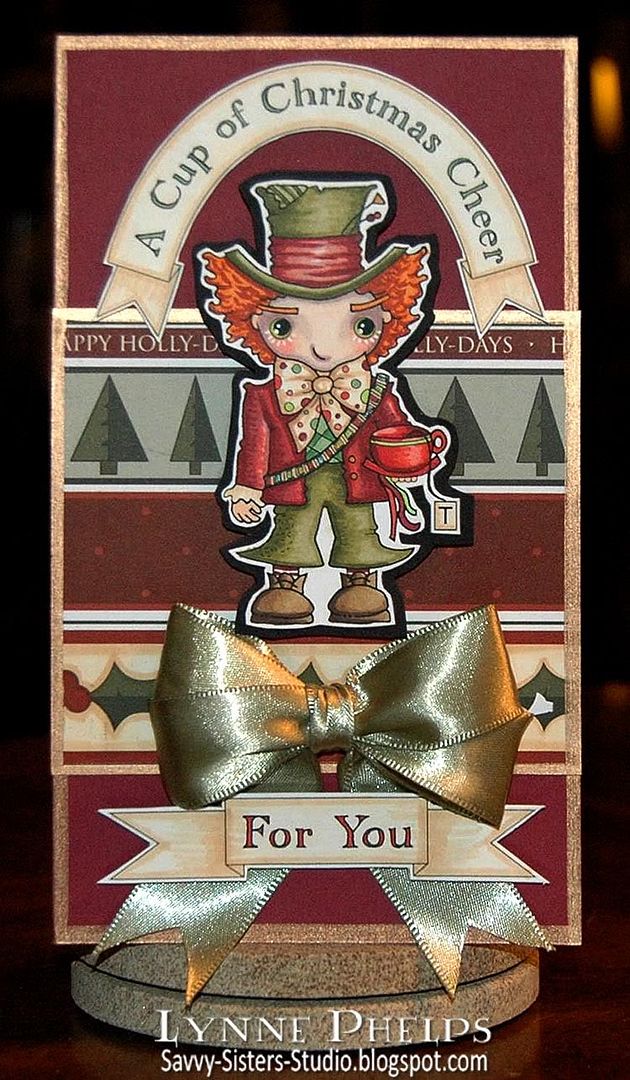
This next card is the Pixie Dust Studios Mad Hatter and the paper is Nikki Sivils. I created the banners and sentiments on the computer, coloring and trimming the printouts. The gold Krylon paint pen edging adds some elegance, and the rich satin ribbon is the perfect finishing touch
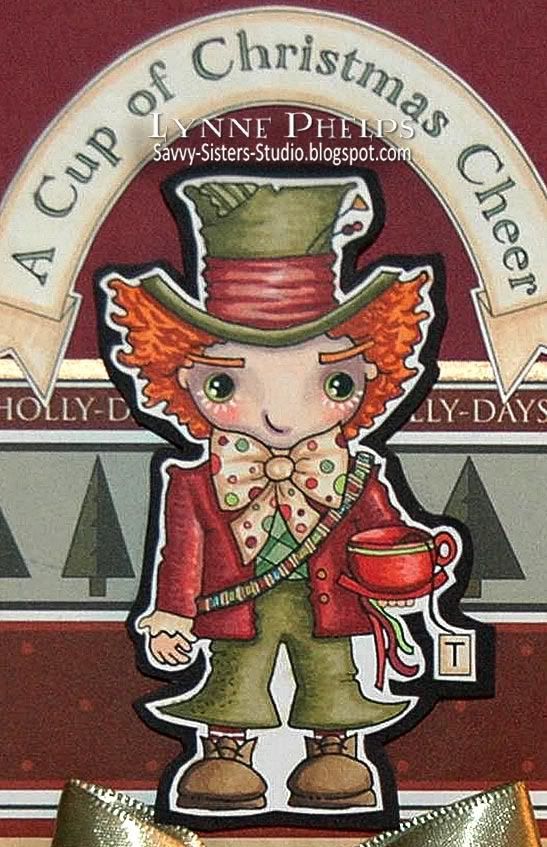
I had a wonderful time coloring this fun image with Copic alcohol markers. Of course I had to color the face a la Johnny Depp! I added more details with a multiliner, like defining the thread areas of the spools on the bandoleer. I trimmed it out, but the small white rim did not isolate it enough from the background patterns. I wanted the Mad Hatter to stand out, so I glued the trimmed out figure to black card stock and trimmed it out again with a larger margin. I really like the way this looked, and it isolated him from the background so he now stands out against the patterns.

Merry Christmas to you and yours! I hope you experience your own Wonderland this year as we once more welcome Christ into our hearts.

Notice Lewis Carroll and Alice in Wonderland in the left panel, and all the characters below.
I will leave you with the full quote from the poem that is quoted in the Lewis Carroll nativity window, "From a Fairy to a Child":


LADY dear, if Fairies may
For a moment lay aside
Cunning tricks and elfish play,
'Tis at happy Christmas-tide.

We have heard the children say—
Gentle children. whom we love—
Long ago, on Christmas Day,
Came a message from above.

Still, as Christmas-tide comes round,
They remember it again—
Echo still the joyful sound
"Peace on earth, good-will to men!"

Yet the hearts must childlike be
Where such heavenly guests abide;
Unto children, in their glee,
All the year is Christmas-tide!

Thus, forgetting tricks and play
For a moment, Lady dear,
We would wish you, if we may,
Merry Christmas, glad New Year! 

--Lewis Carroll; Christmas, 1867.

Sunday, December 4, 2011

It's time for a Lewis Christmas Carroll over at The Altered Alice!


Merry Christmas and Happy New Year from The Altered AliceThis month the design team brings you their holiday wishes, and we invite you to send your holiday greetings to The Altered Alice. You have until Friday, Dec. 23 to enter. The winner post will either be a little early or late, as the last Sunday of the month falls on Christmas day!

Our prize this month is a $40.00 gift certificate to Custom Crops, the premier online retailer for crafters of all kinds. From Accuquilt to Zva Creative, adhesives to vinyl and everything in between, Custom Crops offers a huge selection of the products you've been looking for at competive prices with fast, friendly customer service. Thanks to design team member Donna for organizing this Christmas prize!

To celebrate the season, we bring you The Lewis Carroll Memorial Window at Daniell Chapel in England. Notice the left panel where Lewis Carroll and Alice kneel to pay homage to the newly born Christ in this wonderful Nativity scene! This month's quote is actually contained within the windows, do you see it?
Click to enlarge
The window was designed by stained glass artist Geoffrey Webb,  a must-see for anyone that loves Wonderland. A wonderful Christmas poem by Lewis Carroll is shown in the center three bottom panels, which include characters from Wonderland - the White Rabbit, Dodo, the Caterpillar, Mad Hatter, and more! Our own Sue Roddis visited this chapel and gave me permission to show her close-up photos here, click to enlarge:


We look forward to seeing your holiday greetings, so send us a Christmas card or tag! If it features Wonderland, you will have two chances at the randomly awarded prize instead of one. Multiple entries are fine, but each must be on a separate post. 

Stop by The Altered Alice to see some AMAZING design team inspiration projects, and we hope you will play along as well!

Tuesday, December 21, 2010

Oh Alice! CHAPTER 44: Curioser and Curioser - Winter Wonderland!

Click to enlarge;  Collage stamp © Stampin' Up!

`Curiouser and curiouser!' cried Alice (she was so much surprised, that for the moment she quite forgot how to speak good English); `now I'm opening out like the largest telescope that ever was! Good-bye, feet!' (for when she looked down at her feet, they seemed to be almost out of sight, they were getting so far off). `Oh, my poor little feet, I wonder who will put on your shoes and stockings for you now, dears? I'm sure _I_ shan't be able! I shall be a great deal too far off to trouble myself about you: you must manage the best way you can; --but I must be kind to them,' thought Alice, `or perhaps they won't walk the way I want to go! Let me see: I'll give them a new pair of boots every Christmas.'
Hello from all of us here in Wonderland! This week we are Curiouser and curiouser to see if you are willing to play along with our weekly challenge. The challenge is a simple one, and one that most of us should be able to play along with, we would like to take Wonderland and turn it into a Winter Wonderland! Yes, that's right.....put your boots on, hats, mittens and lets play in the snow! Alice, with a hat on? Rabbit in the snow? Anything that reflects a Winter Wonderland. Have fun with it!

This week we are being sponsored by SUGAR NELLIE / FUNKYKITS. They are a fabulous company and you really should go over and take a peek.
Sugar Nellie is a small Scottish company that brings you fantastic rubber stamps from some amazing artists. Funky Kits is the sole online retailer for Sugar Nellie stamps - so head on over to grab yourself some of that sugary goodness!

The prize for this week will be 1 set of 6, yes, I said 6 Leanne Ellis Alice in Wonderland stamps. I sure wish I was able to win this one. This set of stamps are fantastic!
My Card: Christmas Greetings from Wonderland!

I just received my order from the Stampin' Up! Holiday Mini Catalog, and this fabulous Christmas Collage stamp was at the top of my list! Isn't it just gorgeous? I started with kraft card stock, inking up the stamp first with Versamark and then with dark brown before stamping, which allowed me to heat emboss the image with clear detail powder. TIP: by inking up the stamp first with Versamark, I can turn any color of dye ink into an embossable ink. Otherwise I would need to use a Distress ink or a pigment ink to get the ink to stay wet long enough to emboss.  Then I sponged color into the image, applying Distress inks with Tsukinko Fantastix tools. I used the pointed tip for the red and green shades where I needed to pinpoint the color, and the rounded tip for the golds and yellows in the background. Highlights were added with a white gel pen and Smooch for touches of sparkle in gold, pearl moon, and red!


Click to enlarge

Then I stamped the White Rabbit the same way, sponging with the Fanstastix and highlighting with white gel pen and Smooch. I really love the way this looks on the natural colored kraft card stock.  I filled in the circle on the collage stamp with sponged brown ink and then adhered the White Rabbit cutout with a ⅛-inch thick pop dot. I edged it all the way around with a Krylon Leafing Pen in my favorite Pale Gold.

I love it that this collage stamp includes an open rectangle for you to really personalize the design! I wrote "Greetings from Wonderland" in the space using a dark brown Marvy marker.  I could have computer generated the sentiment, but with the vintage look of the collage stamp I thought handwriting would be ok. TIP: Draw a box on scratch paper and write in the words so you can see what kind of space each word will take. Then compensate for irregularities by changing letter style. My "greetings" was a little wider than I planned, so the "from" would not fit. I just changed to a narrower italic style and dropped down a bit to write the "from" so it looked like I planned it that way! ;-)

The final touch was added by cutting the lacy edge from a small gold paper doily. TIP: Make wonderful ruffled edging with a paper doily! When you trim the edging from the center of the doily, trim as closely to the lace edge as possible. Then straighten out the edge, carefully bending the edge back and forth about every eighth to fourth inch. As you straighten the curve, a wonderful ruffle will form as the outer edge is much fuller than the inner edge. Doesn't it look fantastic?  So rich and glitzy and textured!  Don't you think it adds a lot?

Check out the rest of the design team's creations at Oh, Alice! and enter your own Winter Wonderland card there!

Please leave me a comment and let me know what you think of my Greetings from Wonderland card, sponging, Smooch, or ruffled doily edgings! I love hearing from you and seeing your comments always makes my day!!!

Saturday, December 11, 2010

Oh Alice! CHAPTER 43: Christmas Greetings - "From a Fairy to a Child"


Click to enlarge

LADY dear, if Fairies may
For a moment lay aside
Cunning tricks and elfish play,
'Tis at happy Christmas-tide.

We have heard the children say—
Gentle children. whom we love—
Long ago, on Christmas Day,
Came a message from above.

Still, as Christmas-tide comes round,
They remember it again—
Echo still the joyful sound
"Peace on earth, good-will to men!"

Yet the hearts must childlike be
Where such heavenly guests abide;
Unto children, in their glee,
All the year is Christmas-tide!

Thus, forgetting tricks and play
For a moment, Lady dear,
We would wish you, if we may,
Merry Christmas, glad New Year!
Christmas, 1867.

Welcome down the rabbit hole once again my friends!  DT sister Erin found this poem by Lewis Carroll in the back of a copy of Through the Looking-Glass and What Alice Found There. In researching the history of this poem, Erin found the The Lewis Carroll Memorial Window at Daniell Chapel in England. 

The 3 center panels contain verses from the Lewis Carroll poem used as today's inspiration!  The window was designed by the stained glass artist Geoffrey Webb and depicts a Nativity scene.  This is a must see for anyone that loves Wonderland. Notice Lewis Carroll and Alice in the left panel, and the bottom section of each panel includes characters from Wonderland - the White Rabbit, Dodo, the Caterpillar, Mad Hatter, and more!

For our Oh, Alice! challenge this week let's get into the Christmas spirit. The challenge is to use red, green, + one color.  You can still use other colors for hair and skin.  Just make the main use of color red, green, + one.
Our wonderful sponsor this week is Pixie Dust Studio.  The lucky winner will win their choice of 2 digital images.

My "Touch of Depp" Card

I am using one of the charming Pixie Dust Studio Wonderland images called "A Touch of Depp" and it is so much fun to color - and how can you go wrong with a Johnny Depp inspired image! I printed this Mad Hatter image with a black and white laser onto color laser printer paper and colored with Copic markers. I tried to match the look of Johnny Depp in the Alice in Wonderland movie, but shifted his outfit into various colors of rich reds and greens in keeping with today's challenge. I also made the sentiments and banners on my computer and printed and colored them the same way. I covered the back of all my colored images with glue stick and adhered them to cheap white card stock and trimmed them out.


Click to enlarge
 My colors were inspired by this great patterned paper from Nikki Sivils. I love the rich muted colors of this Happy Holly-Days Christmas collection, and this page of border patterns was the inspiration for this week's card.  To help the Mad Hatter stand out better against the bold prints, I mounted my cutout on black and then trimmed it again and mounted it with pop dots. The banner sentiments were adhered with foam mounting tape that gives it dimension but not as high as the pop dots.

Click to enlarge

Finishing touches included rimming all the edges with a Krylon Pale Gold Leafing Pen, and a double-looped bow  of soft sage green satin ribbon made on my Bow-Easy.

Now let's see what the rest of my design team sisters have created for you this week!

So get your Santa hat on, turn on your favorite holiday music and get crafty for your chance to win your choice of 2 digital images!  You have until 8 p.m. on Friday the 17th of Dec to play along by entering your creation at Oh, Alice!

Please leave me a comment, they really make my day!

Tuesday, December 29, 2009

Nativity Starburst - one last Christmas card to share!

We are still in the twelve days of Christmas, so I thought I would share one last card that didn't make it onto the blog before the big day.
blog,Christmas,nativity
I stamped the Indadinkado nativity scene on color laser paper (Memento ink, Rich Cocoa). I colored it in with markers (Sketch, Copic). The color laser paper really allows you to blend the colors without having to use so much ink to saturate the paper, and I was very pleased with the results. It is also much less expensive than the cardstock varieties that work well with Copics! I mounted it on Really Rust cardstock (SU) after punching a border (Arched Lattice, Martha Stewart) and gilded the border with a gold leafing pen (Gold, Krylon). The background is Mellow Moss cardstock (SU) that has been embossed with the Fleur de Lis folder (Cuttlebug) and edged with the leafing pen. A gold organza ribbon was tied into a multi-loop bow (Bow-Easy). I cut a slit just wider than the ribbon in the fold of the card, so the ribbon passes all the way around the card front, with ends taped under the Nativity panel.
blog,Christmas,nativity
The color is more accurate in the first picture, but this one shows the shiny stuff better! I am still loving the sparkle, and I used a blue gel pen (Sakura, Metallic Blue/Black)in the sky around the starburst. The star itself was accented with a glitter pen (Sakura, Stardust Clear), as was the halos on Mary, Joseph and the Baby.

I hope you are enjoying a wonderful twelve days of Christmas yourself! I hate it when people think it is all over after Dec. 25th, as the twelve days of Christmas are not the days leading up to Christmas, but the time from the Nativity to the arrival of the wisemen on Epiphany.

Your comments mean a great deal, and thanks for looking!

Saturday, December 19, 2009

Wisemen - Same Song, Second Verse!

If you recall, EVERYTHING (including the cats!!) was sparkling after my first glittered card, so I thought I'd better stay away from the hard stuff until I got a better handle on glitter control! Here is the same Wisemen collage stamp from Hero Arts, done with Prismacolor pencils and accented with metallic paint pen.
Wisemen collage card
I stamped the card base (SU Celery, I think) with the "Print Pattern" diamond background stamp (Stampin' Up!) with Marvy Ochre dye ink. Then I edged it with a gold leafing pen (Krylon). The collage was stamped with black Marvy dye ink on white cardstock and colored with Prismacolors and blended with odorless mineral spirits. The words and flourishes were accented with a fine point metallic gold gel pen. After trimming, the gold edge was added with a gold leafing pen (Krylon)and it was mounted on the base with dimensionals.

The ribbon was tied in a double looped bow on the Bow-Easy. Thank goodness for whoever invented this gadget, I love it!
Wisemen collage card
The music was embossed on a scrap of paper, torn, and sponged with Ochre and Pond Green Marvy dye inks. I embossed the music by first inking the stamp with VersaMark and then inking it with a red Marvy dye ink pad, then embossed with clear detail embossing powder. I use this technique all the time - it allows me to emboss with any ink, any color. I rarely use any other color of embossing powder since discovering this technique on Michelle Zindorf's blog. When I mounted it on the card, I folded it over the edge so it also appears on the inside card front. The ribbon wraps all the way around, so that appears on the inside of the card as well.

I hope you enjoyed this different card using the same stamp! I enjoy your comments very much and would love to hear what you think!

Monday, December 14, 2009

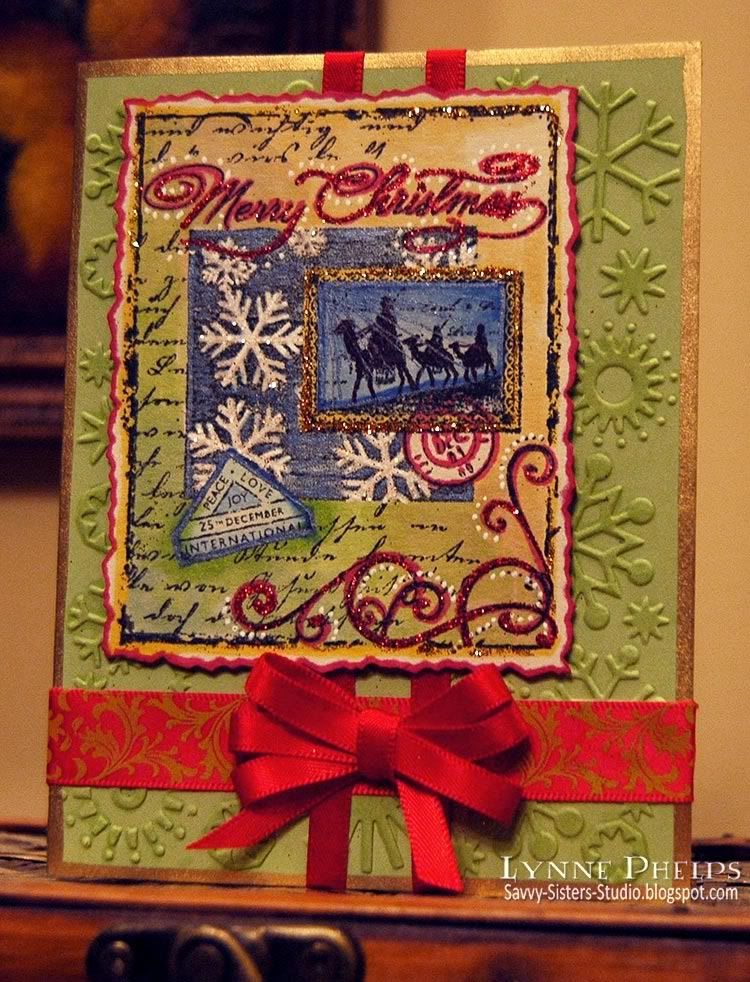
Hero Arts Wise Men Collage - with Sparkle!!

Well, I am sure it happens sooner or later to every stamper. That brightly shining moment from which there is no turning back. That's right; I just discovered GLITTER. I started off small, adding a tiny little star to my Celtic Christmas cards with a Stardust clear glitter pen. Then my Nativity card had LOTS of Stardust glitter pen to show the rays of starlight falling on the scene. But now. . . I've moved on to the hard stuff, the real deal. . . loose glitter and glue.


The base is green SU cardstock - I am afraid I don't know the name of the color. Celery maybe? I hate it that they don't put the labels on the cardstock packages anymore. I embossed it with the original Cuttlebug snowflake embossing folder. I wanted to bring out the raised areas - normally I'd hit it with a VersaMark Dazzle pad, but I was afraid any stray glitter would stick to it like crazy! I also wanted a little more yellow color in the green, so I hit the raised areas with Y000 which warmed up the green just enough! A flourished red ribbon and a narrow satin ribbon with a triple loop bow (thank you Bow-Easy!) and Krylon gold leafing pen around the edge finished it off.


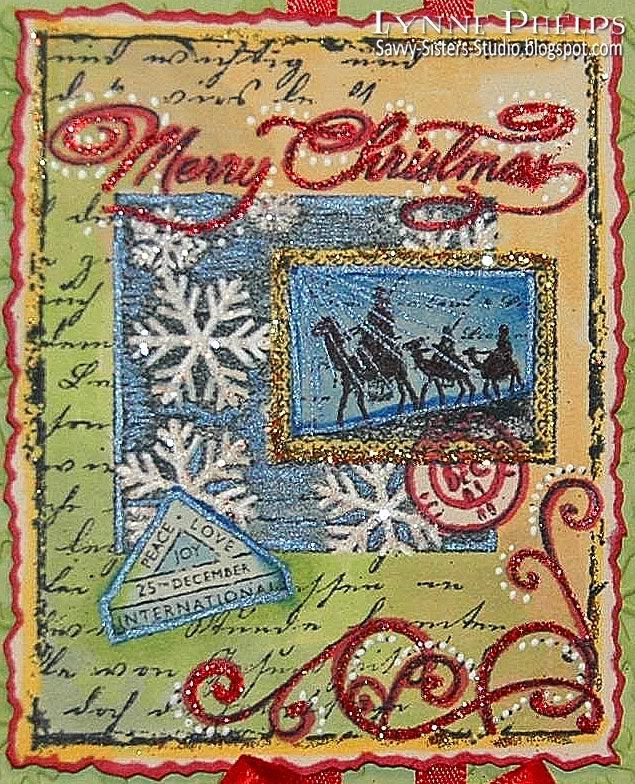
I love collage stamping - I do a lot with the emboss-resist technique. When I saw this series of collage stamps by Hero Arts, I couldn't resist - look at all the assemblage work they had done for me! I colored it with Copics and added white dots to accent the flourishes, then used a Tombow glue pen and added Stampendous red glitter and Art Institute gold glitter. I have to say, there are big differences in glitter - that Art Institute stuff is amazing! I also used a dark blue Sakura Stardust pen in the wise men postoid and in the snowflake backgound. I trimmed it out with a deckle scissors, ran a red Copic marker around the cut edges and mounted it on pop dots.


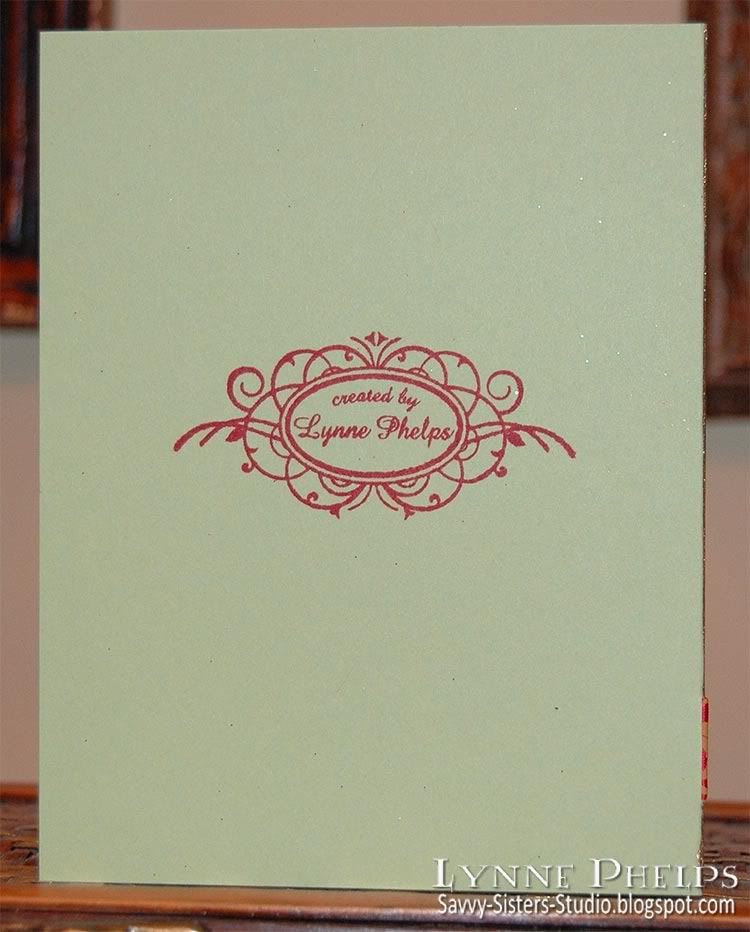
Here is the back of the card. I got this neat personalized unmounted stamp on eBay! This seller is in Malaysia, the prices are wonderful and I was pleased with the transaction. They are by Loongchai74 and you can see all the options here. He sent me proofs of the artwork before he made the stamps, and did not charge extra for custom artwork. I also got a wonderful circular address stamp for my envelope flaps. Just wanted to share in case any of y'all are looking for this kind of thing - it makes me really happy every time I see my new stamp, only now I want to order another that includes my blog address!

So, I need to know. What kind of glitter do you like best? Are there better glue pens than the Tombow? I had a hard time keeping a smooth flow of glue - I kept having to tap it and scribble to get it flowing again. I'd like to find a glue pen that flowed really smoothly. Please leave a comment and let me know!

I also have glitter EVERYWHERE. The cats are sparkling, and how it got in MY hair I do not know! Hmmmm. I think I feel some STICKLES coming on! :-) Leave a comment if you have any glitter management tips for me, LOL!

Sunday, December 13, 2009

In the Beginning, a Child is Born...

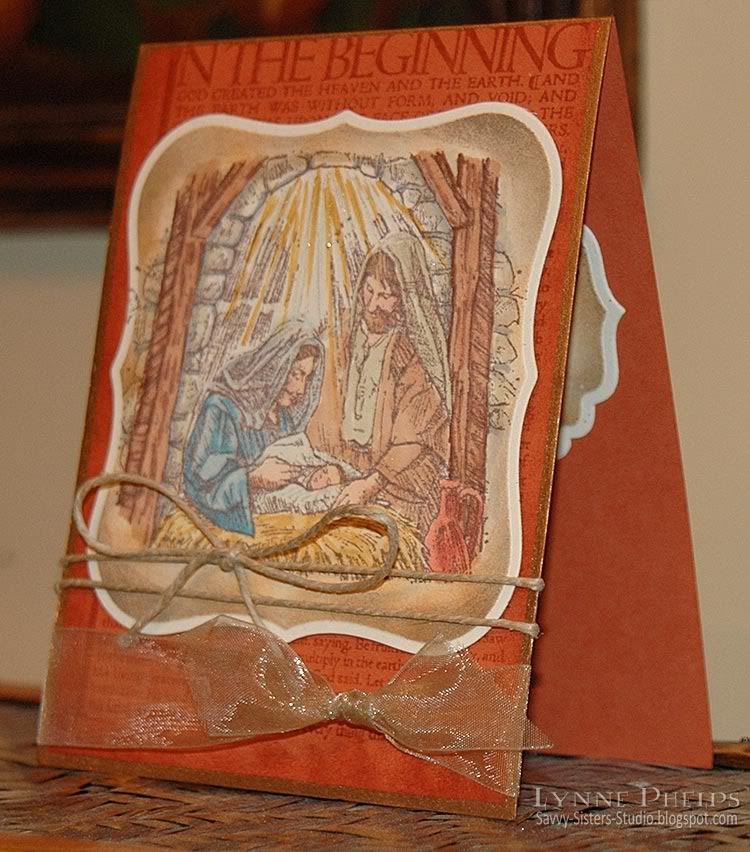
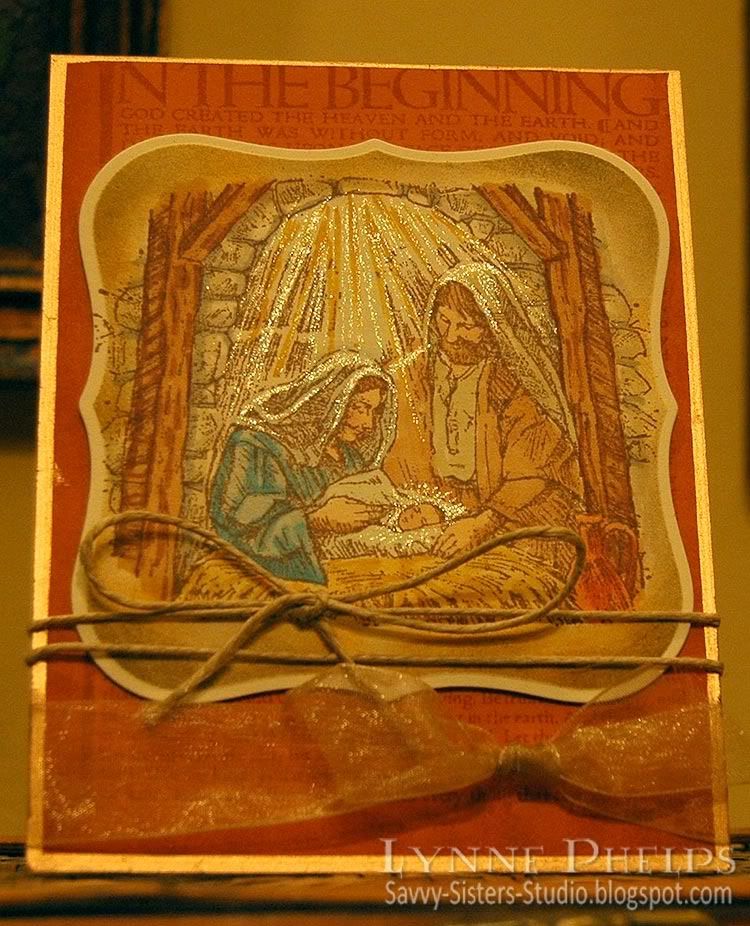
As you may guess by the lack of snowmen and Santas around here, my very favorite kind of Christmas cards center around nativity scenes. The reason for the season, right? This card uses the "A Child is Born" set (Stampin' Up!, retired) which contains one of my favorite nativy scenes. Mary and Joseph look so happy and relieved and fascinated by the new baby, just like any new parents. I imagine Mary has just finished marveling at the tiny fingers and toes!

The base is Really Rust cardstock (SU). I stamped "In The Beginning" (Stamp Out Cute) with Brown (Marvy dye ink). This is an awesome stamp with the actual text from the beginning of Genesis. I sponged around the edges with the same ink, then I ran a Pale Gold leafing pen (Krylon) around the edges.
The image was stamped on Natural Ivory cardstock (SU) with Rich Cocoa ink (Memento)and cut and embossed in a Label One die (Spellbinders) and then colored with Copics. After coloring, I put the image back into the die to use it as a mask and sponged around the edges with Timeless Sepia and Ochre (Marvy dye ink). It was mounted on the base with pop dots, then hemp twine was wrapped and tied in a bow and old gold organza ribbon was tied in a square knot.

I shot this one without the flash to bring out the sparkle! I used a clear glitter pen (Sakura Stardust) to emphasize the rays of starlight pouring down, and also added the shimmer wherever the light touched their robes, and around the baby's face.

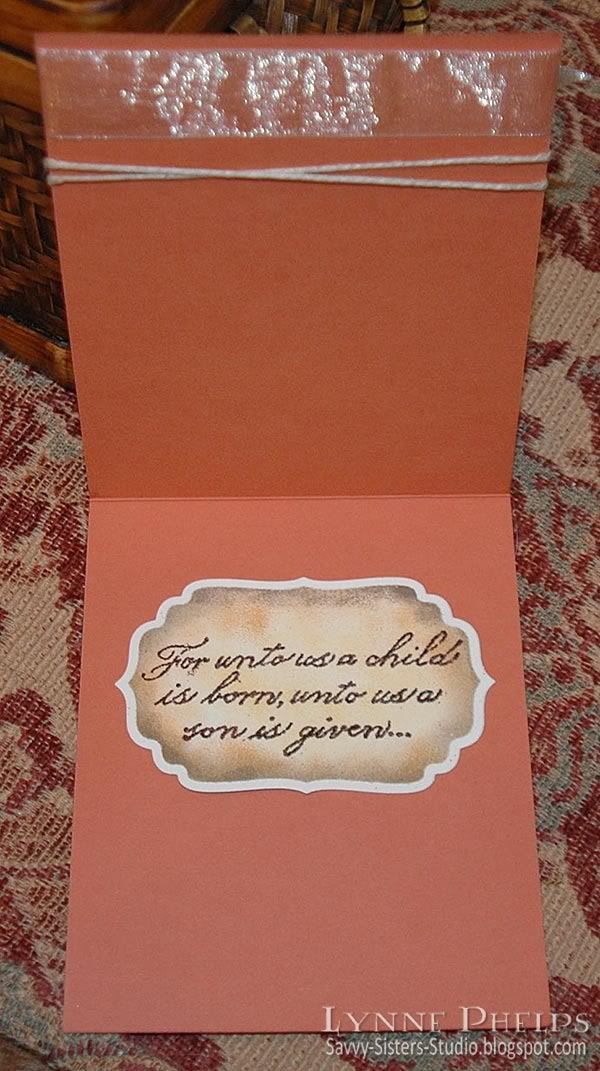
Inside, I stamped the sentiment that came with the set and cut it out with a Label Four die (Spellbinders). I sponged it with Ochre and Timeless Sepia (Marvy) before removing it from the die.
I think the contrast of rustic elements (color, twine, the sketchy style of the image) elegant lines (Label die cuts), and the shimmer (organza ribbon and glitter) are what make it work, in real life anyway. I wish the photgraph did it justice!

I love hearing from you - your comments are what makes blogging worthwhile!

Friday, December 11, 2009

And they wrapped the Babe in swaddling clothes...

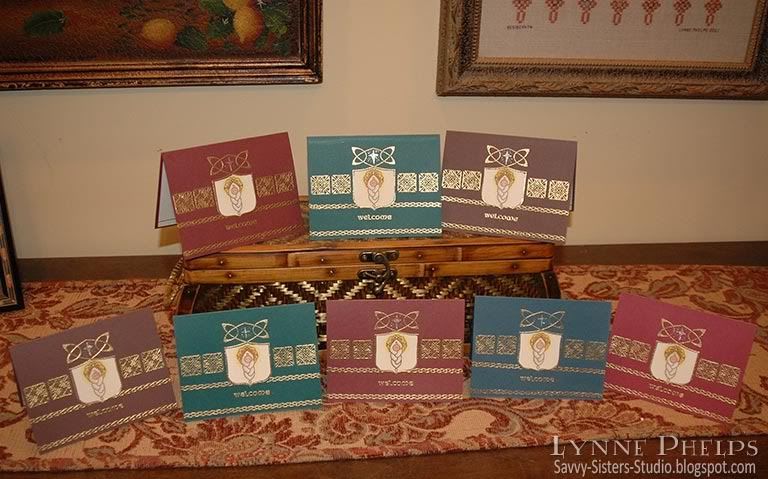
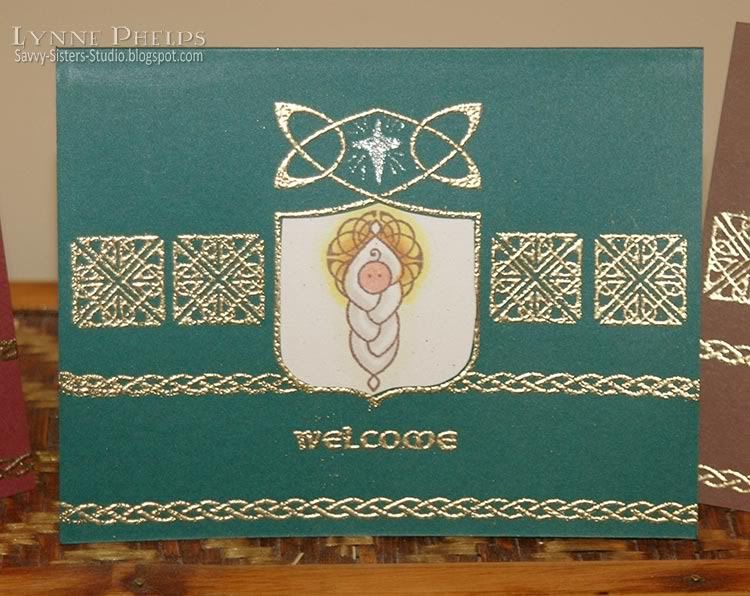
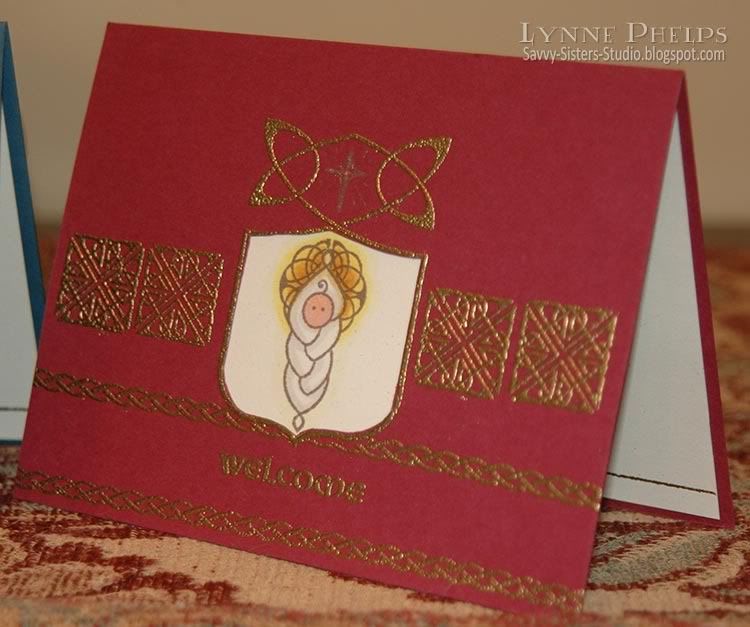
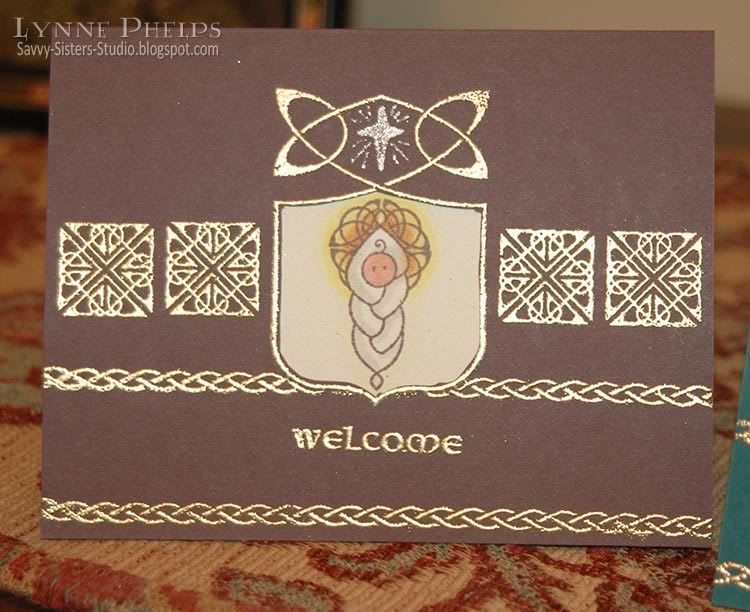
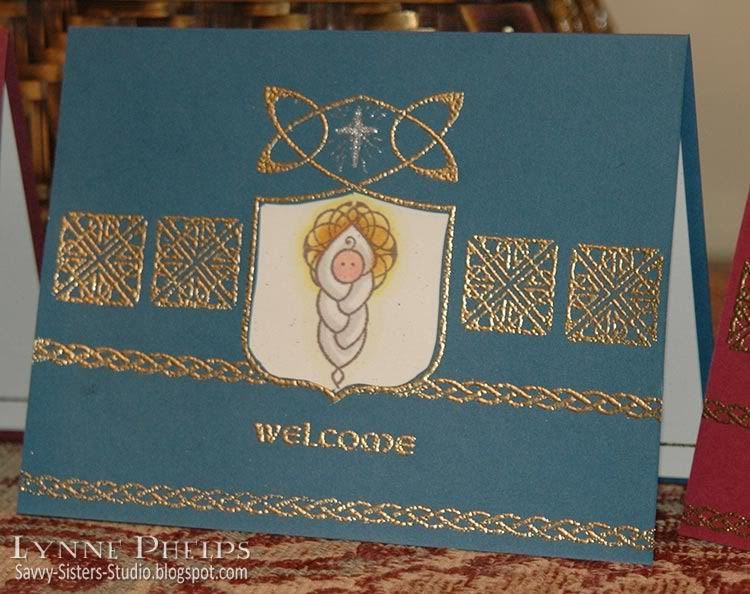
When I first saw Waltzingmouse Stamps' "Celtic Heritage" set, I knew the baby wrapped in a cable or "plaited" blanket would be on this year's Christmas card. It made me think of Baby Jesus right away! Other stamps are from Waltzingmouse "Irish Blessings" set and the inside sentiment is by Sweetgrass Stamps. (Note - Edited to add Labels, a forgotten photo and a stamp credit)

Cardstock is SU Chocolate Chip, Bravo Burgundy, Handsome Hunter and Not Quite Navy. Light cardstock is SU Natural Confetti - it has great little flecks in it that add a lot of interest.

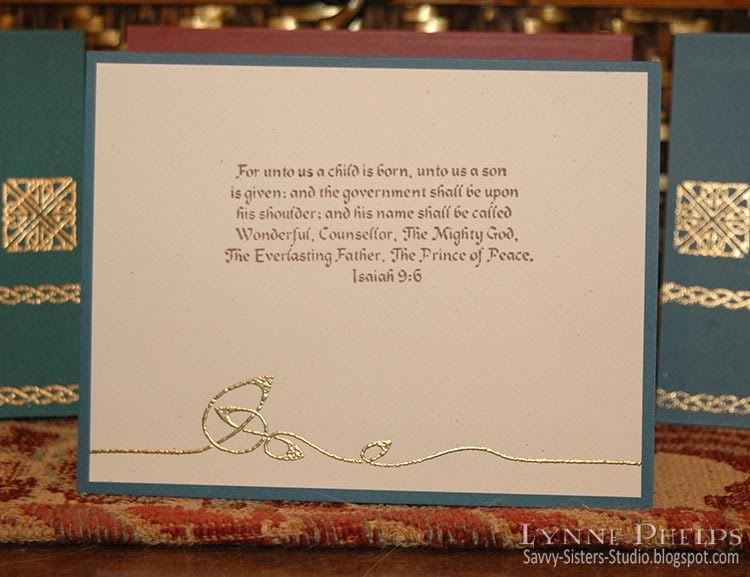
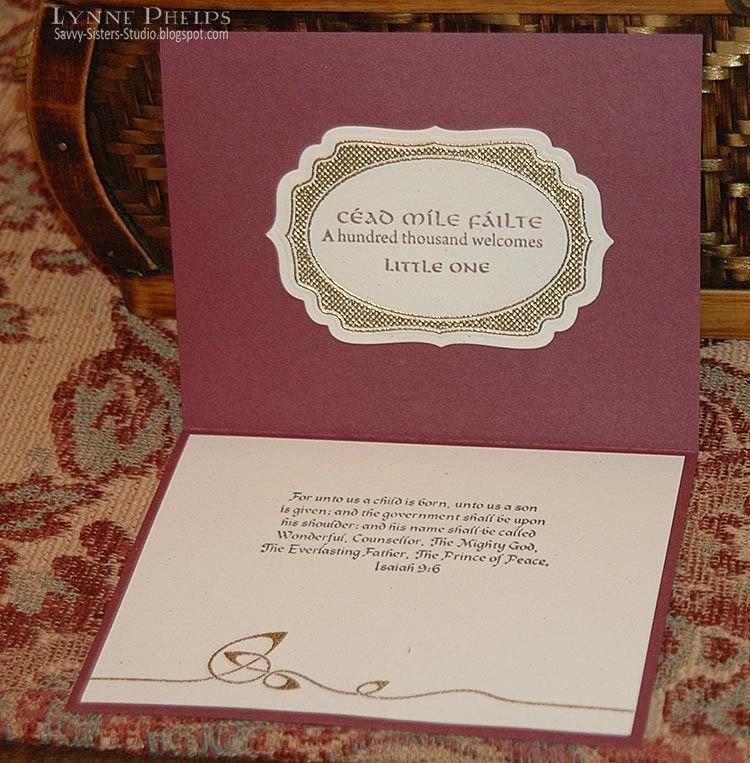
Here is a closeup of the inside, with a passage from Isaiah (Sweetgrass) stamped in Rich Cocoa Memento ink and a beautiful knotwork border (Celtic Heritage) stamped with VersaMark and heat embossed in Ranger Gold embossing powder. The sentiment is the only "Christmas" stamp used in the whole card!! (Am I the only person who hears Handel's Messiah singing in my head whenever I read this passage? Just wondering!!)


First the shield (Celtic Heritage) was stamped, embossed and masked, and then the braided borders (Irish Blessings) were added plus the Welcome (Irish Blessings). The knotwork squares(Irish Blessings) were added last using a Stamp-a-ma-jig for placement. The opening was cut out with an Xacto knife. The baby (Celtic Heritage) was stamped in Rich Cocoa Memento, then I masked the baby and the stamped the small open Lunette (Irish Blessings) twice to form a full circle for the halo. There are larger solid and open versions of the Lunette in Celtic Heritage, but this is the tiny one from Irish Blessings. The baby is colored with Copics, then adhered to the inside of the cardfront to show through the window opening. I drew in a little star in the upper shield opening using a Sakura Stardust clear pen.


Because the Copics that I colored the baby with saturated the backside of the paper, which showed inside the top of the card, I used a Nestibilities Label Four to cover it up on the inside. It is gold embossed with Nestie-friendly Waltzingmouse stamp (Vintage Labels Four) and then stamped with "One hundred thousand welcomes" in Gaelic and English (Irish Blessings) and "Little One" (Celtic Heritage). I thought this was a really elegant cover up and it continued the idea from the front of welcoming the baby Jesus!

More closeups of the card fronts:


It was so much fun to create these cards without using ANY stamps that would be normally thought of as being for Christmas, with the exception of the inside sentiment of course! I thought Welcome was an appropriate message for Jesus' arrival on Earth; it is certainly expressive of the spirit in my heart at this, or anytime of year! Please leave a comment to let me know what you think of my little swaddled Baby Jesus!

Sunday, December 6, 2009

Cuttlebugged Gift Card Holders

This is the time of year for gift card holders, and I got the idea for these from Sharon Johnson's No Time to Stamp blog in this post. I did not have any velcro tape on hand, so instead I used brads or slits to hold the flap closed.

These gift card holders are each made of a strip of 8½ inch paper (SU Mellow Moss or Old Olive) folded twice to create a pocket and a flap. It was super quick to do on my Scor-Pal! The bottom flap is folded up and secured on both sides with tape runner or brads and a brad or slit holds the top flap closed. A border punched strip (Fiskars) is adhered to the edge of the top flap. All edges are sponged.

I cuttlebugged each one twice as they were too long to fit in the folder. Except for the holly holder, each pocket flap is embossed with a different folder than the top flap. The score lines showed me where to place the paper in the folder, so the patterns start and stop in the right place.

Except for the holly version, they all have a cardstock panel with decorative cardstock adhered to the top flap (SU Real Red & Basic Grey - Figgy Pudding) which is held shut with a decorative snowflake brad or a curved slit. The back is also covered with Red/DP panels.

All have "To You from me" (Stampin'Up!) stamped, punched, and edges sponged, popped up on dimensionals on top of a larger punched circle and/or punched scalloped circle.
I enhanced the cuttlebug embossing on most of them by shading the raised areas with a white Prismacolor pencil.
The holly holder is a little different. The Cuttlebug holly folder is so beautiful that I did not need any decorative paper to enhance it. I Cuttlebugged the back and top flap in the first pass, and the pocket flap in the second pass. I lightly shaded the raised areas with green, red, and brown Prismacolor pencils. Then I stamped and gold heat embossed flourishes (Indadinkado Flourises set) in the open areas, then outlined the gold flourishes with a black pen. The scalloped circle was gilded with a gold Krylon leafing pen.

I wish I had noticed that the red edge I put behind the scallop had slipped up on one side - I should have retaped it before taking the photo. This provided a straight edge to fasten under the two brads.

Please leave a comment - I would love to hear what you think!
Related Posts with Thumbnails