Showing posts with label Copics. Show all posts

Monday, October 29, 2012

Alternative Wonderland in Smeared Ink

The October challenge at The Altered Alice is to create something that twinkles like a bat or shines like a tea tray! The challenge derives from this quote:
...it was at the great concert given by the Queen of Hearts, and I had to sing "Twinkle, twinkle, little bat! How I wonder what you're at!"You know the song, perhaps?' `I've heard something like it,' said Alice. `It goes on, you know,' the Hatter continued, `in this way:-- "Up above the world you fly,Like a tea-tray in the sky.Twinkle, twinkle--"'-- Chapter 7, Alice's Adventures in Wonderland
Our sponsor this month is Smeared Ink, home of edgy, wild and fun designs in rubber and digital forms has released a Wonderland Collection; images are available individually or as a set. The randomly-chosen winner of this month's challenge will receive a $15 shopping spree in their online store.


Smeared and Smudged is an online community of rubber stampers and crafters who enjoy using alternative, gothic, edgy, and unique stamps in their designs. They thrive on different and unusual. They welcome the macabre and devious side of things, and most of all, embrace ALL types and styles of art. Whether or not you “come to the dark side”, your creations should be a reflection of you. At Smeared and Smudged, the most important thing is being yourself. There are lots of ways to interact with the community!
Ning Community | Challenge Blog | Facebook Group ]


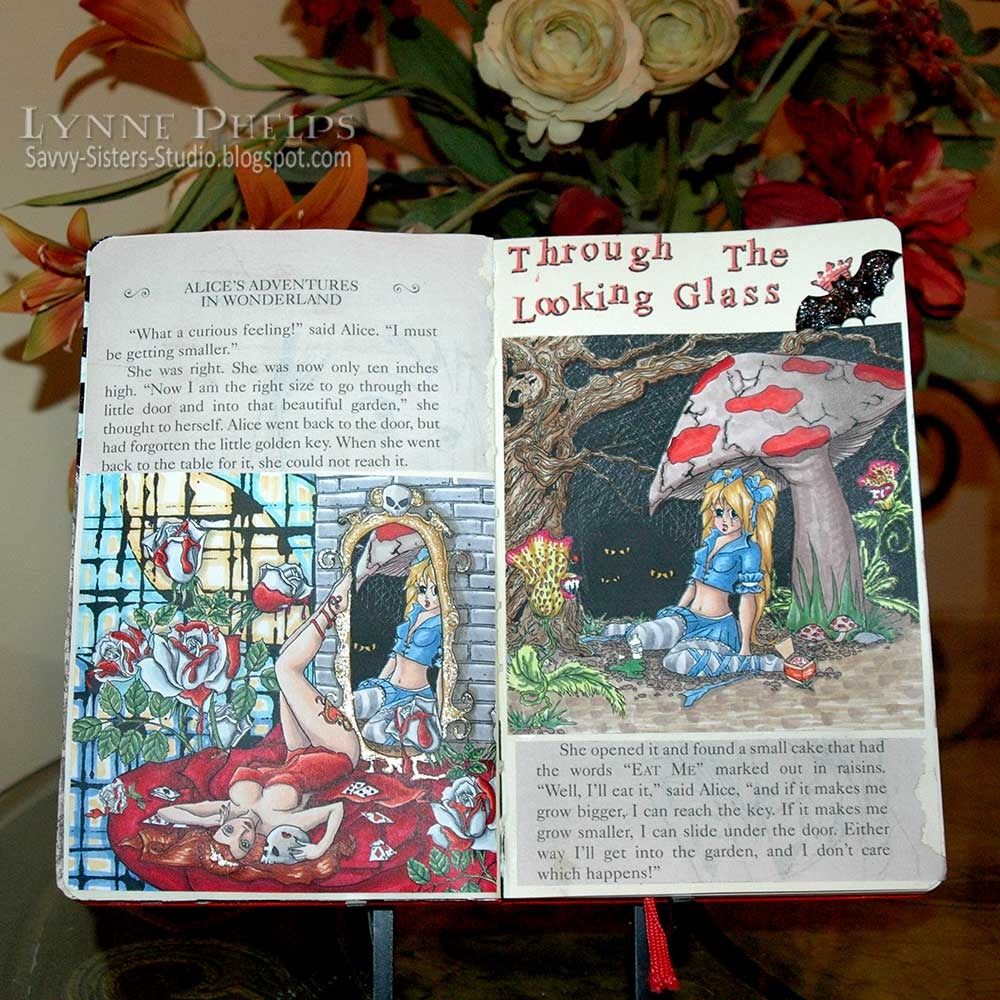
I created a two-page spread in my Alice art journal. I loved the way the Alice image on the right is also seen through the looking glass in the scene with the Queen of Hearts on the left, such a clever touch. Although the images are FAR from my usual style, I do love to color and these incredible detailed images provided hours of coloring fun! These images are racy and a bit on the wild side; an alternative "Smeared and Smudged" Wonderland.
Click to enlarge and see details
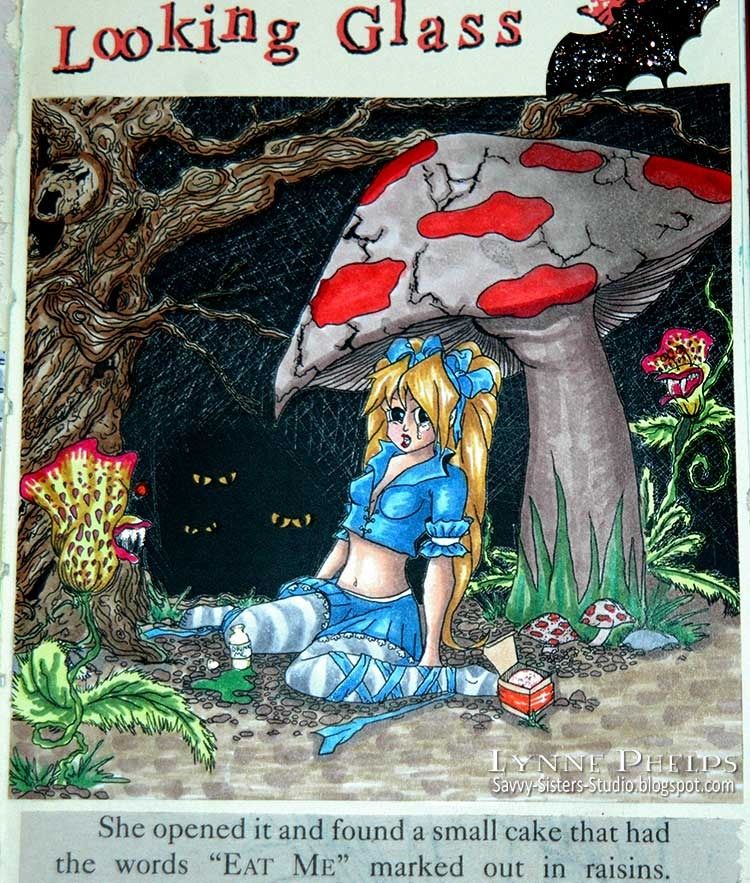
Here we see Alice in distress with watching eyes, tortured tree and carnivorous plants. The small box contains the "Eat Me" cake and the "Drink Me" bottle is a bright green, but the layer of clear sparkling Gelly Roll Stardust reflects the light and obsures the detail. I also added sparkle to the teeth of the carnivorous plants and to Alice's tears. I adored coloring this with my Copic markers. You can see the 3D black glittered bat, a nod to the challenge and to Halloween!

Click to enlarge and see details
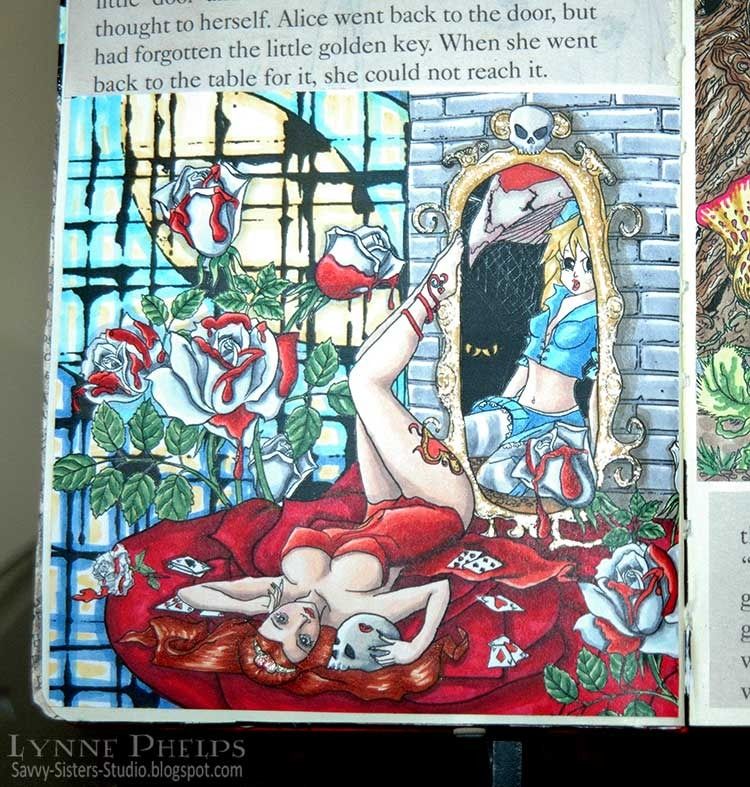
 Aside from the obvious, this image has so many great details. I colored her gown in a warm scarlet red to contrast with the cool violet red of the large rose beneath her. Playing cards are scattered around her and a skull keeps her company as she monitors Alice's progress through her looking glass. I added sparkle to the gold frame of the mirror, it really gleams! A lot of people colored the roses red on this image, but I decided these were the white roses in the process of being changed to red with dripping paint.

Click to enlarge and see details
I hope you enjoyed this month's walk on the wild side of Wonderland with The Altered Alice! Please leave a comment before you go!

Wednesday, September 26, 2012

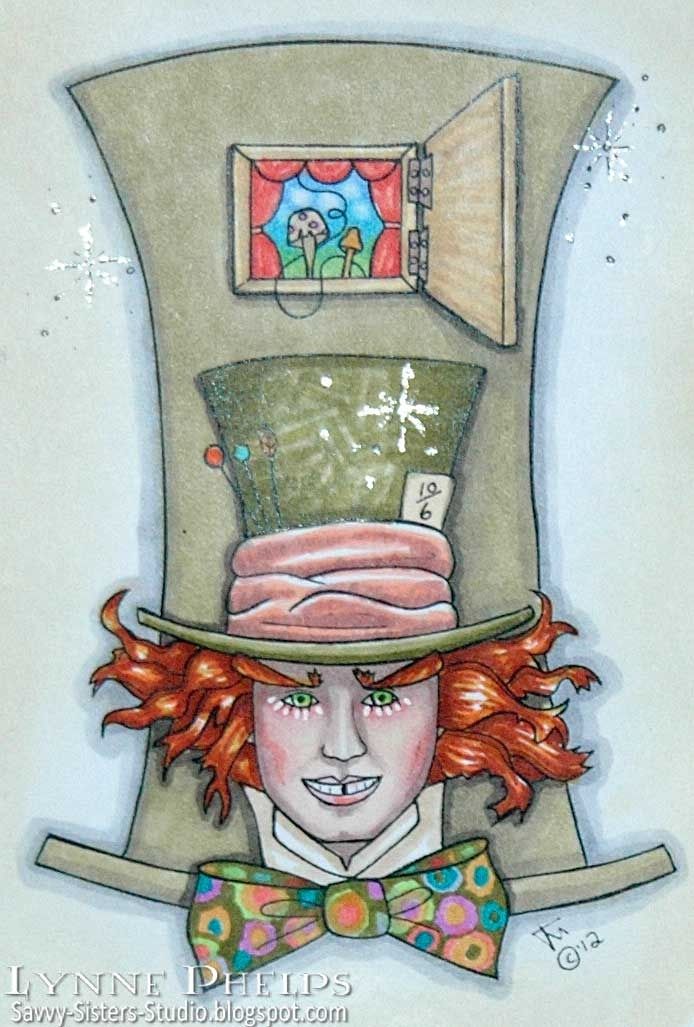
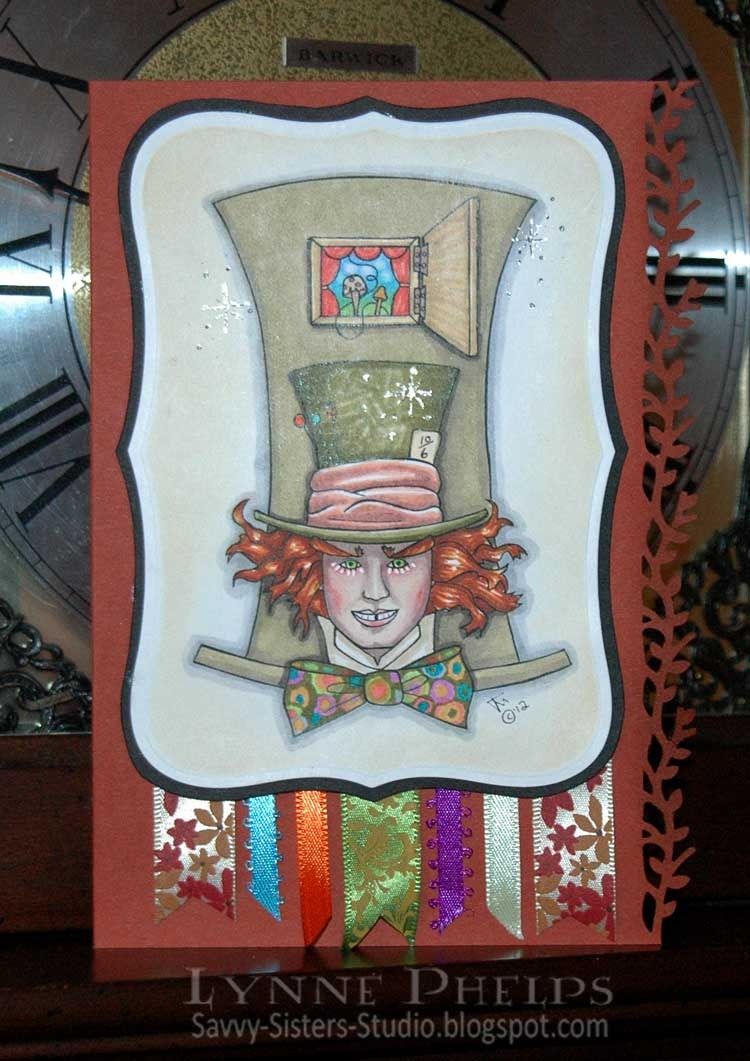
Mad Hatter from The Stamping Boutique

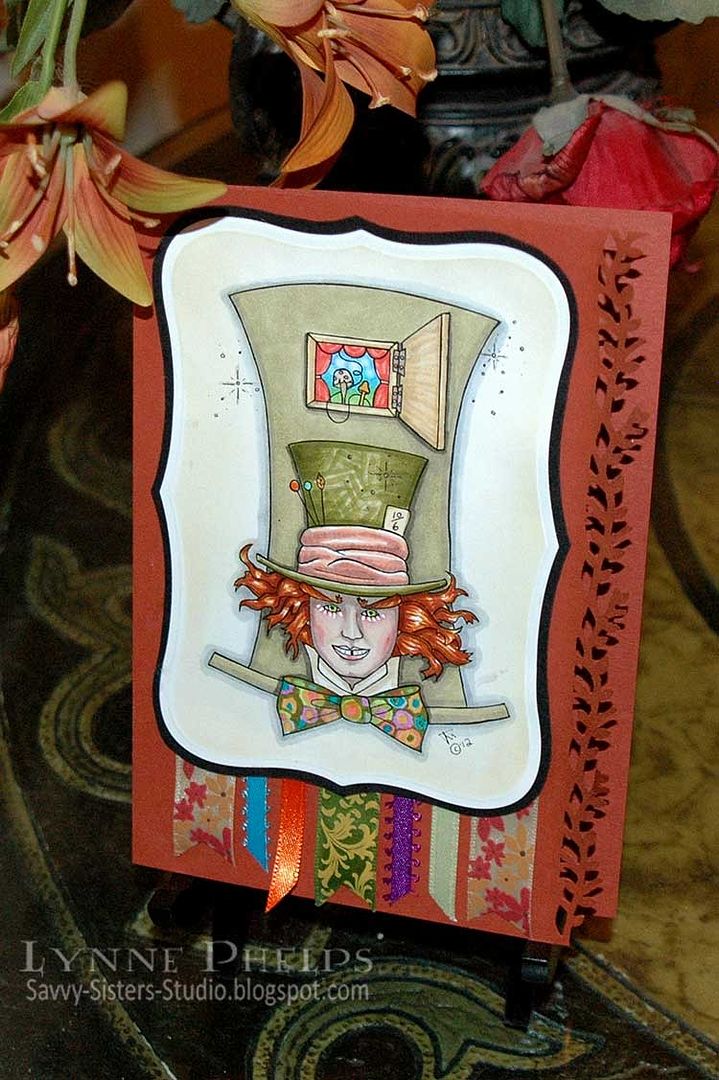
You have a few days left to enter the monthly challenge at The Altered Alice, so get busy! The Stamping Boutique is sponsoring the challenge, and I chose this fabulous Mad Hatter image to color. Isn't is a wonderful image?
The theme is garden or flowers. I worked that in with my punched border and botanical patterned ribbons, which remind me of the ribbon swatches on the Mad Hatter's jacket pocket in the movie.

I colored the image with Copic markers and highlighted below the eyes with a white gel pen, and I used a clear Stardust Gelly Roll pen to highlight the twinkle lines in the background and on his hat. I adore the Tim Burton Alice in Wonderland movie, so I was thrilled that The Stamping Boutique offered this movie version of the Mad Hatter character, I love it! It was so much fun to color.

The image was trimmed out with a Label Eight Nestability by Spellbinders. The edge punch is from Martha Stewart, and the wonderful rich paprika colored card stock is Cajun Craze by Stampin' Up!


So head over to The Altered Alice to submit your garden or flower inspired image, this Friday is the last day; you could win three digi images from The Stamping Boutique!

Sunday, March 20, 2011

Altered Alice CHAPTER 2: Hall of Doors

"There was not a moment to be lost: away went Alice like the wind, and was just in time to hear it say, as it turned a corner, `Oh my ears and whiskers, how late it's getting!' She was close behind it when she turned the corner, but the Rabbit was no longer to be seen: she found herself in a long, low hall, which was lit up by a row of lamps hanging from the roof.

There were doors all round the hall, but they were all locked; and when Alice had been all the way down one side and up the other, trying every door, she walked sadly down the middle, wondering how she was ever to get out again."
     -- Chapter 1, Alice's Adventures in Wonderland
This month's challenge is to use a door or doors, and preferably for the door or doors to open and close so we can see what lays beyond! While it is not required that your project include Alice in Wonderland, we do encourage it. If your project features Wonderland you will get two chances in the prize drawing instead of one!

HURRY UP and get you entry in! You have until this Friday and  our winner will be announced next Sunday! You can make it as simple or complex as you like, just feature a door and link it on the Week 1 post for this challenge!
The Octopode Factory is our March sponsor! We are celebrating because Lily has moved into the world of rubber! That's right - RUBBER STAMPS! Most of the digital images we will be using are those that are now available in rubber,
One lucky winner will win a $30 gift certificate for digital images from The Octopode Factory's Etsy store! Enter by Friday, March 25 at 8 p.m. Eastern time (GMT -5:00) and a winner will be announced on Sunday, March 27. While we'd love to see your Octopode, you can use stamps from any company on your creations, so show us your DOORS!

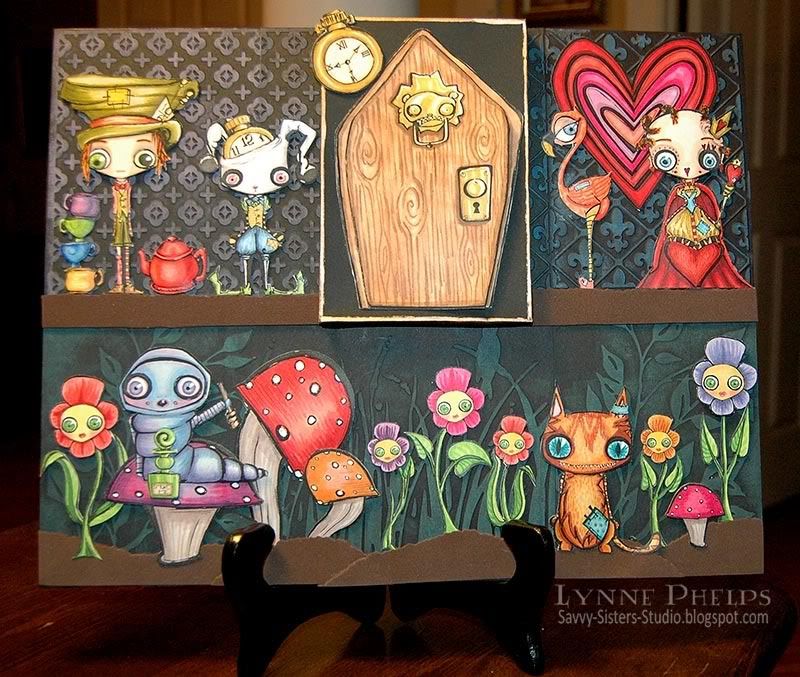
And now for my mad Octopode Wonderland!


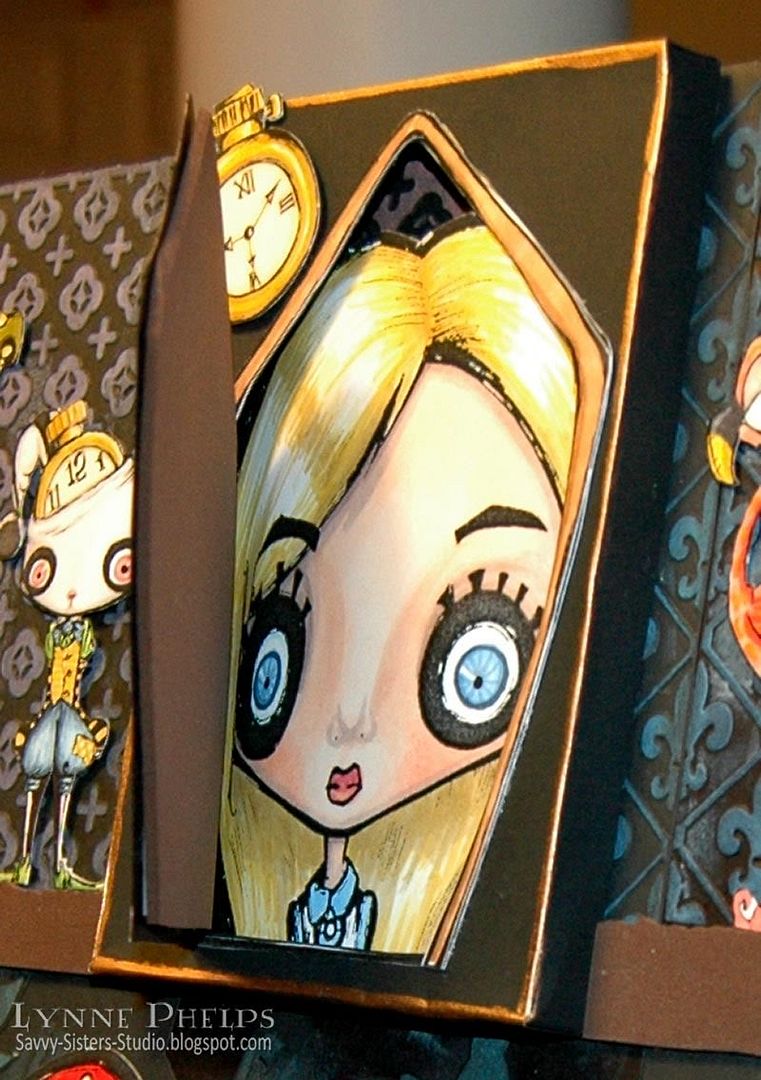
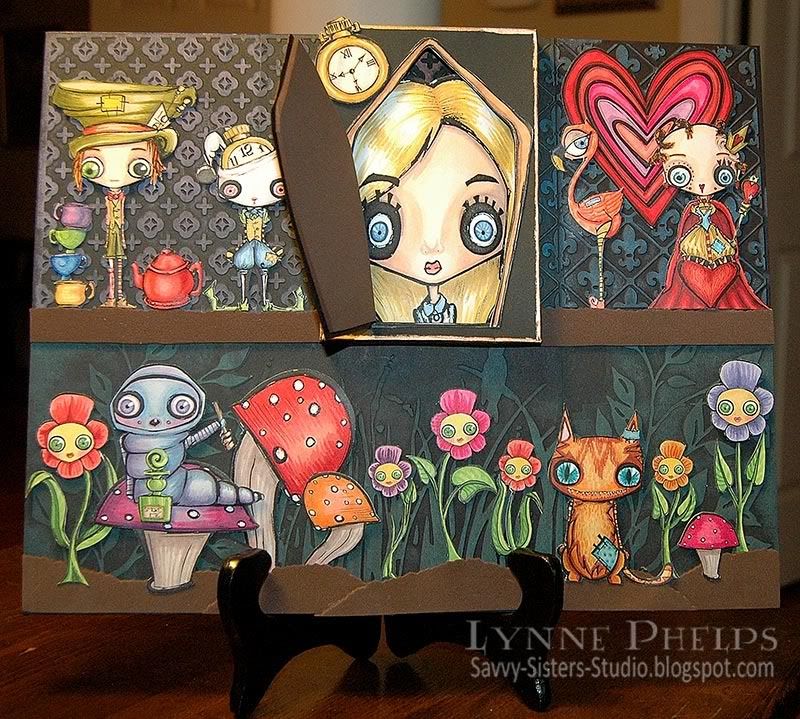
I started with an 11 x 14 inch canvas panel to create this fantasy scene with both the Alice in Wonderland set plus the new Alice Elements. All the elements were printed using a black and white laser on color laser printer paper. They were colored with Copics, adhered to inexpensive cardstock and then carefully trimmed out. The canvas board was covered with panels of black paper that I embossed with my Cuttlebug and then brushed over the high spots with fluid chalk ink pads. All images are Ocotopode, including the brand new door that Lily created in honor of our challenge. I love the Teddy bear door knocker!  The Rainbow Heart is a freebie from Lily's blog!
 

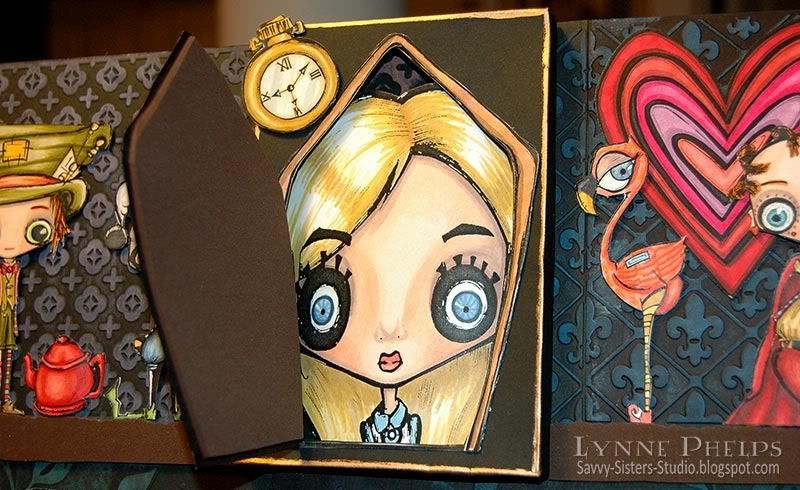
I made a shallow box, a half-inch deep. I set the door into the lid of the box, trimming away the box lid beneath the door opening.  I stretched the door image wider to accomodate the size of the Alice face I was putting inside.

Alice is set into the base of the box, curved over a thick stack of mounting foam tape to give her some dimension. I added a little scrap of leftover embossed black paper in the bottom of the box. Then the lid with the door was glued on to seal it into place.


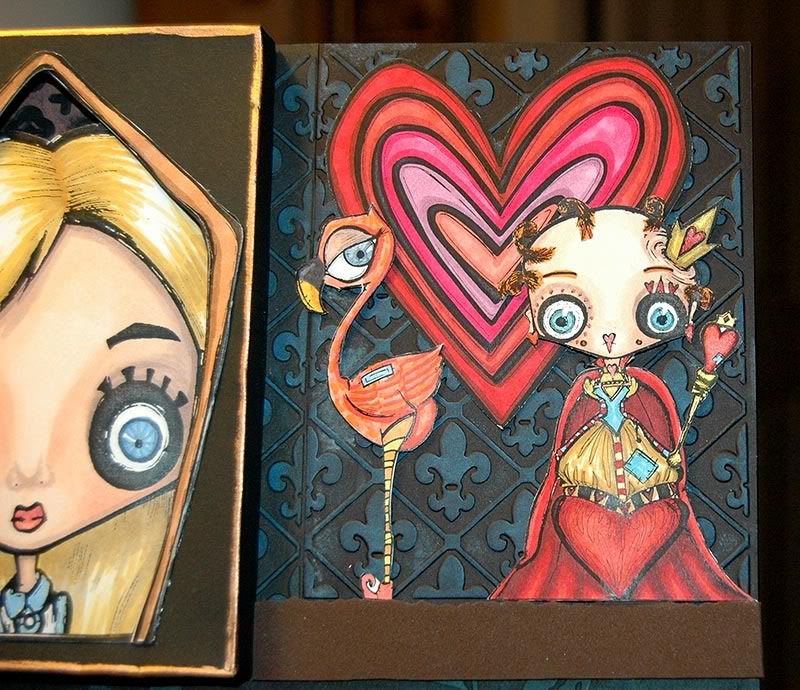
These crazy Octopode images are so much fun to color! The Queen of Hearts with her scepter (with Smooch accents), a flamingo (croquet anyone?) and the Rainbow Heart (blog freebie) are set against fleur-de-lis brushed with blue.
 
 
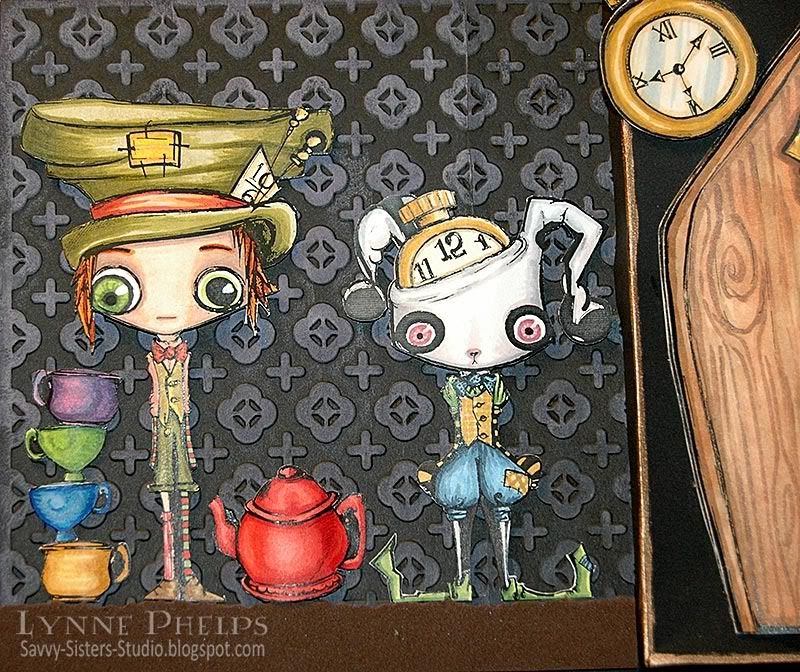
I love the Mad Hatter and White Rabbit! I love drawings that have the pin-dot eyes because it lets me color in the irises and highlights to make wonderful eyeballs, LOL! Look carefully at they way I colored all the eyes, it gives a whole different feeling to their little faces! :-)
 
 
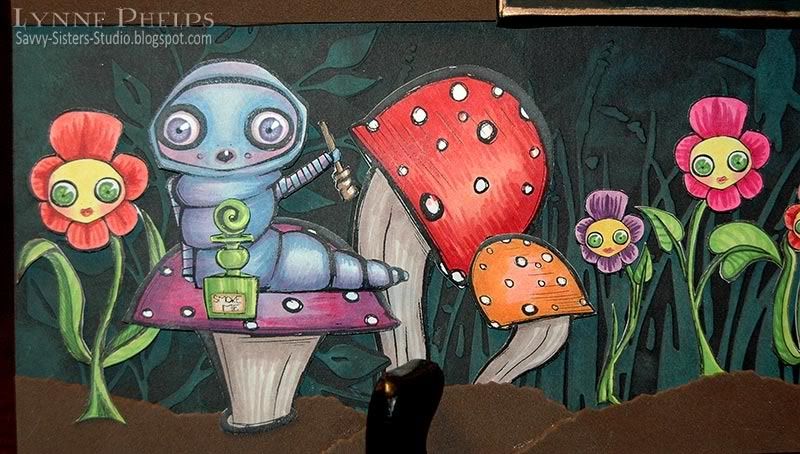
The Caterpillar image along with his stash is why I HAD to get the Alice Elements set (which also includes flamingo, teapot and cups, pocket watch, mushrooms, flower face, etc.)  I had great fun coloring his eyes, which are red and glazed from all that smoke, tee hee! Because they are digital images, I was able to flip and scale the two mushroom images to make many, including stretching one wide enough for the Caterpillar and his stash to sit on one!
 
 
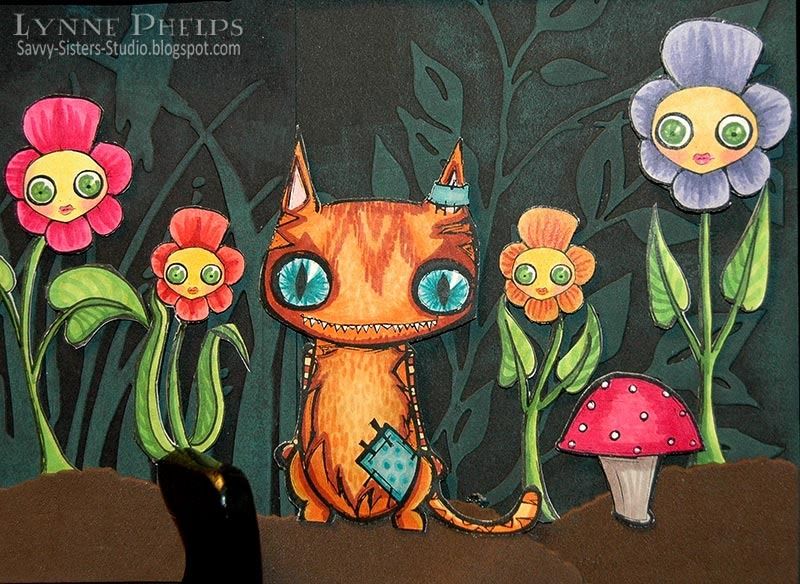
I had fun coloring in the flower faces with their leaf green eyes, and doodling in some leaves to give them a sassy attitude!
 
 
LOVE the Cheshire Cat!  I doodled slitted pupils instead of the round pin-dot pupils to make it look more like my cats with their blue, blue eyes, LOL!  I also had a lot of fun doodling in the fur.
 

Please leave me a comment about my creation for The Altered Alice CHAPTER 2: Hall of Doors challenge! 
 
You have until this Friday, so be sure to link your creations on the Week 1 post!  And be sure to check out the rest of the Design Team creations on Week 2 and Week 3!

Sunday, February 20, 2011

The Altered Alice CHAPTER 1 - Week 4: Too Tall or Too Small!


We are in the final week of the February challenge at The Altered Alice, so be sure to submit your projects before 8:00 p.m. EST (GMT -5:00).  I will announce the winner of the drawing for a $30 gift certificate from Stampotique Originals, our generous sponsor! While it is not required that your creation use Alice in Wonderland, we do encourage it! Entries that feature some aspect of Wonderland will have their name put into the drawing twice.

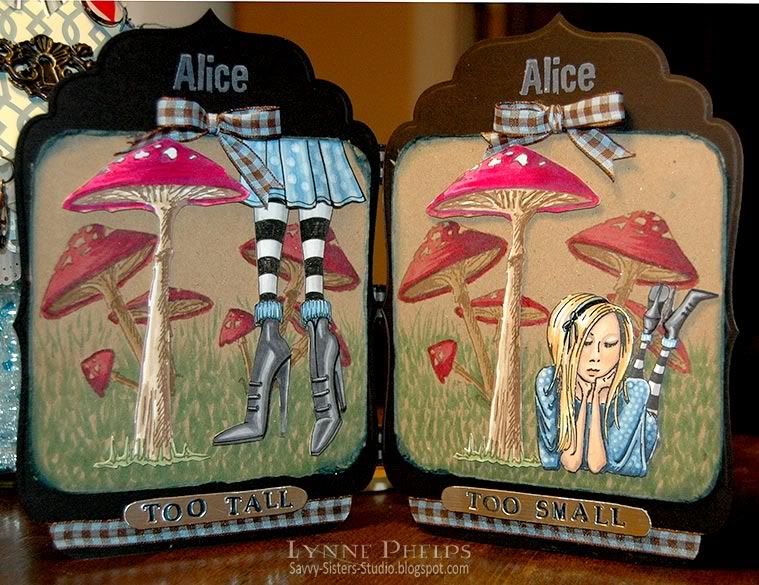
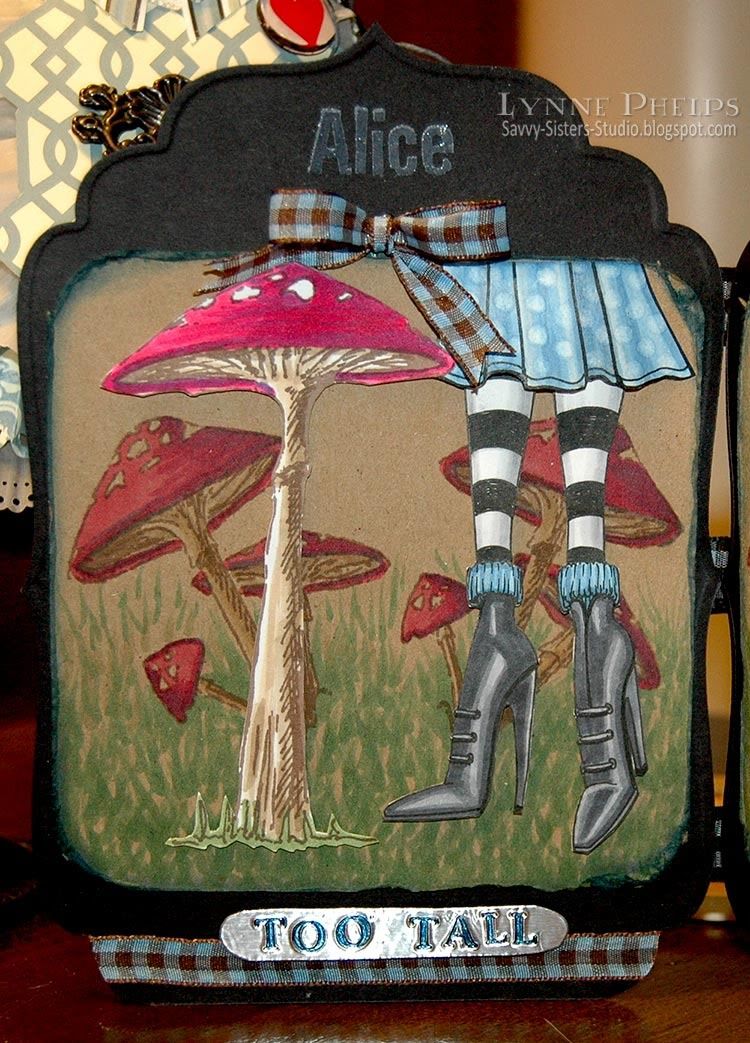
Carol of Stampotique very kindly supplied the design team with some free stamps to show off! I chose mushrooms and my friend and fellow design team member, Terri DeVine, chose Jasmin. I love the Jasmin character and thought she would make an awesome modern day Alice, so I used Terri's stamp at our weekly stamping get together!  Actually the first thing I thought was "check out those SHOES!!!"  I thought it would be a lot of fun to make one scene with the mushrooms where the Jasmin Alice was so small that she was lounging in the shade of a mushroom, and another with those fab shoes at a large scale so you would know she was now huge! I love to draw, so I drew some shoes and legs!

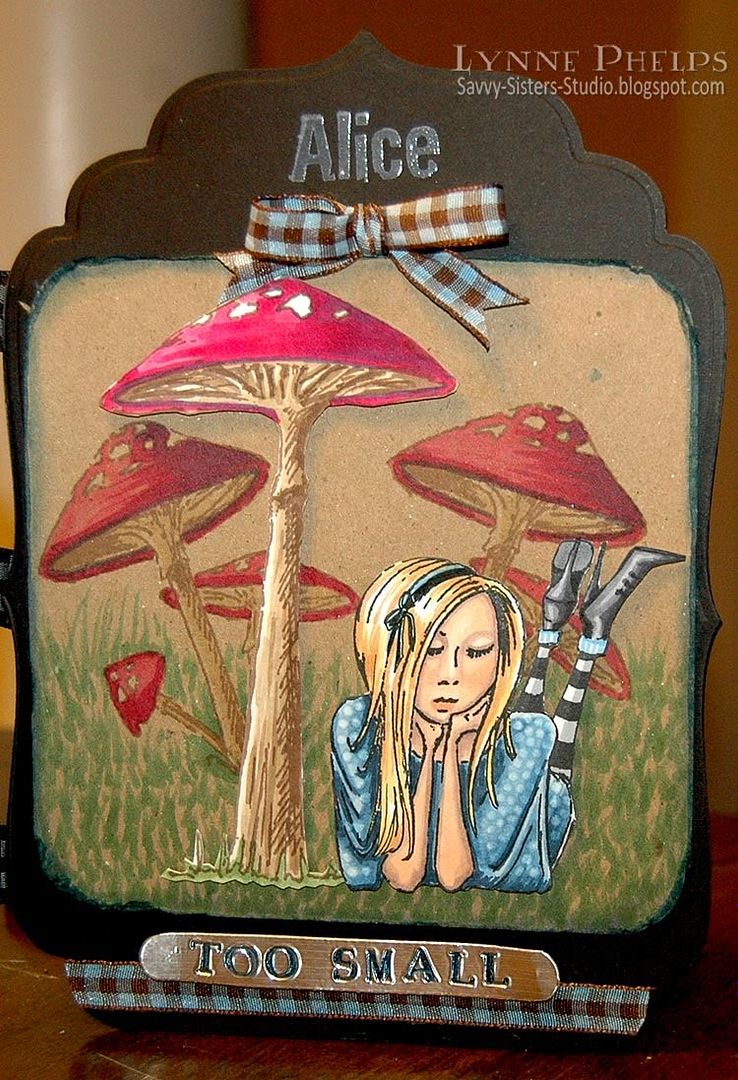
I made the "Too Small" version first. Take a look:


Zutter Distrezz-It-All 7608On white card stock, I stamped the Giant Shroom with brown Memento ink and Jasmin in black. Both were colored with Copics, and the polka dots on her dress were made with the colorless blender. I used a Copic Mulitliner to add a hair ribbon to make her a bit more Alice-y! I wanted to create a sense of depth, so I made the background more muted by stamping the Mushroom group onto kraft card stock. They were  colored with Copics and the grass was created with flicking motions of the marker. The Giant Mushroom and Jasmin were mounted with foam tape to give some dimension. I love how they look closer because they were stamped on white, so the colors are much clearer and stronger.  I distressed the edges with my newest toy, the Zutter Distrezz-It-All! I love how easy it is to tatter the edges, which I then sponged with ink.


Now, aren't those insanely high-heeled boots even more fun when they are big? I drew the boots and stockings with a black Copic Multiliner pen and colored them in with Copics, using my favority "shiny shoes" shading technique, and cut them out. When I mounted them on the kraft background, it did not look right having the legs showing all the way to the top of the panel, so I drew a skirt. I colored it with Copics and used the colorless blender to move the ink to make polka dots, making sure to make the dots themselves much larger in scale than the "too small" version. I put foam tape in the center of the skirt to pop it out more over the legs, but glued down the top and left and right edges of the skirt flush with the page, which looks so neat as the skirt bells out over the legs!

Spellbinders Grand Nestabilities Grand Labels Four Die TemplatesI decided a little tabletop bi-fold would be a fun way to present these. I had orginally thought to make them into two separate cards but they really belong together! I cut the second from the largest Grand Label Four nestie on my Cuttlebug using black card stock, trimming the lower point off to make a straight bottom edge. I purchased the extended 13-inch long plates online when they were on sale, so I can cut all but the largest die in this set on my Cuttlebug. I don't have the Grand Calibur. I have been longing for an electric Vagabond die cutting machine, but then they came out with the oversized Grand Calibur and I love that large platform.  So now my dream machine would be a Grand Vagabond!!!  The Grand Calibur fits the new Grand nesties but it will not accomodate the Sizzix Bigz dies. The Vagabond fits the Bigz but it won't cut a Grand nestie larger than what I can already do with my Cuttlebug! What to do? I can't afford both, nor do I have the space for two machines!


I wanted some labels saying "Too Tall" and "Too Small" so I adhered aluminum HVAC tape to card stock and used a Karen Foster Click-It tool with the add on Alphabet dies. I colored in the depression of each letter with a blue Copic marker and trimmed them out by hand. They were mounted with foam tape over a ribbon I had glued to the black base. The kraft panel was glued on, and the panels were hinged together with strips of gingham ribbon and more glue. It still needed something, so I stamped the "Alice" at the top of each panel with white pigment ink and embossed it with clear powder. This worked out just as I had hoped - the clear powder softened the bright white of the pigment so it is there, but not attention stealing. A bow was glued on to match the brown and white gingham at the bottom; both were colored with a blue Copic marker to change the color.

I hope you enjoyed my funny bi-fold display!  Please leave a comment, I love hearing from you and your comments make it all worthwhile. Go to this post to see the amazing creations from the rest of the design team during the final week of the February challenge, and be sure to get your own creations linked by Friday!

Saturday, November 27, 2010

Oh, Alice CHAPTER 41: Off With Their Heads!


`Let's go on with the game,' the Queen said to Alice; and Alice was too much frightened to say a word, but slowly followed her back to the croquet-ground.

The other guests had taken advantage of the Queen's absence, and were resting in the shade: however, the moment they saw her, they hurried back to the game, the Queen merely remarking that a moment's delay would cost them their lives.

All the time they were playing the Queen never left off quarrelling with the other players, and shouting `Off with his head!' or `Off with her head!' Those whom she sentenced were taken into custody by the soldiers, who of course had to leave off being arches to do this, so that by the end of half an hour or so there were no arches left, and all the players, except the King, the Queen, and Alice, were in custody and under sentence of execution.
Welcome back to the land of wonder and where the saying, 'Off with her head' is a regular statement! Well here in wonderland this week, that is exactly what we want you to do. This week we want you to take your stamps and yep you guessed it,'Off with their heads'. So we are asking you to alter your stamps and mix it up a little by giving them a new head or body. Ohhh this is going to be sooo much fun seeing what you come up with!!!

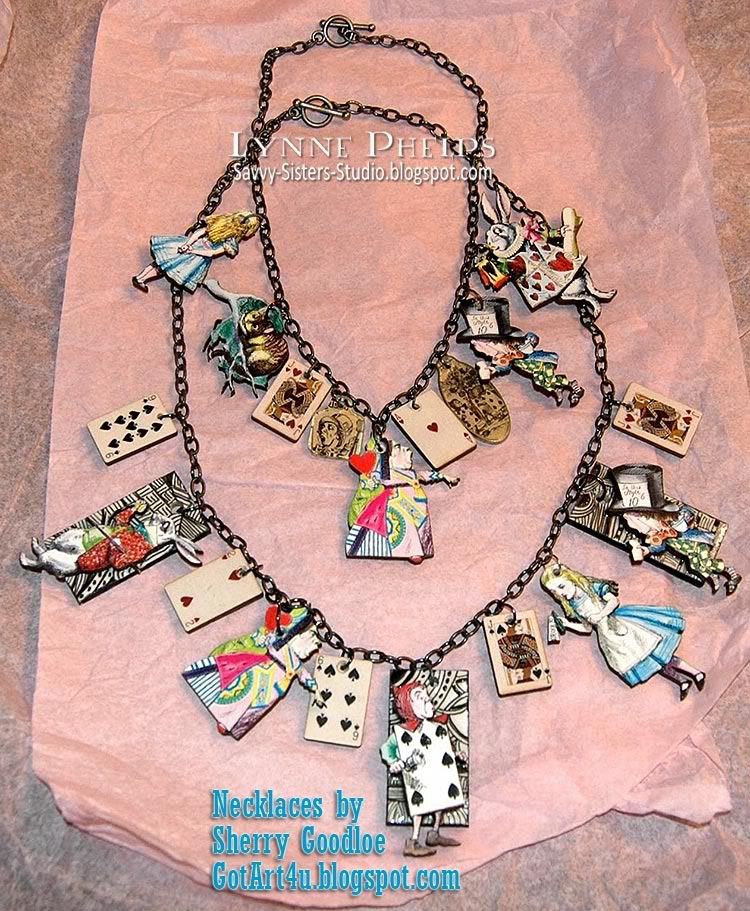
Well, I have to admit that I did not come up with anything at all, but I did spend a good bit on my two newest treasures so I thought I'd share them with you!  I have another blog, The Altered Alice, which features various artists and their Alice in Wonderland creations. Someone suggested I visit Sherry Goodloe's "Got Art?" blog because of her mixed media necklace workshops and her own necklace creations, some of which feature Alice in Wonderland!  I won't say too much as I'll be featuring her on The Altered Alice a little later, but I asked her to let me know if she rounded up anymore Alice charms or necklaces. I was THRILLED when she emailed me to say she had just added two necklaces to her Etsy store. I couldn't decide so I bought BOTH, LOL!!!  I figure they are great as my inspiration for this week's Off with their heads challenge as they feature the Queen and they are worn around the neck!


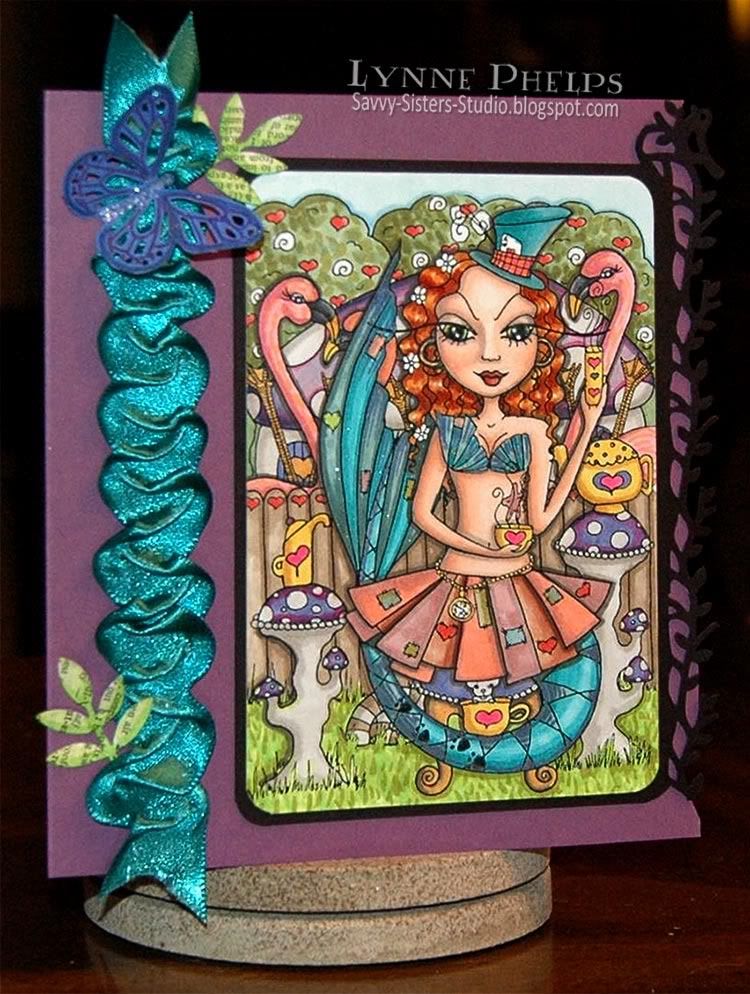
I also finally got LAST week's challenge entry completed, which uses "Mad Fancy," one of the whimsical creations of Maigan Lynn that was provided to the design team as black and white line art by last week's generous sponsor! The challenge, besides the coloring of this fantastically detailed image, was to use a butterfly. Better late than never, right?


Coloring Tips: It was quite a job - a fun job! - to color in this image as the foreground, focal point, and background are all equally detailed. I had a lot of shading within each area but it was all just merging together into a bright pattern. To help the viewer to focus where I wanted them to, I outlined just outside major elements with a dark warm gray (W7) which helped to lift key elements out of the background. You can see the outining better on this closeup; look around the flamingoes, mermaid, skirt panels, and mushrooms. I can't tell you how much it helped to add depth of field to this charming, hectic image! Then to lift the mermaid even more, I colored her tail and shell top with glitter pens in clear and dark blue. I wish you could see all the shimmer, she really gleams!


Check out the other amazing creations by the design team, you won't be disappointed! There were some very creative submissions to this week's challenge!
And be sure to submit your own creation for a chance to win a SCORE-BUDDY from the lovely people at
Srappin' Great Deals!!!. So go chop off some heads for your chance to win this awesome prize. You have until the 3rd of Dec to enter your creation at Oh, Alice!

Please leave me a comment before you go, I love hearing from you! It has been so busy I have not had much time for blogging, and I have missed you terribly!

Tuesday, September 7, 2010

Hind Sight is 20/20

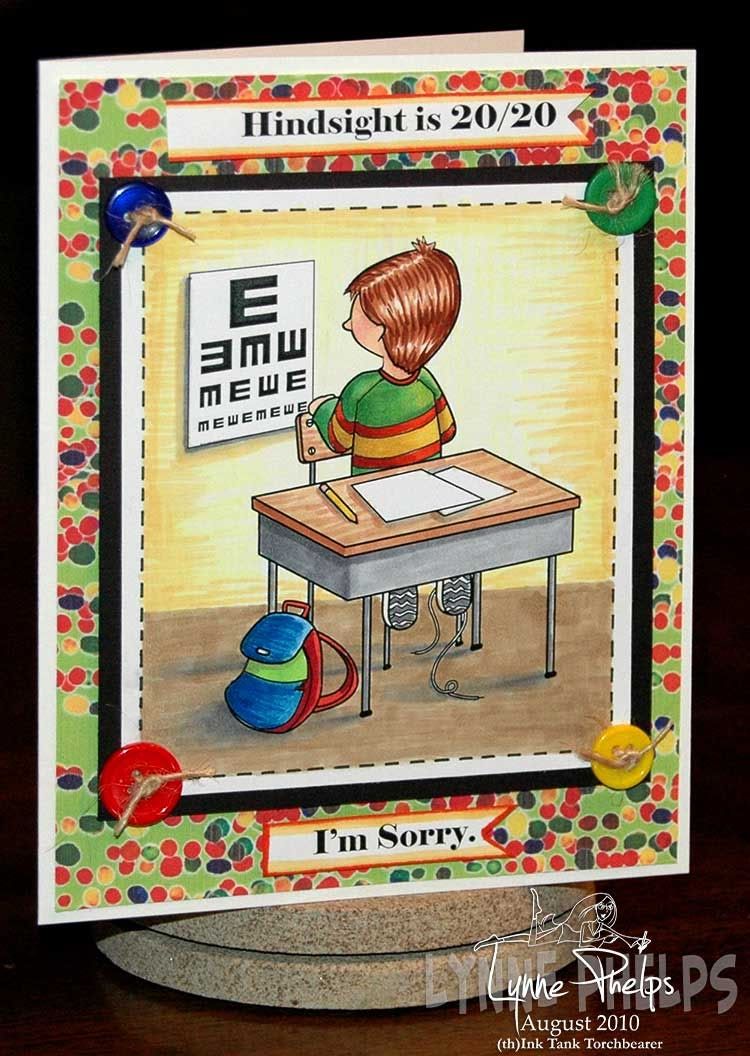
When I first saw this turned around little guy in the August release from Amber INK, the first phrase that popped into my head was "Hind sight is 20/20." We always see so clearly when we look back on things from the perspective of experience. Who had not done things that, upon reflection, they wish undone?  So I decided to use this little turned around dude to make a fun "I'm sorry" card.

Photobucket
Click to enlarge

I created my own little eye chart to make a visual representation of my computer generated sentiment. I angled it a bit to match the angle the desk is at. My only sorrow is I did not keep to that same angle when I colored the floor. I wanted to add a faux "stitched" outline after the combined image was printed, so I drew it in by hand using a ruler and a Mulitliner pen. All coloring was done with Copic markers. The background paper is one of Amber INK's digi iPaper offerings, love those dots!

And my BIG NEWS:

Photobucket

Most of you know I LOVE to color with any medium: Prismacolor pencils, watercolors, pastels, etc., but my true love is coloring with Copic markers!  I was recently certified as a consumer instructor by Copic!!! I hope to start offering coloring classes in the Middle Georgia area on the weekends. Please contact me if you would be interested in learning coloring techniques from me. I have a fine arts and graphic design background and would love to share not only blending techinques but also how to do shading, shadows, lighting and texture. I have not gotten all the details worked out yet so your opinions would be of great interest to me!

Another lovely piece of news is that I have a birthday coming up this week and my Dad is giving me an airbrush compressor to use with my Copic markers!  I am so excited - after being trained on using the airbrush in the certificaton training, I will soon have one of my own!  Thanks in advance, dearest Dad!

Once I have all the kinks worked out, I hope to start traveling further afield to offer classes on the weekends. I used to teach all kinds of classes at the local scrapping and stamping store, and I have missed it so much since the owner closed it down due to illness. We all miss Anne very much!

Photobucket
Click to enlarge


I am entering this card in the following challenges:
  • Amber INK's INKredible 21-Day Challenge: #1 - Books (I think my little dude is going to be learning to READ shortly!!!)
  • Allsorts Challenge Blog: New Beginnings in honor of back to school week (Although my sentiment is not about a new beginning, I am using a "First day of School Kiddo" stamp from Amber INK)
  • Crazy 4 Challenges: Book Related
  • Creative Card Crew: Back to school
  • Moving Along with the Times: #62 - Stitches, Real or Faux (I added my faux black stitched outline with a pen)
  • Stampavie and More: #107 - School
Please leave a comment - I would really like your opinion on my Amber INK card. Do you love this little dude as much as I do? Also let me know what you think about my dream of teaching!

Saturday, August 14, 2010

Oh, Alice! CHAPTER 26: Sizin' up a Sketch... Caterpillar Size!

"The Caterpillar was the first to speak.
`What size do you want to be?' it asked.
`Oh, I'm not particular as to size,' Alice hastily replied; `only one doesn't like changing so often, you know.'
`I DON'T know,' said the Caterpillar.
Alice said nothing: she had never been so much contradicted in her life before, and she felt that she was losing her temper.
`Are you content now?' said the Caterpillar.
`Well, I should like to be a LITTLE larger, sir, if you wouldn't mind,' said Alice: `three inches is such a wretched height to be.'
`It is a very good height indeed!' said the Caterpillar angrily, rearing itself upright as it spoke (it was exactly three inches high).
`But I'm not used to it!' pleaded poor Alice in a piteous tone. And she thought of herself, `I wish the creatures wouldn't be so easily offended!'
`You'll get used to it in time,' said the Caterpillar; and it put the hookah into its mouth and began smoking again..."
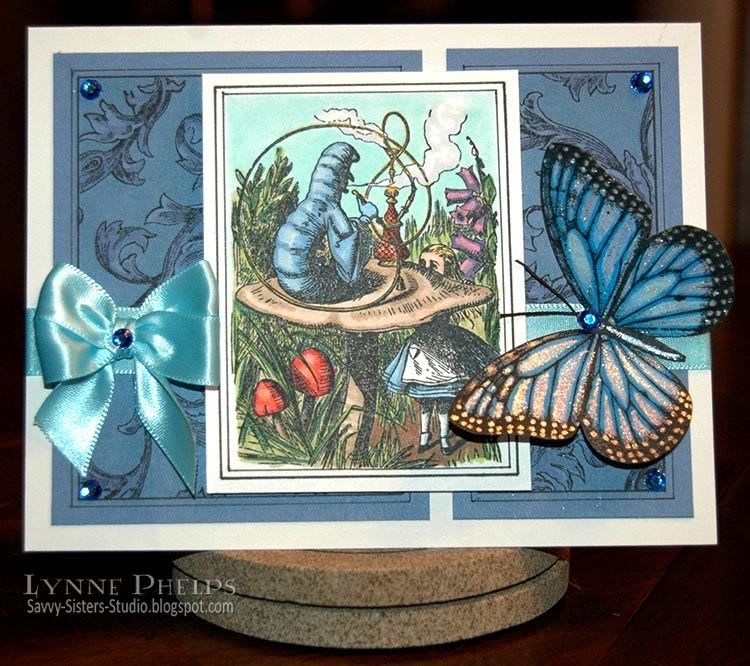
PhotobucketHello! How is everyone here in Wonderland today? We are sizing up a GREAT sketch by JEN and the main panel just HAPPENS to be THREE. INCHES. TALL. :) Now, of course you don't have to stick to this if your image won't fit, but we didn't want to anger Mr. Caterpillar by saying that Three inches wasn't a respectable height, so here's the sketch:

Now, I have to admit that my dimensions are not the same as Jen's sketch, but I am using the original Tenniel illustration of this conversation to show due respect to Mr. Caterpillar!  Also, as a nod to the final scene in the new Tim Burton movie, I have included Absolem the caterpillar  after he metamorphed into the blue butterfly. After the excesses of last week, there is not one bit of embossing or punches on the whole thing!

Photobucket
Click to enlarge

I started by stamping the image on white card and coloring it with Copics. I love this illustration, don't you? Then I trimmed it and outlined it with two different widths of multiliners to give it a bit of a border. I wanted to do the same thing to the background panels to give it some consistency. After I drew the double outlines around the blue panels, I masked the edges with Post-it notes and stamped an antique background design in the center of the panels. I thought the pen and ink style of the background stamp with its hatched shading was a good match for the style of the illustration. Click to look at the bigger version to see better. It looked a bit flat, so I colored a blue green in the background and a violet on the swirling leafy flourishes. It is a very subtle tone-on-tone alteration but it adds depth and interest to the otherwise flat background panels.

I adhered the background panels then ran an aqua blue ribbon around the card front - the ends are taped under the image. The background blue matched the caterpillar, and the ribbon matches the sky so it provides a nice balance! I made a double-looped bow on one side, then I stamped and colored the butterfly on a scrap of white card. I shaded the veins of the wings with deeper blue and colored the centers light blue and violet. The center of each veined area was highlighted with a clear Stardust Gelly Roll pen, love the shimmer! I colored the highlight on the body with a dark blue Stardust pen. I attached the main image with foam mounting tape and used Glue Glider to attach the body only on the butterfly, lifting the wings to give it dimension.

It still looked like it needed something, so I colored some self-adhesive rhinestones with a dark blue Copic marker. I put one in each outer corner of the background panels. I cut some very fine black hemp twine and stuck it down under another blue rhinestone for the butterfly head and antennae. I had more left that I'd colored, so I stuck it in the middle of the bow. Not sure about that last bit of bling!

Photobucket
Click to enlarge

I hope you will play along by submitting your creation on the Oh, Alice! blog. It is always fun to see what others do with the same sketch, so be sure to visit the other members of the Oh, Alice! team for more inspiration from our Twisted Tea Party:

I hope you like my card! Not quite so OTT as many others; I was going for a more tailored architechtural style with the lined panels. Of course I couldn't achieve a minimalist card to save my life, so it's still not too plain! Leave me a comment and let me know what you think; it makes my day when I hear from you!

Stamps: Nature's Blessing - Caterpillar stamp; Stampin' Up! - Wonderful Wings, Antique Background.
Paper: Value Pack - white 5x6.5 inch card and envelope; Stampin' Up! - blue card stock; Beckett - Radience (white) card stock (for coloring with Copics).
Ink: Memento - Tuxedo Black; Copic - Sketch markers, Multiliner SP pens; Sakura - Stardust Gelly Roll pens in clear and dark blue.
Miscellaneous: Ribbon; Paper Studio - adhesive rhinestones; Black hemp twine.
Tools: Tim Holtz - Design Ruler; Bow-Easy.
   

Saturday, July 31, 2010

CHAPTER 24: Windows & Broken Glass - Oh, Alice! Challenge

Photobucket
`Now tell me, Pat, what's that in the window?'
`Sure, it's an arm, yer honour!' (He pronounced it `arrum.')
`An arm, you goose! Who ever saw one that size? Why, it fills the whole window!'
`Sure, it does, yer honour: but it's an arm for all that.'
`Well, it's got no business there, at any rate: go and take it away!'


There was a long silence after this, and Alice could only hear whispers now and then; such as, `Sure, I don't like it, yer honour, at all, at all!' `Do as I tell you, you coward!' and at last she spread out her hand again, and made another snatch in the air. This time there were TWO little shrieks, and more sounds of broken glass. `What a number of cucumber-frames there must be!' thought Alice. `I wonder what they'll do next! As for pulling me out of the window, I only wish they COULD! I'm sure I don't want to stay in here any longer!'
Hello friends...it's CRYSTAL CLEAR that today you're all joining us for a fabulous challenge here at Oh, Alice! We have all sorts of lovely techniques for you to try today! Your mission today with Oh, Alice!, should you choose to accept it, is to try a technique using cracked glass, crystal effects (or glossy accents), or a window stamp/technique. There are TONS of possibilities with today's challenge and we are SO ready to see all of the fabulous creations you enter! Here are my two takes on the challenge:

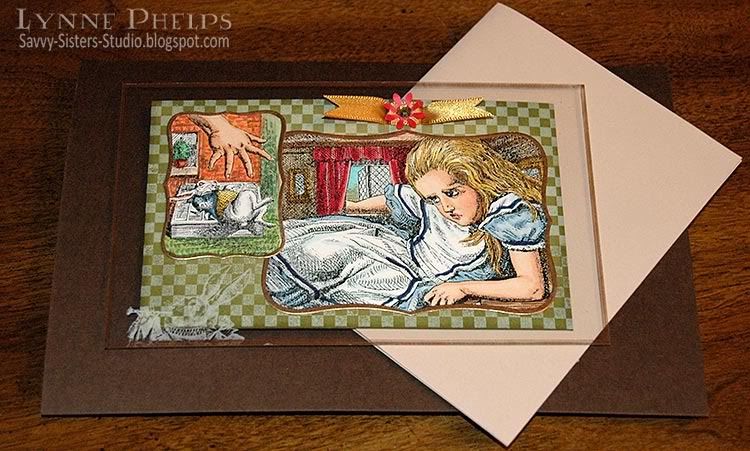
Clear Postcard: Alice has a really bad day!

Photobucket
Click to enlarge

I used a piece of clear packaging that held clear stamps for this one! I edged it with a gold leafing pen and stamped the Herald Rabbit in the corner in white ink.  I printed both images with my B&W laser printer on color laser printer paper, which works really nicely with Copic markers. I die-cut them and edged them with the same gold leafing pen and adhered them to the front.

Photobucket

This is a postcard type flat card, no fold. I stamped a checkerboard in white on olive card stock and adhered it to the back of the clear acetate, being very careful to place ahesive where it would be covered by the images on the front side of the plastic.  I cut a couple slots and threaded a ribbon through, then added a small punched flower and stuck a bit of bling in the center!  By having the olive card stock on the back side of my clear postcard, it gives me a place to write a message!

Photobucket
Click to enlarge

This photo is a little sharper, and I laid it on top of some brown and ivory card stock so you could see the clear areas. Fun!

Going Through the Looking Glass

Photobucket
Click to enlarge

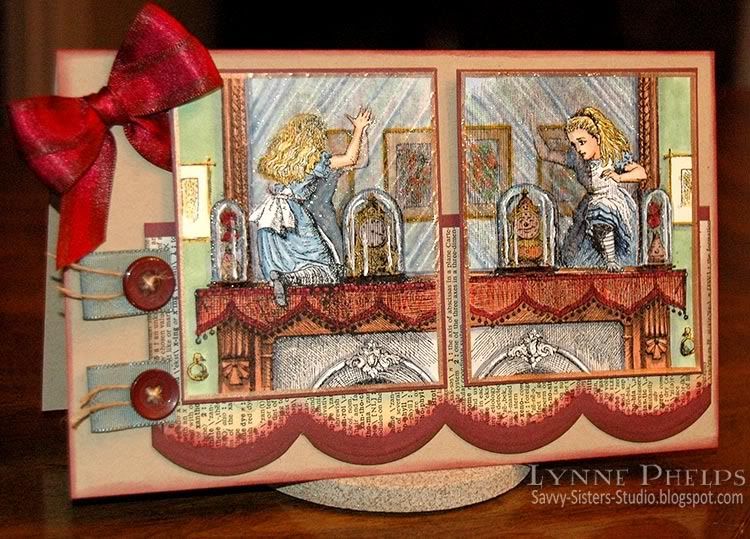
But I also HAD to use the two images of Alice going through the Looking Glass for this challenge!  I printed both with my B&W laser printer on color laser printer paper and colored them with Copic markers.

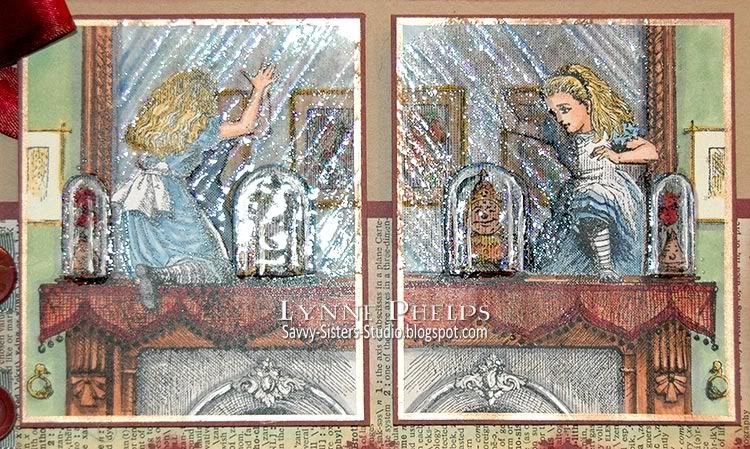
Then I used a glue pen to follow the reflective streaks across the glass and used an icy blue glitter. I colored over the whole surface of the mirrors with a versamarker and heat embossed with clear detail powder, repeating this step three times. I used detail powder so it would not spread into the areas like her face when it melted.  Next I gave the glass domes over the clock and vase the same treatment but used three or four layers of clear Ultra Thick Embossing Enamel.

Photobucket
Click to enlarge

Sure wish this glorious shiny finish was easier to photograph! Neither photo gives a good feeling for how glassy the finish is and how 3D the glass domes feel!

Remember to go to Oh, Alice! to enter your own creations in our Glass/Clear challenge! Here's some more inspiration from the DT:
I would love to hear your comments, it really makes my day when I hear from you! Everytime a comment pops into my email I get the biggest smile!

Clear Postcard:
Stamps: Free digi images from Lenny's Alice in Wonderland site; Waltzingmouse Stamps - Off Beat Backgrounds; Nature's Blessings - white herald rabbit.
Paper: Stampin' Up! - Old Olive card stock.
Ink: Palette Hybrid Ink: New Canvas (white).
Miscellaneous: Krylon - Pale Gold Leafing Pen; Ribbon.
Tools: EK Success - small daisy punch; Spellbinders - Labels Eight Nestability dies.

Looking Glass Card:
Stamps: Free digi images from Lenny's Alice in Wonderland site.
Paper: Papertrey Ink - kraft; Stampin' Up! - burgundy card stock; Old dictionary page.
Ink: Ranger Distress Ink - Scattered Straw, Aged Mahogany, Walnut Stain.
Miscellaneous: Ribbon; Buttons.
Tools: EK Success - scallop border punches; Bow Easy
    
Related Posts with Thumbnails