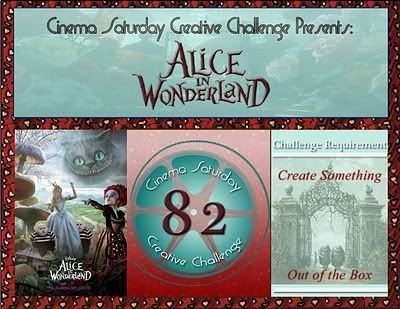
"This question the Dodo could not answer without a great deal of thought, and it sat for a long time with one finger pressed upon its forehead (the position in which you usually see Shakespeare, in the pictures of him), while the rest waited in silence. At last the Dodo said, `EVERYBODY has won, and all must have prizes.'Hello all! We are so excited about today's inspiration piece, which just so happens to feature Alice! The Mad Hatter herself is VERY fond of Tarina Tarantino jewelry and is lucky enough to own a VERY fun ring that she scored while in Disneyworld last time. Check out the fabulous Queen Alice ring HERE.
`But who is to give the prizes?' quite a chorus of voices asked.
`Why, SHE, of course,' said the Dodo, pointing to Alice with one finger; and the whole party at once crowded round her, calling out in a confused way, `Prizes! Prizes!'
Alice had no idea what to do, and in despair she put her hand in her pocket, and pulled out a box of comfits, (luckily the salt water had not got into it), and handed them round as prizes. There was exactly one a-piece all round. `But she must have a prize herself, you know,' said the Mouse.
`Of course,' the Dodo replied very gravely. `What else have you got in your pocket?' he went on, turning to Alice..."
For today's challenge, we are all gaga over the beautiful piece at right - although it pictures a flamingo instead of our lovable Dodo, it is quite prize-worthy for those who can afford to buy it! Your mission today is to create SPARKLY FABULOUSNESS (yes, include some BLING, please!) as inspired by this photo.
For myself, I was inspired by our chapter reading and wanted to include the original illustration of the kind Dodo offering Alice a piece of candy from her own pocket as a prize! Dodos are such amusing looking birds, and I love how Tenniel gave him human hands, too funny! I also wanted to echo the bezel frame that holds the pendant, so I created a medallion as a "setting" for my illustration with rhinestones all around. Although it doesn't show, the medallion is clear heat embossed which adds a lot of shine to the whole project, to echo the glossy shine of the pendant.
Emboss-Resist Background:
I started by creating this medallion background, and I am SO pleased with how it turned out. I started by sponging a piece of white cardstock with a circle of Scattered Straw Distress Ink, then encircled that with Broken China, then a ring of Faded Jeans. I lightly misted it with water and used a clean makeup sponge to blend all the sponging together. I dried the paper with my embossing heat gun. By heating both sides of the paper, it straighted back out pretty nicely. Then I stamped this gorgeous medallion stamp with clear Versamark ink and heat embossed it with clear detail powder. This put a clear enamel coating over the sponged color. Because I used cheap white card instead of watercolor paper for this panel, all the water and rubbing roughed up the the surface, which resulted in the medallion stamp looking distressed instead of solid!
Next I brayered gray Weathered Wood Distress Ink over the whole area. The embossed medallion resisted the ink, only the unprotected paper absorbed the ink. I wiped the medallion off with a baby wipe. I wanted more contrast between the background and the medallion, so I sponged Black Soot Distress Ink just over the medallion area. Once I wiped off the medallion again, it really popped!! Just what I wanted. It is always so GREAT when the vision in your head comes out just right on paper!!! I trimmed it to a 4.75-inch square and edged it with a Pale Gold leafing pen.
I printed the scene with the Dodo with my black and white laser printer on color laser printer paper and colored it with Copics. In my image editor I had masked the image to a circle and added the black outline, which made it easy to trim out with scissors. I die cut and embossed a Peony Nestability shape from white card and colored the part that would show with Copic markers to match the image and background. I adhered the colored Alice with Dodo image to the center.
I wrapped this beautiful gold double-faced satin ribbon around the black card front, taping the ends down where they would be hidden by the medallion panel. Then I adhered the medallion panel with my new pink ATG glue gun (love love love the new ATG gun!!!) and adhered the peony image panel to the center with thick foam tape to pop it up from the background. Bling was required, so I used Copics to color some clear rhinestones gold to match my project and stuck them on around the medallion.
I like to make the bow look like it was tied from the base ribbon, not just stuck on. So I took a piece of fine twine and tied it around to pinch the ribbon where the bow would be adhered. Then I stuck the bow on with Fast Grab Tacky Glue and it was done!
Here are some blingtastic samples from the rest of our Twisted Tea Party:
- Jessica (our MAD HATTER)
- Erin
- Jen
- Kim
- Kristy
- Ky
- Margie
- Peggy
- Randi
- Sammi
- Sara
- Suzi
- Tasha
- Plus Stepanie, our August Guest Designer
Stamps: Free digital image from Lenny's Alice in Wonderland site; Stampin' Up! - Medallion.
Paper: Georgia Pacific - white card stock; ValuePack - 5 x 6.5-inch black card and envelope; HP - Color laser printer paper.
Ink: Memento - Tuxedo Black; Ranger Distress Ink - Scattered Straw, Broken China, Faded Jeans, Weathered Wood, Black Soot; Copic - Sketch Markers; Krylon - Pale Gold Leafing Pen.
Miscellaneous: Ribbon - Double-faced 7/8-inch satin ribbon from Hobby Lobby; The Paper Studio - Self-adhesive clear flatback rhinestones; May Arts - scrap of Jute String.
Tools: Ranger Inksentials - Small brayer, ink blending tool, ink blending foam pads; Spellbinders - Peony nestabilities; Scotch - Adanced ATG gun, foam mounting tape.










Wow this is so stunning Lynne, i love your colour work. The whole design is fantastic
ReplyDeletelove tasha xx
Beautiful job, Lynne!!! love that resist effect!
ReplyDeleteHi Lynne, love your backgroud, wonderful colours and detail as always. The dodo image is fab and your colouring/shading is superb. Tracy Evans x
ReplyDeleteThis is Fabulous Lynne! I love that Medallion stamp and your image looks fantastic! Oh and that bow is just devine, I struggle to get my bows to sit so neatly! Love it!
ReplyDeleteOh my word! This is stunning! Love your stenciled background, LOVE your coloring and main image. Gorgeous card.
ReplyDeleteHugs and smiles
Wow Lynne, this is amazing!!! beautiful design & coloring!
ReplyDeleteThis is absolutely amazing!
ReplyDeleteBeautiful, Lynne! I especially love the medallion background!!!
ReplyDeleteWow, this is so stunning, Lynne! The gold just stands out so beautifuly! I love the ribbon! You really have inspired me to look and dig a lil deeper the next time :)
ReplyDeletehugs, margie
This is one gorgeous creation!! Love the medallion and all your attention to detail! Just amazing!
ReplyDeleteThis is so beautiful. I'm sitting here starring at it with my cup of coffee. I guess it's time to go stare some more. And I'm serious.
ReplyDeleteI'm wondering if you would shoot a tutorial on how you made your bow. I don't quite understand where you put your twine.
ReplyDelete