


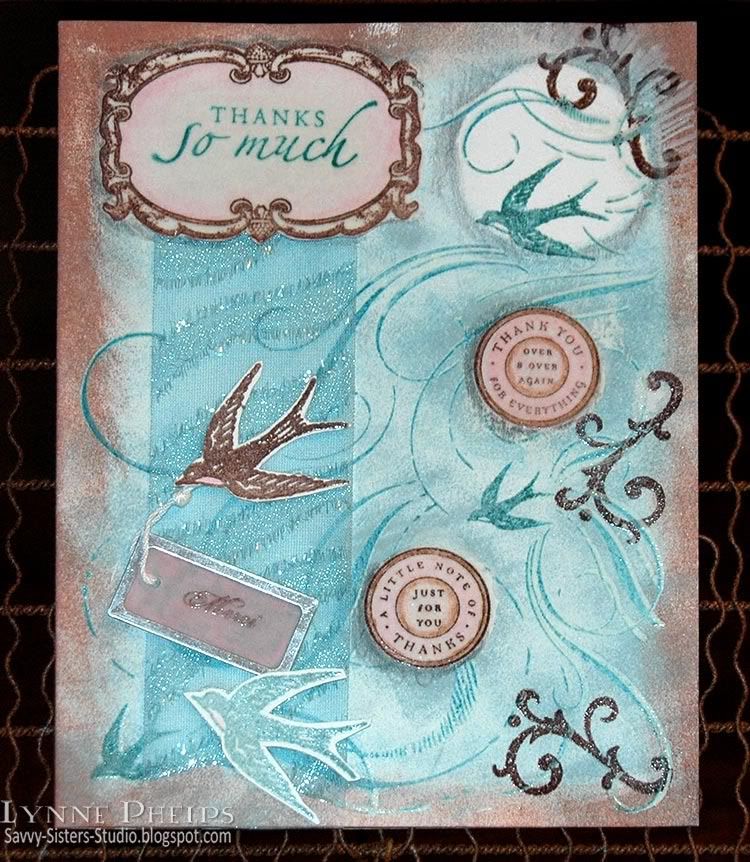
With the emboss/resist technique, you start by stamping the foreground elements first. So the frame was stamped in brown, the sentiment was stamped in teal, then it was colored colored in with a soft pink colored pencil and blended with odorless mineral spirits (sometimes called Gamsol) to smooth it out. You first color with Prismacolor pencils, then you take a paper blending stump and lightly dampen the tip with odorless mineral spirits and rub it over the coloring to smoothly blend. TIP: Remember to work in a ventilated area - odorless does NOT mean vapor-free, so work safe! Then I colored over the entire frame area with a Versacolor marker, being VERY careful not to go outside the outer line. This is the same clear watermark ink as comes in Versamark ink pads. Then I heat embossed the whole thing with clear detail embossing powder. This coats it with a shiny plastic-like finish so it will resist anything that comes later - it will wipe clean with a slightly dampened paper towel. The same thing was done with the two pink circles.
Next I stamped the large flourish and bird background stamp by inking it first with Versamark and next with a teal dye ink. This double-inking technique allows me to heat emboss with any dye ink; I heat embossed the background with clear detail embossing powder. It did not stick to the areas that were previously embossed.

Next the brown flourishes were stamped around the outer edge. It looks like the are behind because they don't stick to the embossed background image.
I punched a circle out of a Post-It note and stuck it on while I sponged brown all around the edges and teal in the center area. The circular Post-It note mask was removed and shadows were added around some elements with Prismacolor pencils. The heat embossed foreground elements were wiped clean with a damp paper towel. My white card was completely gone, and my card was still ONE layer!
I cut two slits for a sparkly ribbon to pass through, along the bottom edge of the frame and another just above the brown sponging along the bottom edge. I stamped the bird twice, once in brown, once in teal, heat embossed and cut them out. I stamped "Merci" in brown ink on a pale pink vellum tag and heat embossed. I taped the end of the knotted string to the back of one of the birds and adhered them with foam tape over the ribbon.
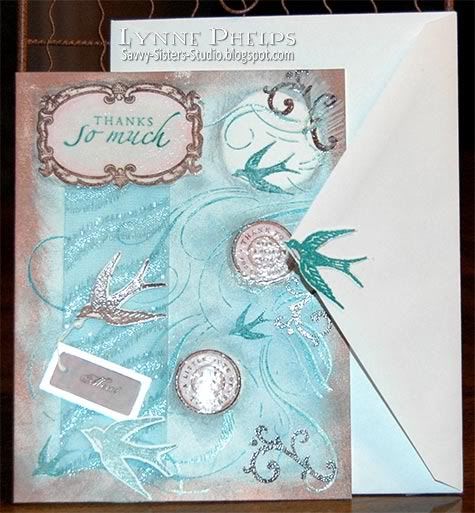
Can't forget the envelope! I added some stamping and sponging to the front left corner. On the back, I adhered a stamped and cutout bird to the tip of the envelope flap.
This card was for my sister, Janet, and she LOVED it! She has a clear acrylic store-type revolving card rack in her craft room and this card occupies a place of pride! I love the emboss/resist technique. To do this the "old" way you would have to stamp and trim out paper masks for everything, and this technique is so much easier and a lot more fun!
What do you think? Ready to try it? Leave me a comment and let me know what you think! :-)
Stamps: Stampin' Up! - Carte Postale set, Finials & Frames set, Sincere Salutations set, Circle of Friendship set, French Flair background.
Paper: Value Pack - white 5-inch x 6.5 inch white card and envelope.
Ink/Coloring: Marvy Matchables dye ink pads; Prismacolor colored pencils.
Miscellaneous: Metal-rimmed vellum tag; ribbon.
Tools: Sponges; Paper blending stump; Odorless mineral spirits.


Sometimes I'm at a loss as to what to do on a background, this just shows with some planning it can look better than any decorative paper out there! Gorgeous card!
ReplyDeleteI'm not surprised your sister was pleased and this card has pride of place, it is stunning. The colours are beautiful and I do love this colour combination. As always your attention to detail is fantastic. Wonderful finish to the card and the images are fab. Another beautiful creation. Wish I got cards like this LOL. Tracy x x
ReplyDelete