Sunday, December 13, 2009

In the Beginning, a Child is Born...

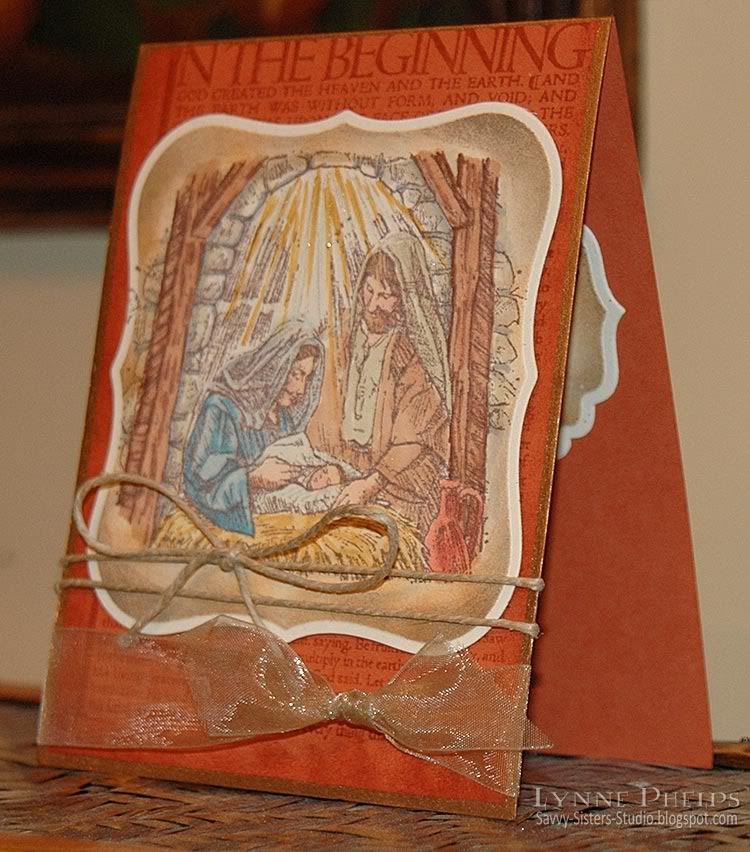
As you may guess by the lack of snowmen and Santas around here, my very favorite kind of Christmas cards center around nativity scenes. The reason for the season, right? This card uses the "A Child is Born" set (Stampin' Up!, retired) which contains one of my favorite nativy scenes. Mary and Joseph look so happy and relieved and fascinated by the new baby, just like any new parents. I imagine Mary has just finished marveling at the tiny fingers and toes!

The base is Really Rust cardstock (SU). I stamped "In The Beginning" (Stamp Out Cute) with Brown (Marvy dye ink). This is an awesome stamp with the actual text from the beginning of Genesis. I sponged around the edges with the same ink, then I ran a Pale Gold leafing pen (Krylon) around the edges.
The image was stamped on Natural Ivory cardstock (SU) with Rich Cocoa ink (Memento)and cut and embossed in a Label One die (Spellbinders) and then colored with Copics. After coloring, I put the image back into the die to use it as a mask and sponged around the edges with Timeless Sepia and Ochre (Marvy dye ink). It was mounted on the base with pop dots, then hemp twine was wrapped and tied in a bow and old gold organza ribbon was tied in a square knot.
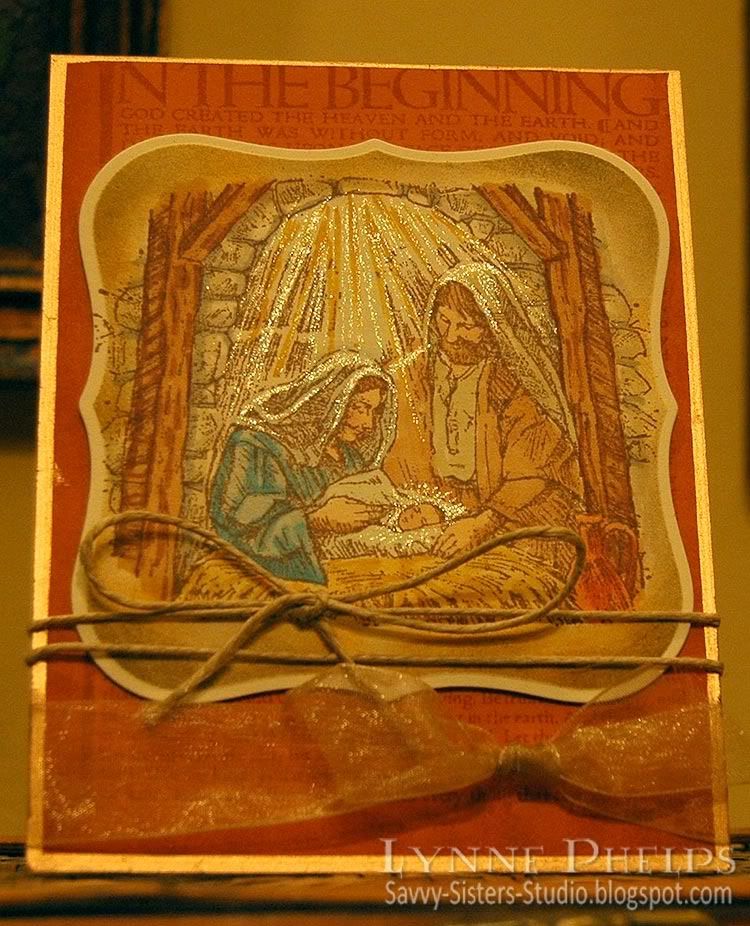
I shot this one without the flash to bring out the sparkle! I used a clear glitter pen (Sakura Stardust) to emphasize the rays of starlight pouring down, and also added the shimmer wherever the light touched their robes, and around the baby's face.
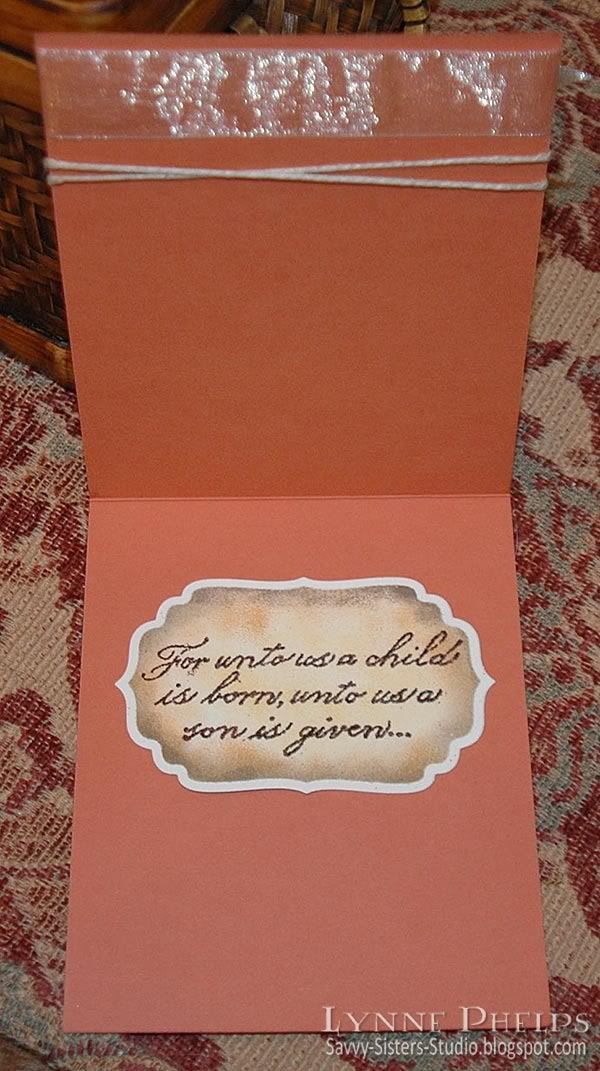
Inside, I stamped the sentiment that came with the set and cut it out with a Label Four die (Spellbinders). I sponged it with Ochre and Timeless Sepia (Marvy) before removing it from the die.
I think the contrast of rustic elements (color, twine, the sketchy style of the image) elegant lines (Label die cuts), and the shimmer (organza ribbon and glitter) are what make it work, in real life anyway. I wish the photgraph did it justice!

I love hearing from you - your comments are what makes blogging worthwhile!

Friday, December 11, 2009

And they wrapped the Babe in swaddling clothes...

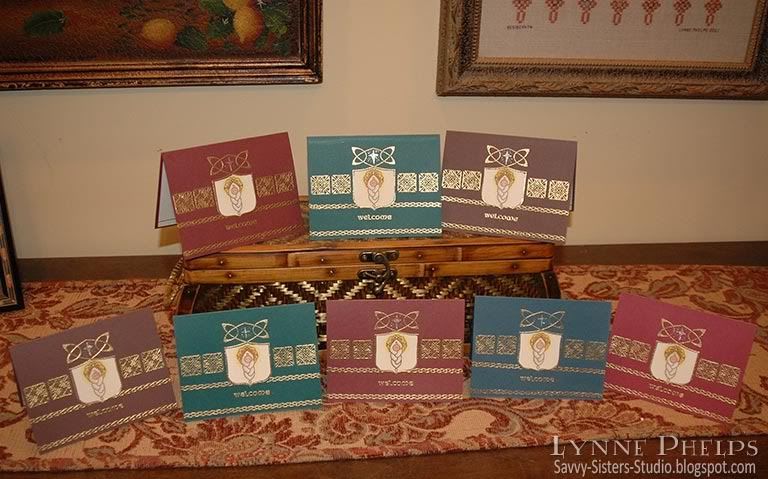
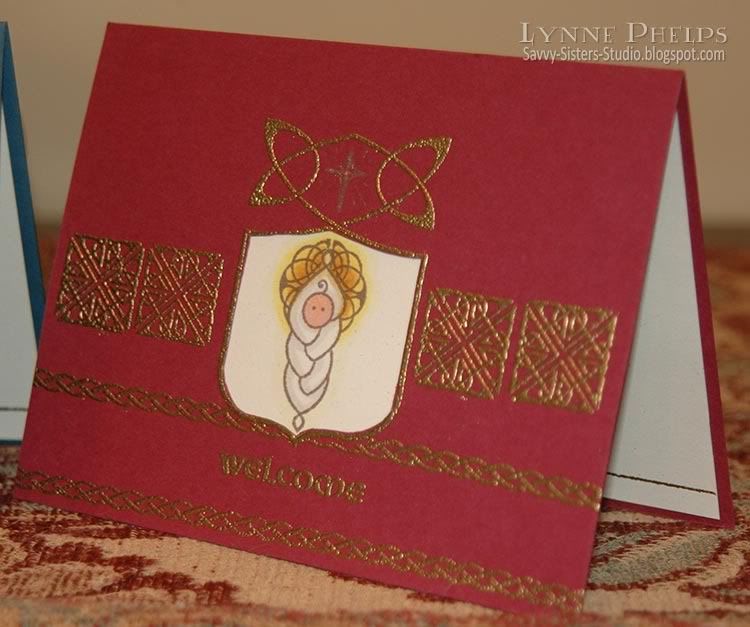
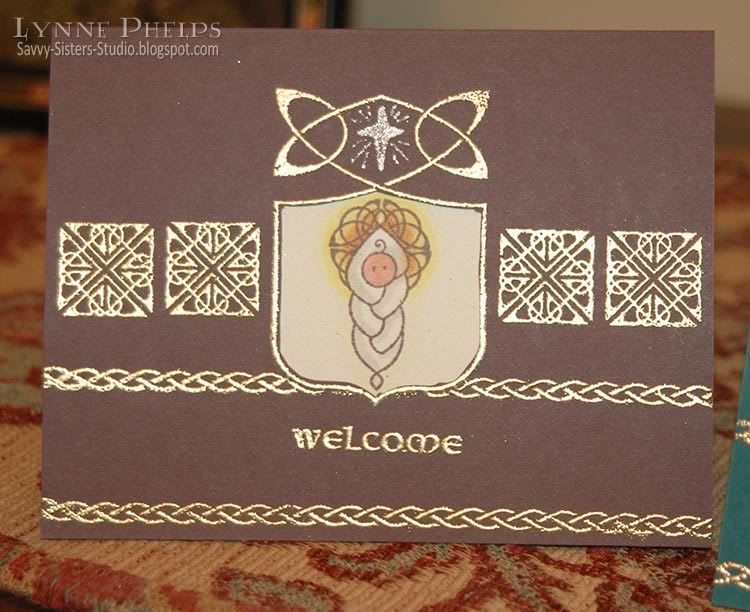
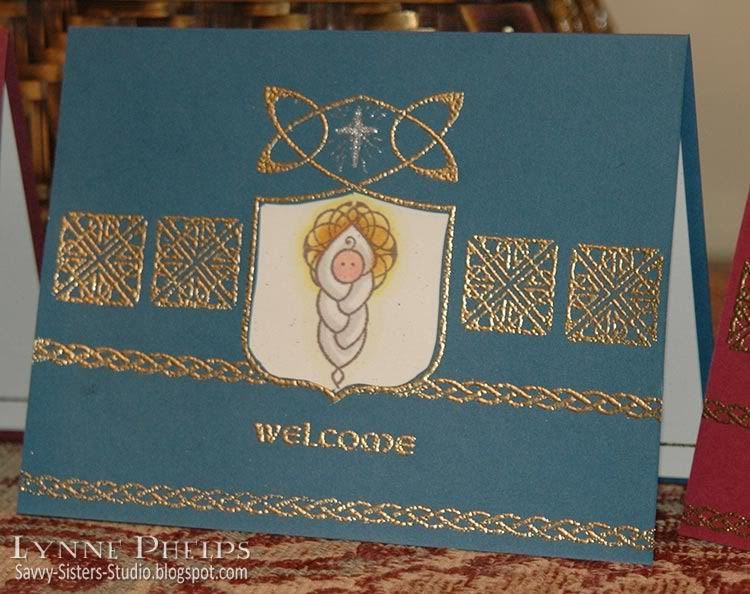
When I first saw Waltzingmouse Stamps' "Celtic Heritage" set, I knew the baby wrapped in a cable or "plaited" blanket would be on this year's Christmas card. It made me think of Baby Jesus right away! Other stamps are from Waltzingmouse "Irish Blessings" set and the inside sentiment is by Sweetgrass Stamps. (Note - Edited to add Labels, a forgotten photo and a stamp credit)

Cardstock is SU Chocolate Chip, Bravo Burgundy, Handsome Hunter and Not Quite Navy. Light cardstock is SU Natural Confetti - it has great little flecks in it that add a lot of interest.

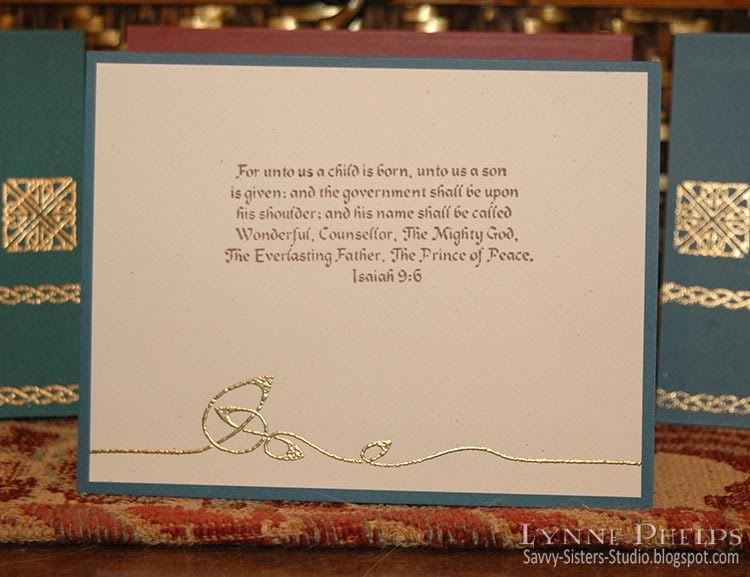
Here is a closeup of the inside, with a passage from Isaiah (Sweetgrass) stamped in Rich Cocoa Memento ink and a beautiful knotwork border (Celtic Heritage) stamped with VersaMark and heat embossed in Ranger Gold embossing powder. The sentiment is the only "Christmas" stamp used in the whole card!! (Am I the only person who hears Handel's Messiah singing in my head whenever I read this passage? Just wondering!!)


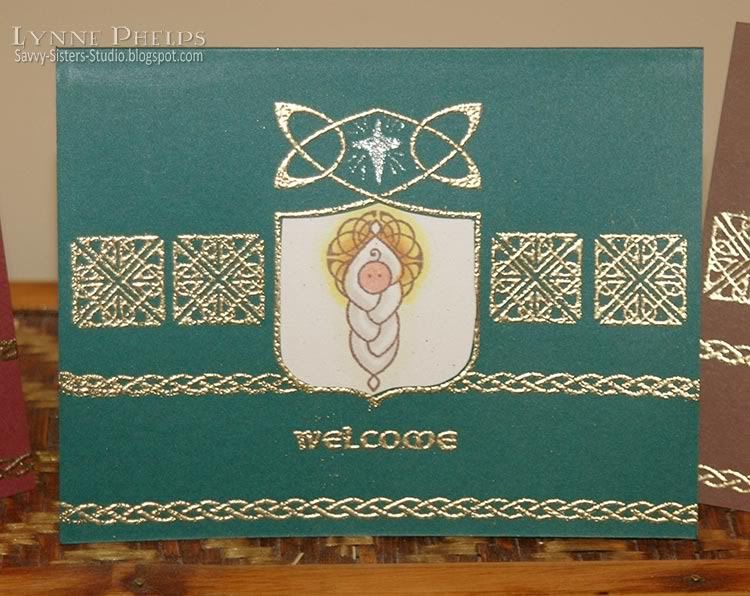
First the shield (Celtic Heritage) was stamped, embossed and masked, and then the braided borders (Irish Blessings) were added plus the Welcome (Irish Blessings). The knotwork squares(Irish Blessings) were added last using a Stamp-a-ma-jig for placement. The opening was cut out with an Xacto knife. The baby (Celtic Heritage) was stamped in Rich Cocoa Memento, then I masked the baby and the stamped the small open Lunette (Irish Blessings) twice to form a full circle for the halo. There are larger solid and open versions of the Lunette in Celtic Heritage, but this is the tiny one from Irish Blessings. The baby is colored with Copics, then adhered to the inside of the cardfront to show through the window opening. I drew in a little star in the upper shield opening using a Sakura Stardust clear pen.


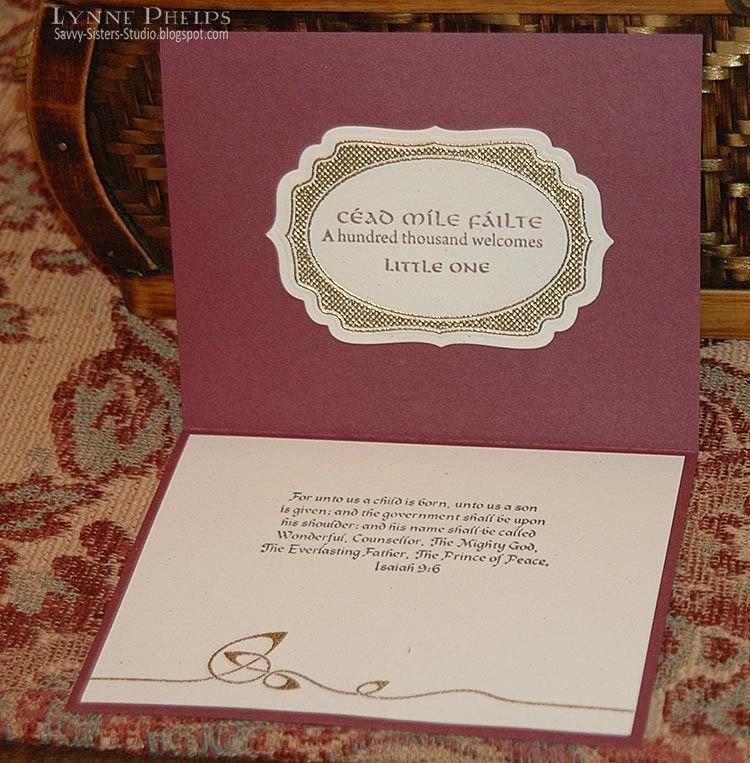
Because the Copics that I colored the baby with saturated the backside of the paper, which showed inside the top of the card, I used a Nestibilities Label Four to cover it up on the inside. It is gold embossed with Nestie-friendly Waltzingmouse stamp (Vintage Labels Four) and then stamped with "One hundred thousand welcomes" in Gaelic and English (Irish Blessings) and "Little One" (Celtic Heritage). I thought this was a really elegant cover up and it continued the idea from the front of welcoming the baby Jesus!

More closeups of the card fronts:


It was so much fun to create these cards without using ANY stamps that would be normally thought of as being for Christmas, with the exception of the inside sentiment of course! I thought Welcome was an appropriate message for Jesus' arrival on Earth; it is certainly expressive of the spirit in my heart at this, or anytime of year! Please leave a comment to let me know what you think of my little swaddled Baby Jesus!

Sunday, December 6, 2009

Cuttlebugged Gift Card Holders

This is the time of year for gift card holders, and I got the idea for these from Sharon Johnson's No Time to Stamp blog in this post. I did not have any velcro tape on hand, so instead I used brads or slits to hold the flap closed.

These gift card holders are each made of a strip of 8½ inch paper (SU Mellow Moss or Old Olive) folded twice to create a pocket and a flap. It was super quick to do on my Scor-Pal! The bottom flap is folded up and secured on both sides with tape runner or brads and a brad or slit holds the top flap closed. A border punched strip (Fiskars) is adhered to the edge of the top flap. All edges are sponged.

I cuttlebugged each one twice as they were too long to fit in the folder. Except for the holly holder, each pocket flap is embossed with a different folder than the top flap. The score lines showed me where to place the paper in the folder, so the patterns start and stop in the right place.

Except for the holly version, they all have a cardstock panel with decorative cardstock adhered to the top flap (SU Real Red & Basic Grey - Figgy Pudding) which is held shut with a decorative snowflake brad or a curved slit. The back is also covered with Red/DP panels.

All have "To You from me" (Stampin'Up!) stamped, punched, and edges sponged, popped up on dimensionals on top of a larger punched circle and/or punched scalloped circle.
I enhanced the cuttlebug embossing on most of them by shading the raised areas with a white Prismacolor pencil.
The holly holder is a little different. The Cuttlebug holly folder is so beautiful that I did not need any decorative paper to enhance it. I Cuttlebugged the back and top flap in the first pass, and the pocket flap in the second pass. I lightly shaded the raised areas with green, red, and brown Prismacolor pencils. Then I stamped and gold heat embossed flourishes (Indadinkado Flourises set) in the open areas, then outlined the gold flourishes with a black pen. The scalloped circle was gilded with a gold Krylon leafing pen.

I wish I had noticed that the red edge I put behind the scallop had slipped up on one side - I should have retaped it before taking the photo. This provided a straight edge to fasten under the two brads.

Please leave a comment - I would love to hear what you think!
Related Posts with Thumbnails