


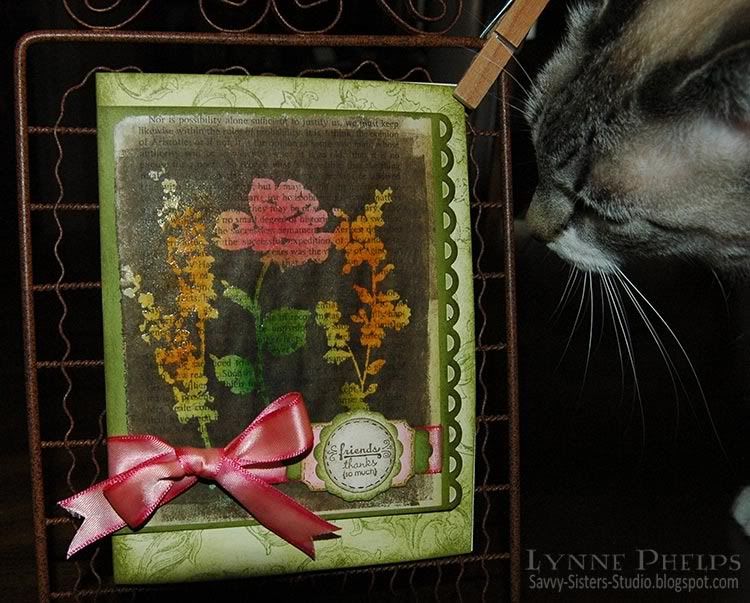
I saw this cool technique in the latest Stampers' Sampler magazine and had to try it for myself! The page of vintage book text was sponged with greens, pinks, and oranges. Then the solid flower silhouettes were stamped with Versamark and clear heat embossed. Then the whole thing was brayered with dark brown ink. Is this a cool effect or WHAT? I really like this little garden gate easel for displaying cards. Because they can see THROUGH it, my photographer's assistants are willing to stay behind the card instead of in front of it, which means it takes a lot less time to snap a picture! My number one assistant, Beignet, is supervising today's efforts.
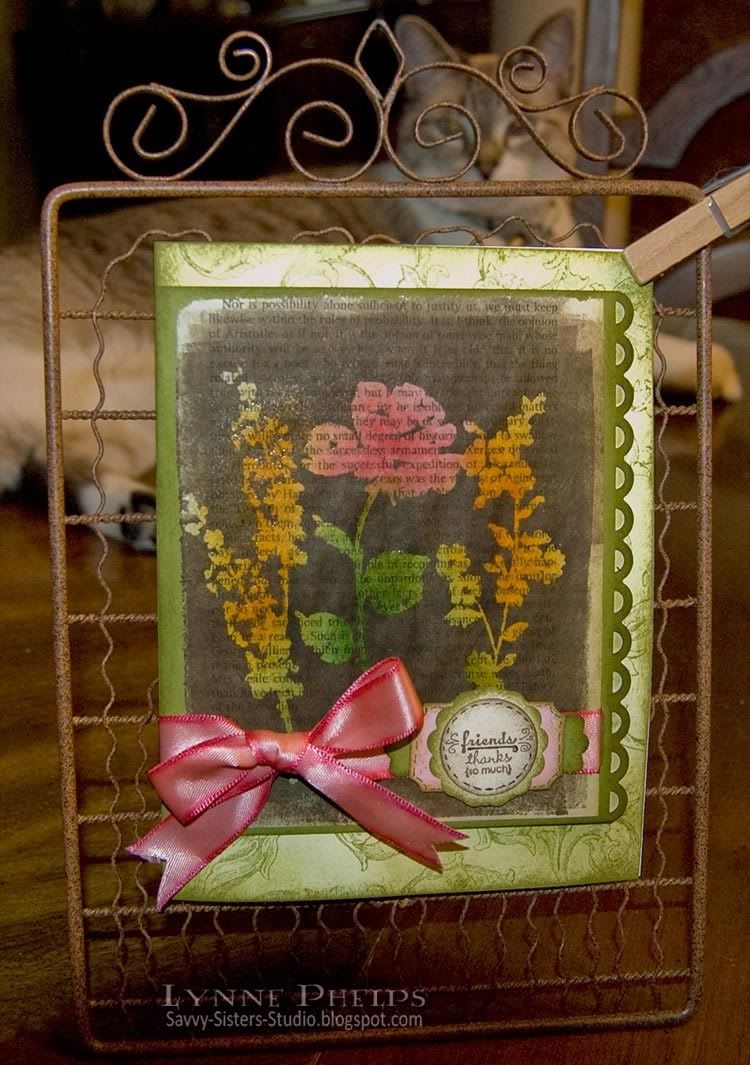
As you can see, the areas where I stamped and clear embossed the flowers preserved the colorful sponging as the brown ink would not stick. I rough brayered around the edges to leave some of the original page showing. One change would be to glue the whole book page to a piece of cardstock, as despite drying it with a heat gun, it stayed a little rippled.
Then I mounted that on a green panel with scallops punched down one side. I stamped an old-fashioned flourish design in the background with green and sponged green heavily around the edges and lightlly in the center.
The pink ribbon was edged with a slightly darker pink Copic marker so it would blend with the range of tones in the center flower. I did not want to try and wrap the ribbon around the scallops, so I cut a slit in the green panel at the edge of the book page to pass the ribbon through. This is a hand tied bow, nice and floppy! I wanted a softer bow and I wanted to actually tie the ribbon around the panel, so I skipped the Bow-Easy this time!

For the sentiment, I used two stamps, "friends" and "thanks (so much)" one above the other. It is on a stack of punched and sponged shapes - a one-inch ivory circle sponged with brown, on a scalloped ivory circle sponged in green, on a pink designer label punch sponged in green, on a green modern label punch sponged in green. Then I added some doodles with a super fine-line pen to add a little interest.
Here is my photographer's assistant, Beignet, carefully inspecting the styling and making sure the bow is nicely fluffed!
I had a lot of fun trying out this technique from the magazine. Have you tried it yet? I will be using this technique again for sure! It gives a similar effect to using a reverse-silhouette stamp where the background is inked and the silhouette is open space - lets you stretch your stamping dollars and increases the versatility of the stamps you have!
Stamps: Clearly Inspired by Paper Studios - Brushed Flowers; Stampin' Up - Tiny Tags, Antique Background;
Paper: Page from a book; Stampin' Up! - Old Olive cardstock; Value Pack 5.5 x 6" ivory card
Ink: Ranger Distress Ink - Pine Needles, Peeled Paint, Worn Lipstick, Spiced Marmalade, Walnut Stain (used for brayering over other colors)
Embellishments: Michaels - 5/8" Pink Satin Ribbon
Tools: Fiskars border punch - Apron Lace; Stampin' Up! punches - Modern Label, Designer Label, Scallop Circle; EK Paper Shaper punch - 1" circle; Ranger mini brayer; Tack sponges.


Lovely lovely card - I really like this technique. The vintage look is wonderful!
ReplyDeleteI saw it too, yours came out even better!
ReplyDeleteThis is a lovely tech.
ReplyDeleteThanks for sharing. When I get time to try I will send you the link. Regards Virginia