


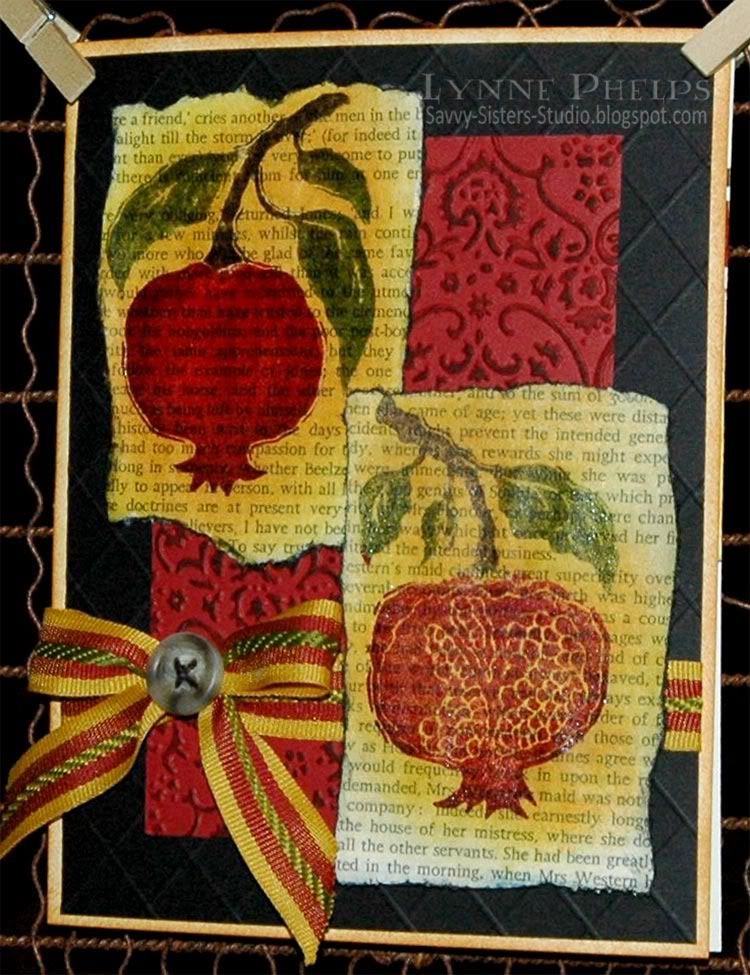
It was so easy to custom color the different bits just by carefully dabbing my ink pads, no markers were used to get this effect! After carefully inking up the stamps with Distress inks I heat embossed them with clear detail powder. I love it that all of the Distress inks, even though they are dye ink pads, can be used for heat embossing as they stay wet long enough to really hold the powder! I stamped them onto paperback book pages from a Penguin copy of Tom Jones. What a deal, do you know how long that novel is? I'm glad to be plowing through it in my stamp room instead of trying to read it, LOL!! Then I sponged around the embossed image with yellow and orange shades, and brushed the torn edges of the paper across a black ink pad.
To assemble the card, first I sponged all around the edges of an ivory card to match the warm gold background of the pomegranates. Next, I scored a diamond pattern into a piece of black cardstock - I love the texture that this gives! Then I used an embossing folder on the burgundy cardstock and ran it though my Bug. I took a matching inkpad and brushed it across the raised areas to give the embossing more definition. I was lucky enough to have some fun striped grosgrain ribbon with colors to perfectly matched this card, so I added a strip to the burgundy panel and used a glue dot to stick on a bow made on the Bow-Easy.
The paperback book paper is really floppy and somewhat translucent as it is very thin. I glued each one to a piece of white cardstock just slightly smaller that the paper, as I wanted to have the torn edges loose. I mounted the panels with dimensionals to give it some depth.
Can't forget the inside! I really love using bits and scraps from making the card front in a little assemblage like this to frame or bracket the sentiment.
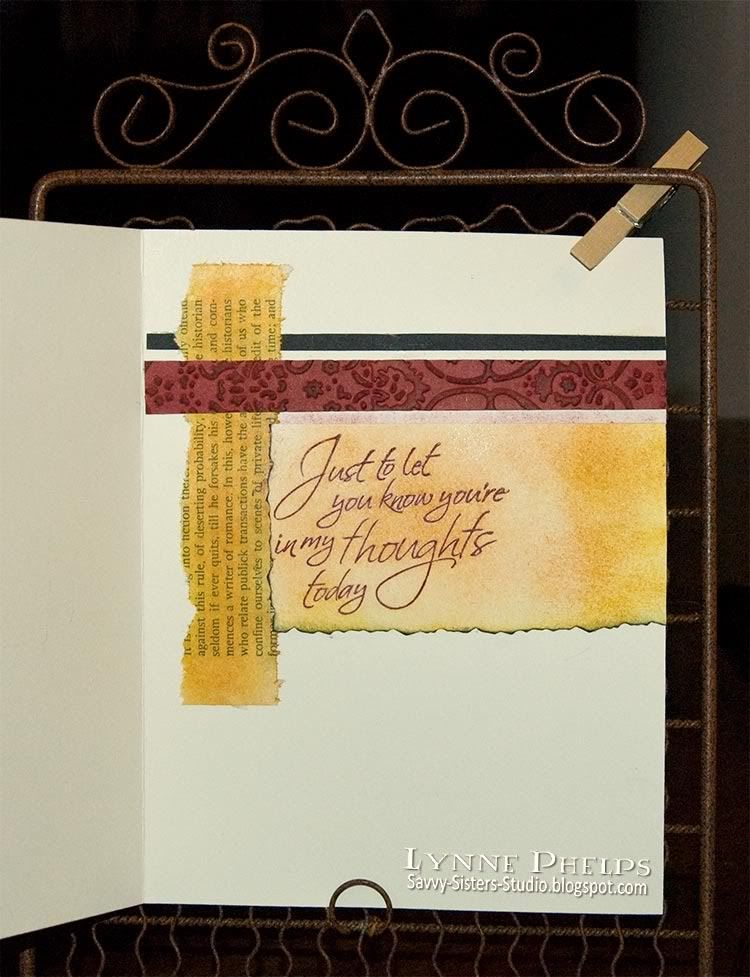
This inside nearly ended in distaster! Remember the reason you can emboss and sponge so sucessfully with Distress inks is that they stay wet for so long??? Well, I stamped the sentiment, and long after a normal dye ink would have been dry, I brushed something across it and completely smeared the whole thing! Of course I had already adhered the cardfront so securely that I would probably rip it up if I tried to detach it for use on another card.
What to do? Patch over the whole thing of course! I took a long look at the front of the card again and decided the inside really needed some of the lighter gold shades carried to the inside, as the text strip had gotten a bit too orangy! I stamped the sentiment again on a scrap--and IMMEDIATLY heat imbossed with clear powder, so as to avoid smearing--and sponged on the same warm shades I used on the card front! I actually like this a lot better than what I had before. Don't you love it when your lemons turn to lemonade? ;-)
How often do your stamping mishaps result in better creations? I'd love to hear some of YOUR stories!! Please leave a comment, as your comments really make my day!
Stamps: Pomegranates - A Stamp in the Hand; Sentiment - Hero Arts
Paper: Book pages; Stampin' Up! - Bravo Burgundy, Basic Black; ValuePack 5 x 6½ inch ivory card
Ink: Ranger Distress Ink: Mahogany, Fired Brick, Peeled Paint, Walnut Stain, Mustard Seed, Spiced Marmalade, Black Soot
Tools: Embossing Folder - Cuttllebug Textile Pattern; ScorePal


Hi
ReplyDeleteIndeed I also have to find solutions if it goes wrong and mostly it works out nicer then the intended result.
Because I have to work with what I got and be even more creative then before.