


We are in the final week of the February challenge at The Altered Alice, so be sure to submit your projects before 8:00 p.m. EST (GMT -5:00). I will announce the winner of the drawing for a $30 gift certificate from Stampotique Originals, our generous sponsor! While it is not required that your creation use Alice in Wonderland, we do encourage it! Entries that feature some aspect of Wonderland will have their name put into the drawing twice.
Carol of Stampotique very kindly supplied the design team with some free stamps to show off! I chose mushrooms and my friend and fellow design team member, Terri DeVine, chose Jasmin. I love the Jasmin character and thought she would make an awesome modern day Alice, so I used Terri's stamp at our weekly stamping get together! Actually the first thing I thought was "check out those SHOES!!!" I thought it would be a lot of fun to make one scene with the mushrooms where the Jasmin Alice was so small that she was lounging in the shade of a mushroom, and another with those fab shoes at a large scale so you would know she was now huge! I love to draw, so I drew some shoes and legs!
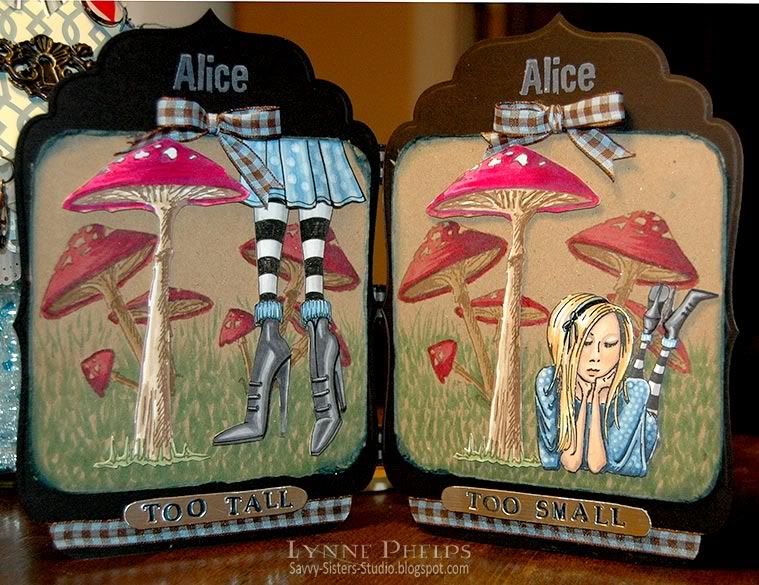
I made the "Too Small" version first. Take a look:
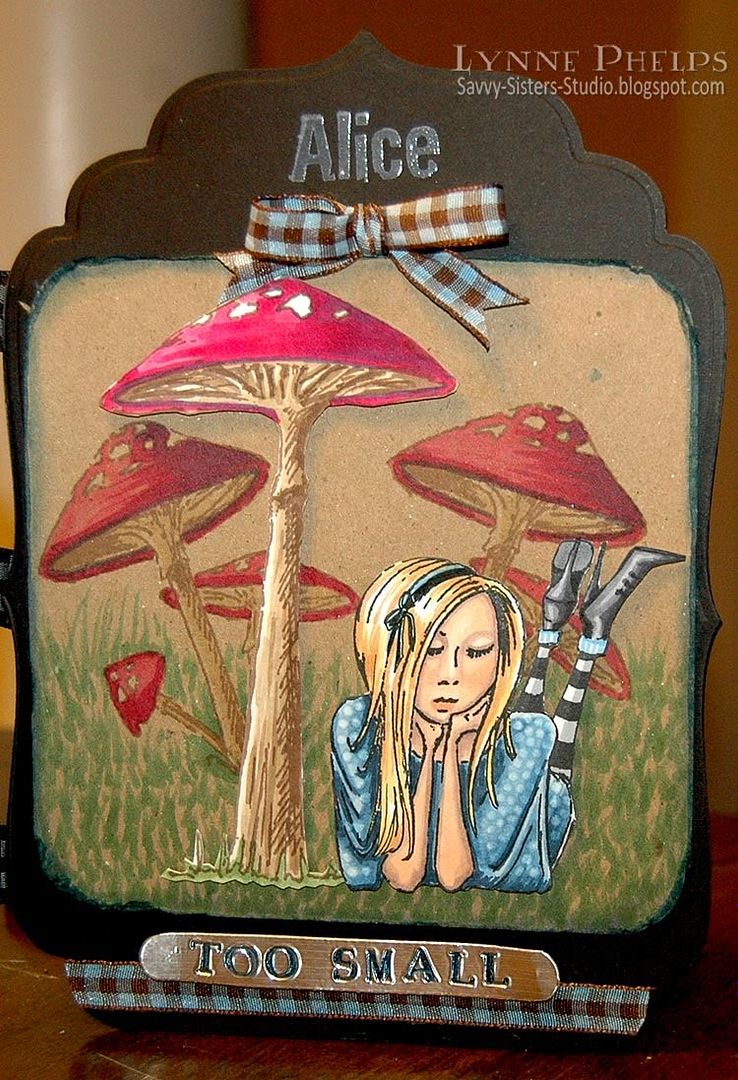
 On white card stock, I stamped the Giant Shroom with brown Memento ink and Jasmin in black. Both were colored with Copics, and the polka dots on her dress were made with the colorless blender. I used a Copic Mulitliner to add a hair ribbon to make her a bit more Alice-y! I wanted to create a sense of depth, so I made the background more muted by stamping the Mushroom group onto kraft card stock. They were colored with Copics and the grass was created with flicking motions of the marker.
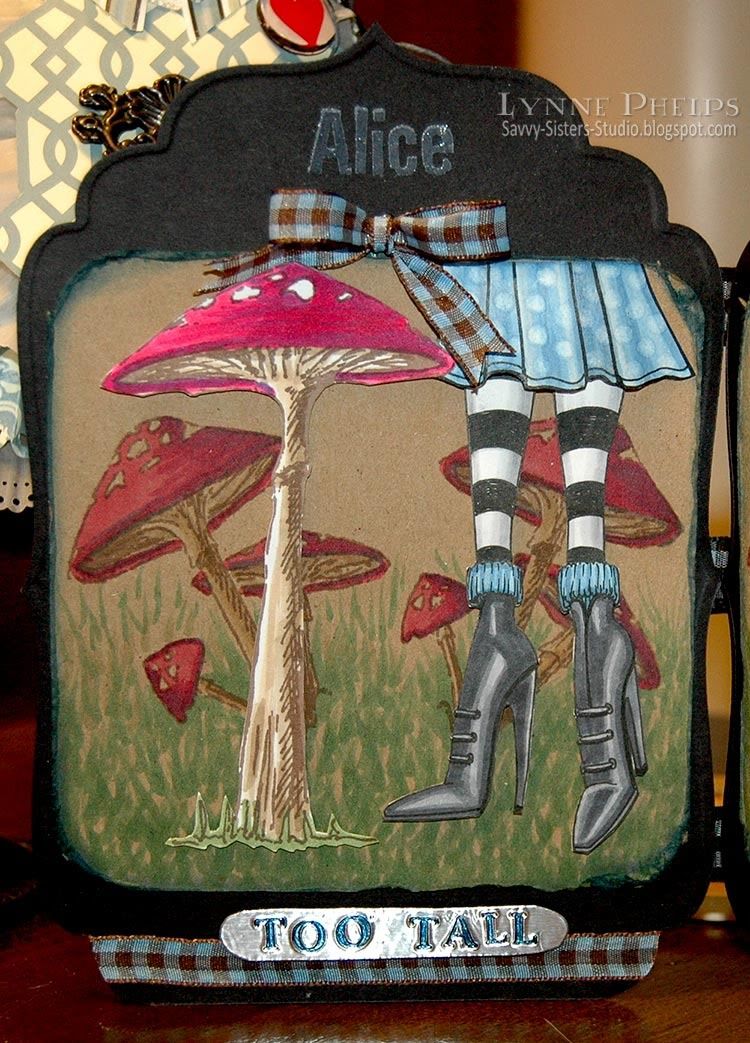
Now, aren't those insanely high-heeled boots even more fun when they are big? I drew the boots and stockings with a black Copic Multiliner pen and colored them in with Copics, using my favority "shiny shoes" shading technique, and cut them out. When I mounted them on the kraft background, it did not look right having the legs showing all the way to the top of the panel, so I drew a skirt. I colored it with Copics and used the colorless blender to move the ink to make polka dots, making sure to make the dots themselves much larger in scale than the "too small" version. I put foam tape in the center of the skirt to pop it out more over the legs, but glued down the top and left and right edges of the skirt flush with the page, which looks so neat as the skirt bells out over the legs!

I wanted some labels saying "Too Tall" and "Too Small" so I adhered aluminum HVAC tape to card stock and used a Karen Foster Click-It tool with the add on Alphabet dies. I colored in the depression of each letter with a blue Copic marker and trimmed them out by hand. They were mounted with foam tape over a ribbon I had glued to the black base. The kraft panel was glued on, and the panels were hinged together with strips of gingham ribbon and more glue. It still needed something, so I stamped the "Alice" at the top of each panel with white pigment ink and embossed it with clear powder. This worked out just as I had hoped - the clear powder softened the bright white of the pigment so it is there, but not attention stealing. A bow was glued on to match the brown and white gingham at the bottom; both were colored with a blue Copic marker to change the color.
I hope you enjoyed my funny bi-fold display! Please leave a comment, I love hearing from you and your comments make it all worthwhile. Go to this post to see the amazing creations from the rest of the design team during the final week of the February challenge, and be sure to get your own creations linked by Friday!


Lynne this is absolutely fabulous. How I wish I could draw, I'm so envious . Your attention to detail is always spot on for example the dress and how it falls over the legs and the scale is perfect. Think I need to have some lessons on how to use copics, your colouring is so professional. Tracy Evans x
ReplyDeleteLynne, this is INSANE! AMAZING card. I can't draw stick figures and you drew those legs and gorgeous shoes in the too tall panel? And your coloring? Freaking fantastic!
ReplyDeleteYou are AMAZING!
Wow wow wow wow wow!!! Lynne this is so sensational!! I just love both of these and they are absolutely perfect together!! LOVE that skirt! It's gorgeous!! Love those shrooms.. love that image.. she makes a perfect Alice! I love how you drew in her hairband oh and WOW ... your colouring is AMAZING!!!
ReplyDeleteSammi
xx
This is fantastic.....what a great idea and so cleverly executed!!
ReplyDeleteWOW- i LOVE the "too tall" and "too small"theme-what a great project and the images are fantastic! VERY cool, Lynne!
ReplyDeleteLynne: This is crazy beautiful! I love what you did with Jasmin and the shoes you drew are amazing. I always look forward to seeing your creations and this one is fabulous!
ReplyDeleteHi my sweet Lynne,
ReplyDeleteI´ve missed the right words in english for his what my eyes see.
WOWOWOWOWOWOWOWOWOW !!!! All the little details and your coloring is perfect. I love it. WOW !!!
Olá Lynne!
ReplyDeletevenho sanar algumas duvidas...
espero que voce consiga traduzi-las:
onde posso postar esse dress from que produzi inspirado no seu projeto http://anacaldatto.blogspot.com/2011/02/dress-form-altered-alice.html
quero postar no blog The Altered Alice mas não sei em qual challenge - week 4? week 1?
voce pode me orientar?
outra duvida!
ReplyDeletetentei comprar pelo blog da sua irma Janet mas não consegui
como faço?
meu e-mail naacaldatto@yahoo.com.br
I sit here having read through your post smiling from ear to ear.
ReplyDeleteThe too tall panel is a fantastic idea and is so cleverly done!(Jasmins boots were based on a pair I used to own lol)
LOVE IT LOVE IT LOVE IT!! You made my day.
Jo :0)