Our theme for November at The Altered Alice was GRATITUDE. The theme ties in nicely with this month's sponsor, Nature's Blessings, who have offered a $30 shopping spree to the randomly chosen winner! Nature's Blessings stamps were the beginning of my love affair with Alice in Wonderland stamping, as they have beautiful rubber versions of the original Tenniel illustrations of Alice's Adventures in Wonderland AND Through the Looking Glass. Without Nature's Blessings, The Altered Alice might not exist! In their words:
As avid readers and bibliophiles, we fell in love with the beautiful line drawings in the books in our family library. Our antiquarian stamps are a collection of our favorite images. If your tastes range from the classically elegant to the quirky and fun, then we make stamps for you! We also offer a variety of original art: be sure to visit John Wagner's page of Calligraphy and Art Lettering, and Laura Ann's pages of stamps for holidays and special occasions.NOTE: Due to technical difficulties, my gratitude project will be shown in December. However, I wanted to share the project that started my love affair with Nature's Blessings stamps!
Dreaming of Wonderland:
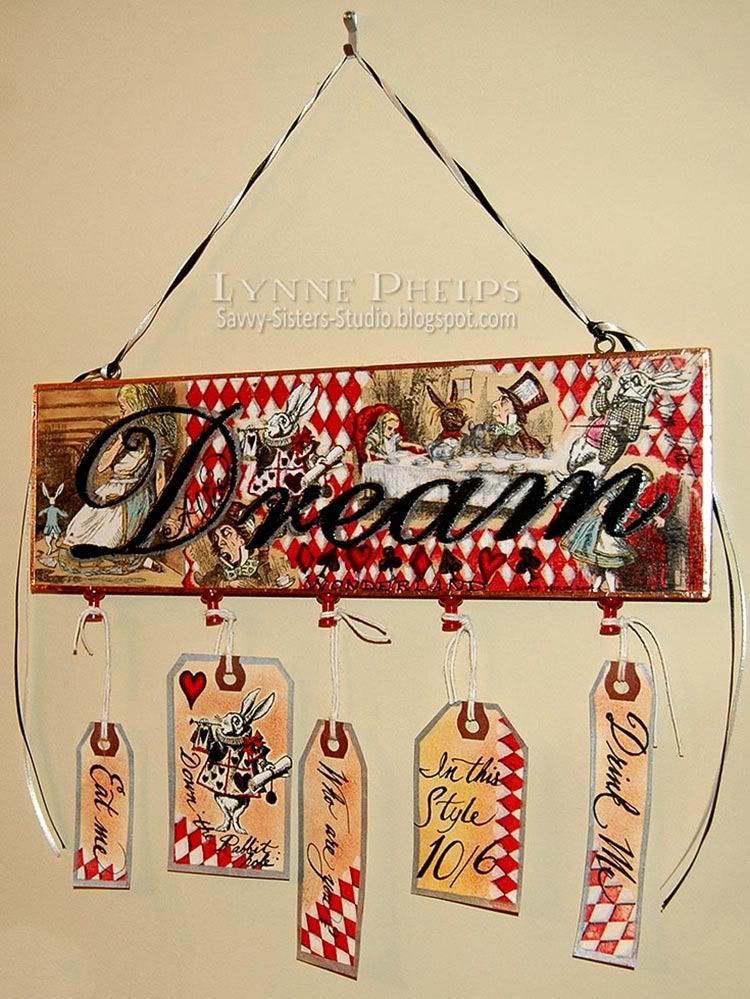
You can click the photo above to make it bigger. I had a wood plaque in my stash that had the word "Dream" on it. The natural, unpainted wood surface was already sanded and coated with a soft clear gloss, all ready for altering!
I started by stamping various Nature's Blessings Alice stamps around the big word, coloring in each image with Prismacolor pencils. Nature's Blessing stamps used include White Rabbit, I'm Late, I'm Late, Hatter, Herald, Little Golden Key and Mad Tea Party.

I masked each image with cut-out post-it notes, and filled in the background with a harlequin diamond pattern stamped with red chalk ink. I thought the diamonds were very "suitable", get it? One of the card suits? The background looked too "flat" so once the ink was completely dry, I colored in the open diamonds with white Prismacolor pencil and then used a gray pencil to add a little shadow to the side of the red diamonds. This gave the background a lot of dimension!
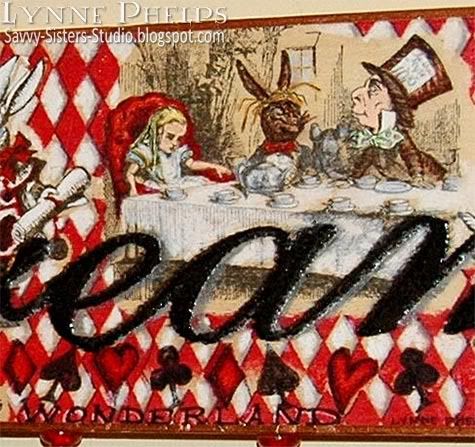
Then I added some doodles with a super-fine tipped black Sharpie! I put "Alice" inside the "D" of Dream. I sketched in a row of card suit symbols under the word Dream, filling them in with red and black Sharpies, and then printed "Wonderland" beneath that. I scribbled "I'm late! I'm late!" near the white rabbit holding a watch in the upper right corner.
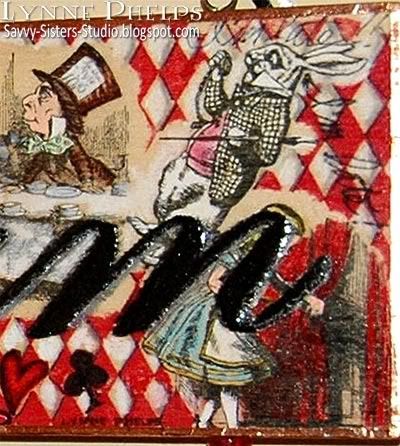
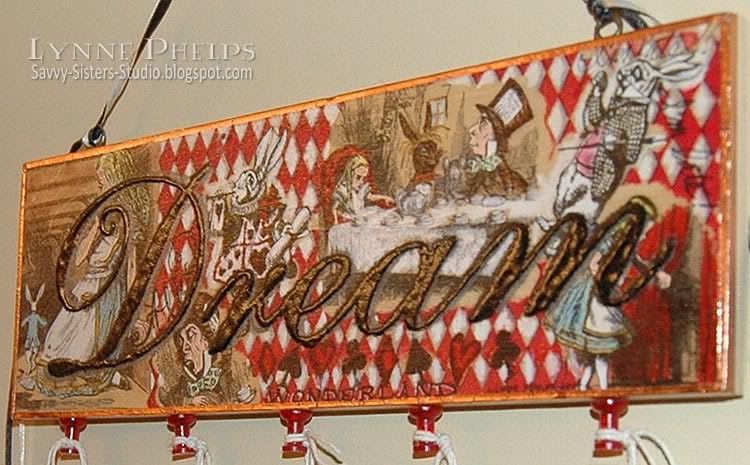
By this time the word "Dream" had diamonds all over it and was looking the worse for wear! With a silver paint pen, I added a "drop shadow" to the right side of each letter. Then I carefully filled in the letters with a Versamarker and heat embossed it with ultra-thick black embossing powder. I repeated this a couple more times until it was quite thick.

You can see the dimension of the embossing in the glare, and in the photo below. It really adds a lot! Then I added copper foil tape around the edges. The adhesive on copper foil tape is pressure sensitive, so I burnished it on firmly with a bone folder. You can click the photo below to make it bigger.
It still looked unfinished! I wanted it to be taller, not so horizontal. What to do, what to do? I was rummaging through drawers of stash and stabbed myself on a red push pin. Hmmmm. Yes, I was able to push in a row of pins across the bottom! Time for some tags! Gotta love the tags!
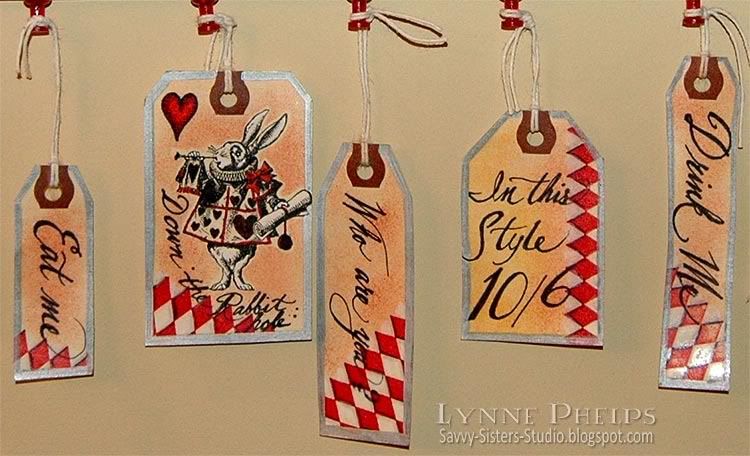
I started a bunch of manila shipping tags. I stamped the rabbit first and filled him in with Prismacolor pencils, then stamped the edge with the harlequin diamond stamp and filled it in with white and a gray drop shadow as before. I masked then stippled the background with several colors using Color Duster brushes. Then I made a tag that matches the one tucked into the Mad Hatter's hatband: "In this Style 10/6" which, for us ingnorant Yankees means ten schillings and sixpence, or half a guineau back in Alice's day! I started with the diamonds then mimicked the writing on Tenniel's original illustration. I liked the text so much I added "Down the Rabbit hole" to the first tag.
I stepped back and took a look. If I added anymore images like the rabbit, it was going to take away from the wood plaque. So text only - I thought of some short text snippets I could put on my other tags and the first one that came to mind was the Caterpillar asking Alice "Who are you?" and then of course the other size changing scenes with "Drink Me" and "Eat Me" finished it off.
I have temporarily added black and white ribbons to hang it, but I think I may look for some Tim Holtz type of chain or similar to hang it with in the future. A couple coats of clear and I was done for now.
One more view of the completed piece! Click the image to enlarge.
I hope you enjoyed my little journey through Wonderland and the sharing of a bit of the my creative process! I know it is not good manners to say it about your own work but I LOVE this thing!! And I love Nature's Blessings stamps!
FYI, this project won an Audrey Award too!
Please leave a comment before you go!










I love your Dreaming of Wonderland plaque. That would brighten up any wall. Thanks for sharing!
ReplyDeleteThis is really great - just love it!
ReplyDeleteI hope this project is hanging with pride somewhere in your home...because it's awesome! Hope this note finds all well with you. Just dropping by to wish you and yours a Merry Christmas.
ReplyDeleteI love that fanciful project!
ReplyDeletebeautiful! so much work, but worth it I think!
ReplyDelete