Tuesday, December 21, 2010

Oh Alice! CHAPTER 44: Curioser and Curioser - Winter Wonderland!

Click to enlarge;  Collage stamp © Stampin' Up!

`Curiouser and curiouser!' cried Alice (she was so much surprised, that for the moment she quite forgot how to speak good English); `now I'm opening out like the largest telescope that ever was! Good-bye, feet!' (for when she looked down at her feet, they seemed to be almost out of sight, they were getting so far off). `Oh, my poor little feet, I wonder who will put on your shoes and stockings for you now, dears? I'm sure _I_ shan't be able! I shall be a great deal too far off to trouble myself about you: you must manage the best way you can; --but I must be kind to them,' thought Alice, `or perhaps they won't walk the way I want to go! Let me see: I'll give them a new pair of boots every Christmas.'
Hello from all of us here in Wonderland! This week we are Curiouser and curiouser to see if you are willing to play along with our weekly challenge. The challenge is a simple one, and one that most of us should be able to play along with, we would like to take Wonderland and turn it into a Winter Wonderland! Yes, that's right.....put your boots on, hats, mittens and lets play in the snow! Alice, with a hat on? Rabbit in the snow? Anything that reflects a Winter Wonderland. Have fun with it!

This week we are being sponsored by SUGAR NELLIE / FUNKYKITS. They are a fabulous company and you really should go over and take a peek.
Sugar Nellie is a small Scottish company that brings you fantastic rubber stamps from some amazing artists. Funky Kits is the sole online retailer for Sugar Nellie stamps - so head on over to grab yourself some of that sugary goodness!

The prize for this week will be 1 set of 6, yes, I said 6 Leanne Ellis Alice in Wonderland stamps. I sure wish I was able to win this one. This set of stamps are fantastic!
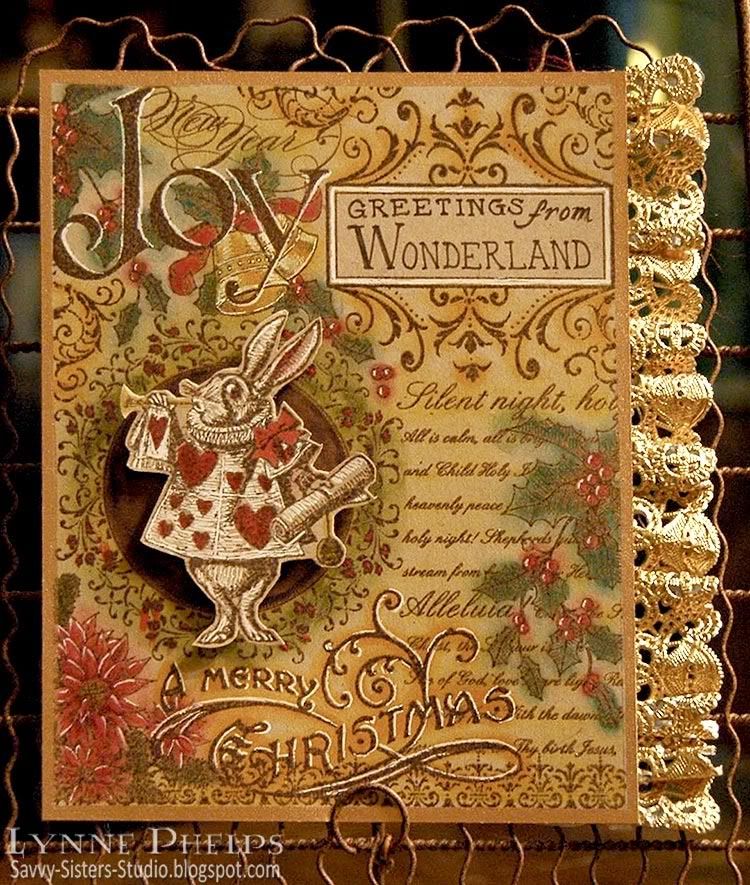
My Card: Christmas Greetings from Wonderland!

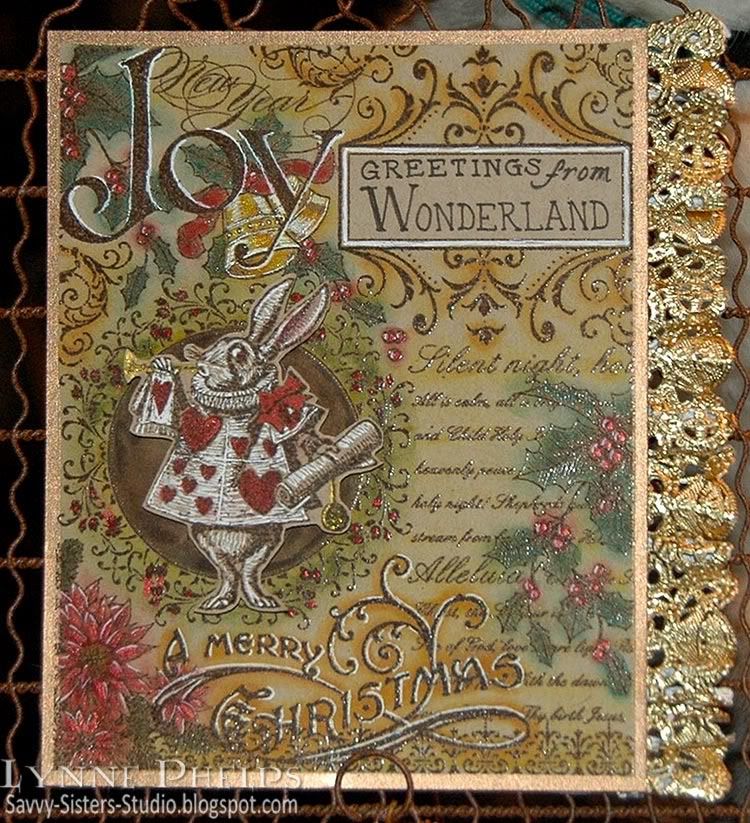
I just received my order from the Stampin' Up! Holiday Mini Catalog, and this fabulous Christmas Collage stamp was at the top of my list! Isn't it just gorgeous? I started with kraft card stock, inking up the stamp first with Versamark and then with dark brown before stamping, which allowed me to heat emboss the image with clear detail powder. TIP: by inking up the stamp first with Versamark, I can turn any color of dye ink into an embossable ink. Otherwise I would need to use a Distress ink or a pigment ink to get the ink to stay wet long enough to emboss.  Then I sponged color into the image, applying Distress inks with Tsukinko Fantastix tools. I used the pointed tip for the red and green shades where I needed to pinpoint the color, and the rounded tip for the golds and yellows in the background. Highlights were added with a white gel pen and Smooch for touches of sparkle in gold, pearl moon, and red!


Click to enlarge

Then I stamped the White Rabbit the same way, sponging with the Fanstastix and highlighting with white gel pen and Smooch. I really love the way this looks on the natural colored kraft card stock.  I filled in the circle on the collage stamp with sponged brown ink and then adhered the White Rabbit cutout with a ⅛-inch thick pop dot. I edged it all the way around with a Krylon Leafing Pen in my favorite Pale Gold.

I love it that this collage stamp includes an open rectangle for you to really personalize the design! I wrote "Greetings from Wonderland" in the space using a dark brown Marvy marker.  I could have computer generated the sentiment, but with the vintage look of the collage stamp I thought handwriting would be ok. TIP: Draw a box on scratch paper and write in the words so you can see what kind of space each word will take. Then compensate for irregularities by changing letter style. My "greetings" was a little wider than I planned, so the "from" would not fit. I just changed to a narrower italic style and dropped down a bit to write the "from" so it looked like I planned it that way! ;-)

The final touch was added by cutting the lacy edge from a small gold paper doily. TIP: Make wonderful ruffled edging with a paper doily! When you trim the edging from the center of the doily, trim as closely to the lace edge as possible. Then straighten out the edge, carefully bending the edge back and forth about every eighth to fourth inch. As you straighten the curve, a wonderful ruffle will form as the outer edge is much fuller than the inner edge. Doesn't it look fantastic?  So rich and glitzy and textured!  Don't you think it adds a lot?

Check out the rest of the design team's creations at Oh, Alice! and enter your own Winter Wonderland card there!

Please leave me a comment and let me know what you think of my Greetings from Wonderland card, sponging, Smooch, or ruffled doily edgings! I love hearing from you and seeing your comments always makes my day!!!

Saturday, December 18, 2010

Oh, Alice! Winter Wonderland - Tomorrow!

I am on another business trip - the last of the year, thank goodness. I had hoped to be home by now creating an Oh, Alice! card for you, but it turns out I won't be able to make it home until tomorrow. In the meantime, please check out the fabulous Winter Wonderland creations created by my design team sisters to inspire you, and I'll have my card for you tomorrow!

>> Go to Oh, Alice! to see the Winter Wonderland inspiration creations

Saturday, December 11, 2010

Oh Alice! CHAPTER 43: Christmas Greetings - "From a Fairy to a Child"


Click to enlarge

LADY dear, if Fairies may
For a moment lay aside
Cunning tricks and elfish play,
'Tis at happy Christmas-tide.

We have heard the children say—
Gentle children. whom we love—
Long ago, on Christmas Day,
Came a message from above.

Still, as Christmas-tide comes round,
They remember it again—
Echo still the joyful sound
"Peace on earth, good-will to men!"

Yet the hearts must childlike be
Where such heavenly guests abide;
Unto children, in their glee,
All the year is Christmas-tide!

Thus, forgetting tricks and play
For a moment, Lady dear,
We would wish you, if we may,
Merry Christmas, glad New Year!
Christmas, 1867.

Welcome down the rabbit hole once again my friends!  DT sister Erin found this poem by Lewis Carroll in the back of a copy of Through the Looking-Glass and What Alice Found There. In researching the history of this poem, Erin found the The Lewis Carroll Memorial Window at Daniell Chapel in England. 

The 3 center panels contain verses from the Lewis Carroll poem used as today's inspiration!  The window was designed by the stained glass artist Geoffrey Webb and depicts a Nativity scene.  This is a must see for anyone that loves Wonderland. Notice Lewis Carroll and Alice in the left panel, and the bottom section of each panel includes characters from Wonderland - the White Rabbit, Dodo, the Caterpillar, Mad Hatter, and more!

For our Oh, Alice! challenge this week let's get into the Christmas spirit. The challenge is to use red, green, + one color.  You can still use other colors for hair and skin.  Just make the main use of color red, green, + one.
Our wonderful sponsor this week is Pixie Dust Studio.  The lucky winner will win their choice of 2 digital images.

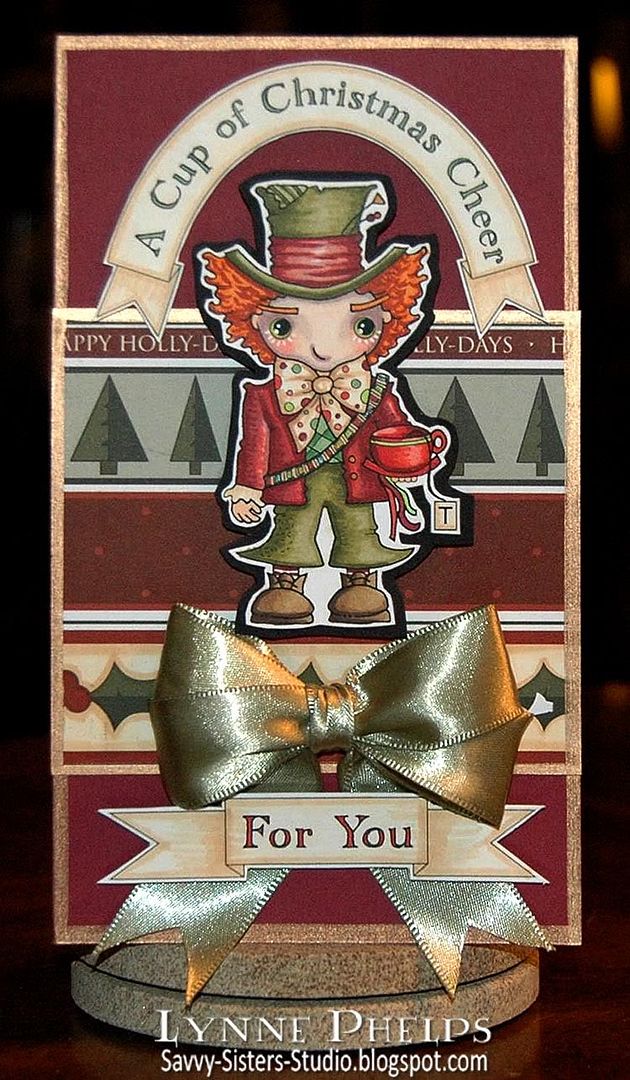
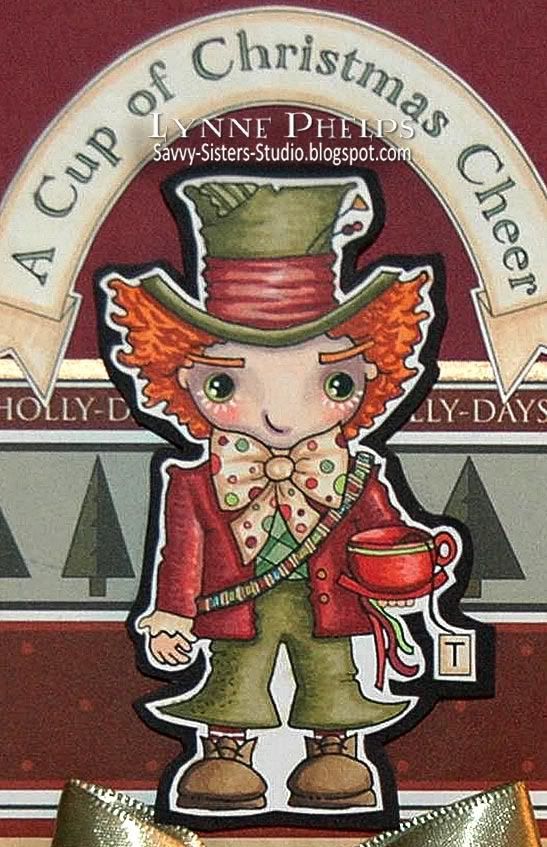
My "Touch of Depp" Card

I am using one of the charming Pixie Dust Studio Wonderland images called "A Touch of Depp" and it is so much fun to color - and how can you go wrong with a Johnny Depp inspired image! I printed this Mad Hatter image with a black and white laser onto color laser printer paper and colored with Copic markers. I tried to match the look of Johnny Depp in the Alice in Wonderland movie, but shifted his outfit into various colors of rich reds and greens in keeping with today's challenge. I also made the sentiments and banners on my computer and printed and colored them the same way. I covered the back of all my colored images with glue stick and adhered them to cheap white card stock and trimmed them out.


Click to enlarge
 My colors were inspired by this great patterned paper from Nikki Sivils. I love the rich muted colors of this Happy Holly-Days Christmas collection, and this page of border patterns was the inspiration for this week's card.  To help the Mad Hatter stand out better against the bold prints, I mounted my cutout on black and then trimmed it again and mounted it with pop dots. The banner sentiments were adhered with foam mounting tape that gives it dimension but not as high as the pop dots.

Click to enlarge

Finishing touches included rimming all the edges with a Krylon Pale Gold Leafing Pen, and a double-looped bow  of soft sage green satin ribbon made on my Bow-Easy.

Now let's see what the rest of my design team sisters have created for you this week!

So get your Santa hat on, turn on your favorite holiday music and get crafty for your chance to win your choice of 2 digital images!  You have until 8 p.m. on Friday the 17th of Dec to play along by entering your creation at Oh, Alice!

Please leave me a comment, they really make my day!

Saturday, December 4, 2010

Oh Alice - I'm running late

I am rearranging my craft room and it is still in a state of chaos, but friends are coming over later today to help me make it workable! Please check back, I will have my Oh, Alice! card up in a day or two. In the meantime, please visit Oh, Alice! and see the rest of the design team's wonderful creations featuring hand made flowers and Some Odd Girl stamps!
Related Posts with Thumbnails