Tuesday, January 26, 2010

I'm a Shining Star!!!

My Card was featured at SSCC!
I am so thrilled that my hospitality house card, which I submitted to the Stamping Sisters in Christ Challenge #22, was selected as one of this week's Shining Stars!! They announced this week's winners today. Each week someone selects a Bible verse, and expands on it's significance to them, and poses a challenge based on some aspect of the text. Challenge #22 was Joshua 24:15 - "As for me and my house, we will serve the Lord." You had to make a card that was house related or a home decor item.

Now I get to display my Shining Star award in my sidebar. My first award, and what could be nicer than it being for a SSC challenge? I'm very happy today!

Monday, January 25, 2010

Punched Flower Thank You

(Note - edited post to add some missing links!)
One of the things that really sets the beautiful Prima flowers apart is the petals are usually ridged from center to tip, and the petals are really curved - they have a lot of dimension. I started thinking about what I could do with some much humbler home-made flowers created with paper punches!
Punched Flower Thank You
I started with a soft green card base (Stamin' Up!) which I embossed with Swiss Dots (Cuttlebug). Then I cut a Label 1 Nestie (Spellbinders) from white cardstock (Georgia Pacific) and sponged the edges with turquoise dye ink (Marvy). I stamped a bold stylized flourish for the stems (Brocade Basics - Stampin' Up!) with muted green dye ink (Marvy). The larger flower was punched (Retro Flower - EK Paper Shapers), and then I ridged each petal three times using my Scor-Pal. Smaller flowers were punched (Marvy), I sponged all the petals (Bubblegum Pink - Marvy) and then curved them around a paint brush handle. I stacked the flowers, and added a button to the center of each with a glue dot. Hemp twine had been tied in a bow through the holes of the button. (I found this very fine twine in Michaels in the jewelry section, near the leather thongs. It comes with four colors on a card, or four sections of natural).
Punched flower close-up
I wanted some sparkle, so I used a two way glue pen to add coarse crystal glittler to various areas. I like the "sugar-coated" look of the coarse glitter. I am getting a lot better with glitter control, as I sparkled at the end of the exercise but the cats escaped relatively unscathed!
Photobucket
I stamped the sentiment (Stampin' Up!) in bubblegum pink (Marvy) and cut it out with a notched end to give it that banner look that I'm so fond of lately! I used a glue dot at the left and a big button with a twine bow, then I arched the sentiment panel away from the card base a bit to add dimension before adding another glue dot at the right end.

This card is my submission to Stamping Sisters in Christ Challenge #23 - 1st Peter 1:23: "For you have been born again, not of perishable seed, but of imperishable, through the living and enduring word of God." Since most seeds spring up in green shoots, the challenge is to use a touch of green on your card. Of course I have moved beyond seeds into fully grown paper flowers!

This card is also for Flourishes Timeless Tuesday Challenge FTTC51 - Make something inspired by the letter "P" - and I chose PUNCHES!

Please leave a comment - that's what makes blogging worthwhile. I treasure every one!

Saturday, January 23, 2010

Button Birthday Wreath and my Photo-Shoot Assistant

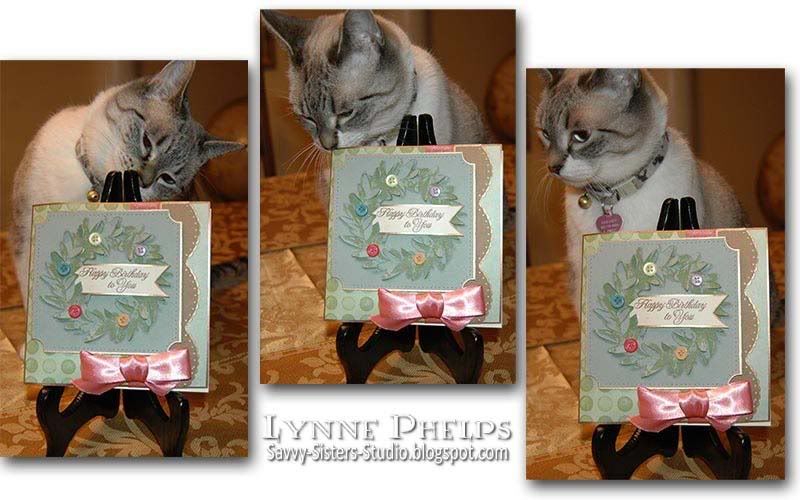
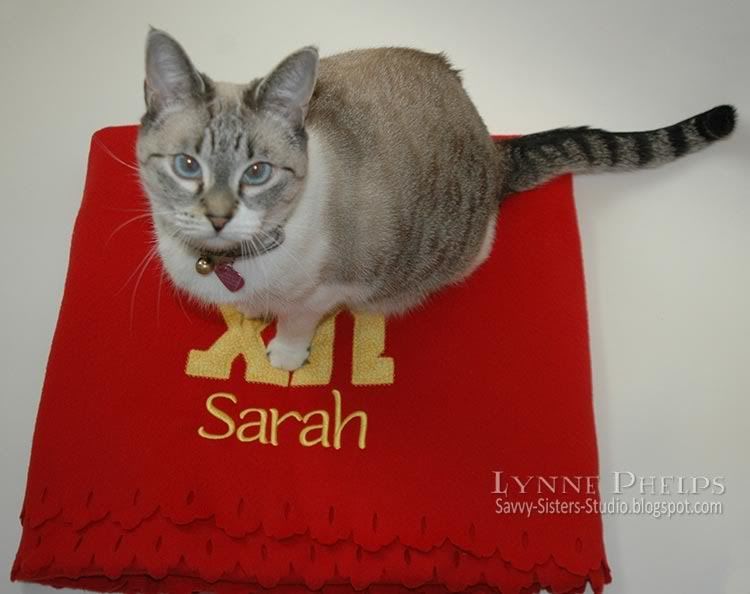
I thought I would share with you what I go through to photograph these cards! I was never a cat person before. I have my first two cats, and they are both the boss of me! After dogs, it has been very humbling. You know what they say - Dogs have OWNERS; Cats have STAFF!!! May I present Beignet, my Siamese mix kitty, and a self-appointed photo-shoot assistant!
Photobucket
I have always loved this leafy wreath stamp and I like giving it some dimension by "lifting" some of the leaves. It occured to me that people place wreaths on their door year round, so I was not restricted to using it only at Christmas. I added some buttons and ribbon in Spring colors and made it into a birthday card!

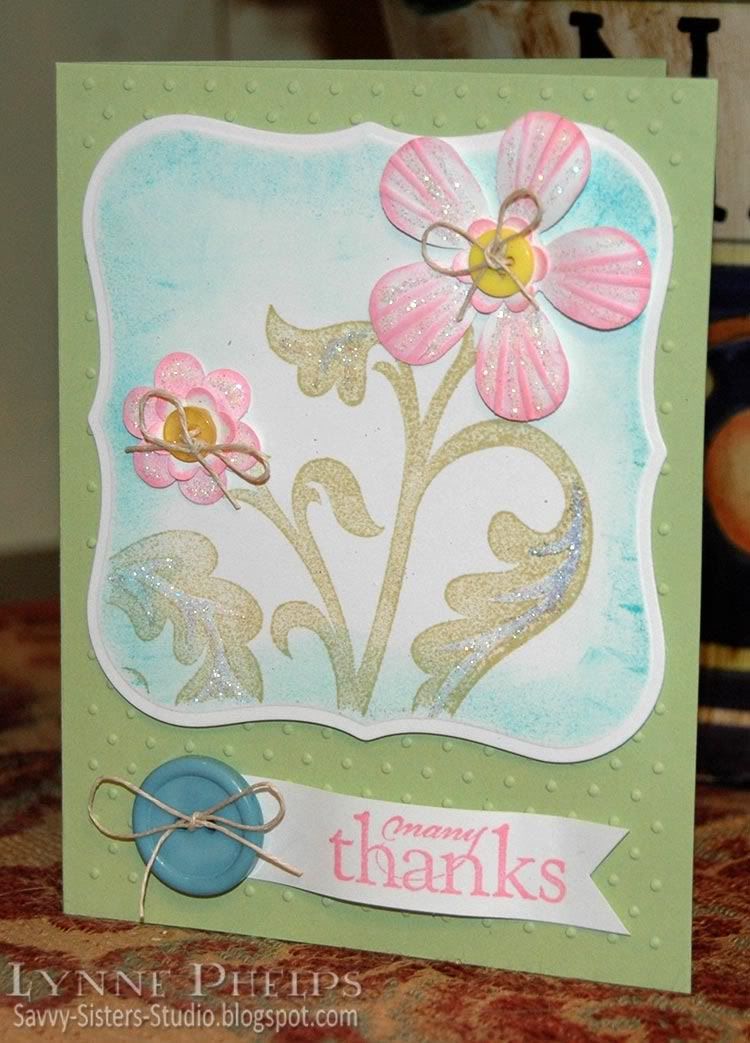
The ivory card base was stamped with distressed polka-dots (Dotted - Stampin' Up!)  in green (Memento - Bamboo Leaves), leaving the right edge unstamped. I sponged it with pale aqua ink (Adirondack - Ranger).  On pale green cardstock (SU) I stamped the wreath (Stampington) in in green 
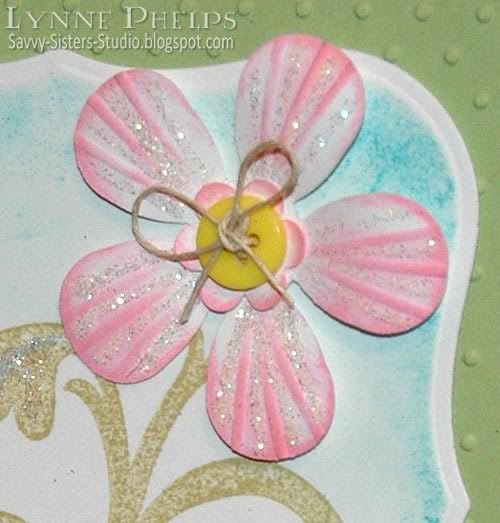
(Memento - Bamboo Leaves). Then I trimmed around the ends of several leaves with an Xacto knife and lifted them up to add dimension. I wish you could see how much this adds, the photo does not really show the effect.
Photobucket
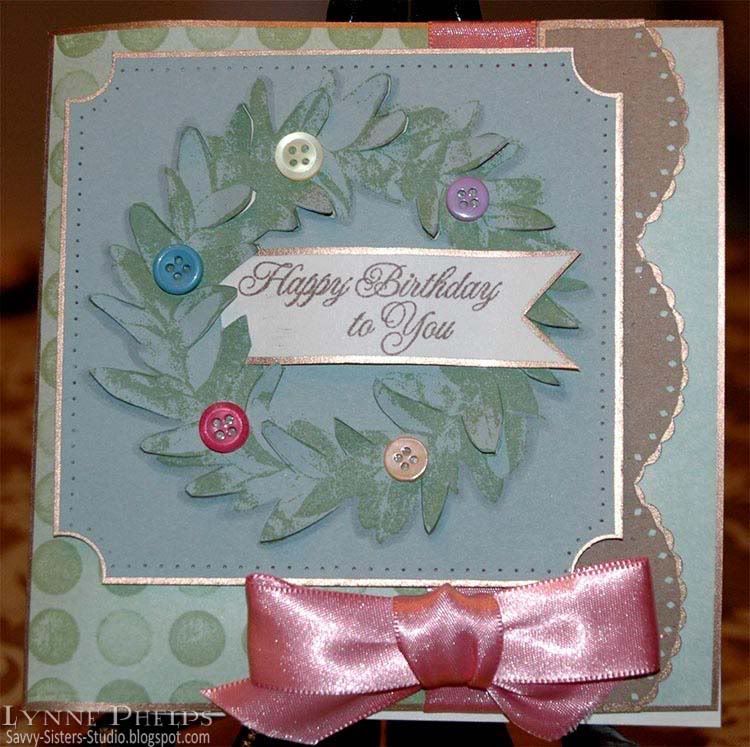
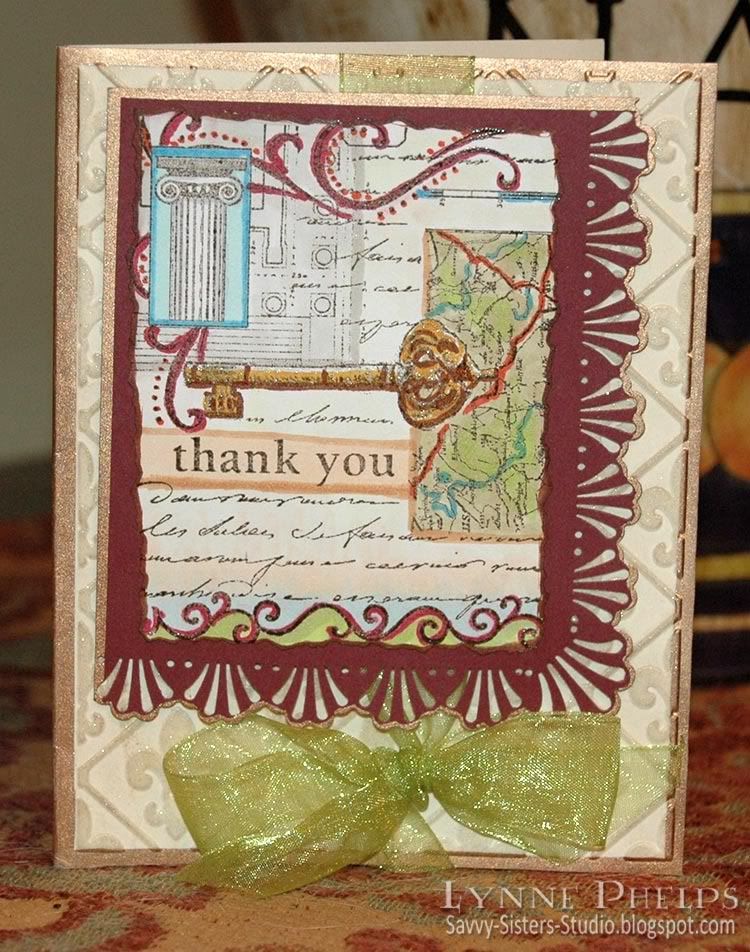
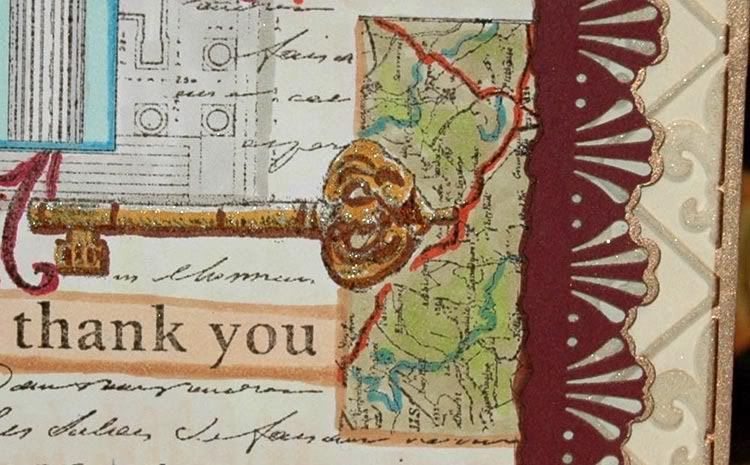
I cut the corners of the green panel with a 3/4 inch circle punch, and then used my Tim Holtz design ruler to pierce a border around the edge of the panel. A gold leafing pen (Krylon) was used to gild the edges.  Buttons were applied with glue dots.  I stamped the sentiment (Damask Designs - Papertrey Ink) on an ivory scrap, notched the end to make a banner look and gilded the edges.  I edged punched a scrap of kraft cardstock with a large scallop (EK Success) and gilded the edge. I adhered the scallops to the card base, then wrapped a pink satin ribbon all the way around the card front. I tied a bow with the Bow-Easy and stuck it on with a glue dot.

I cut a slit along the left inside edge of the wreath and tucked the end of my banner in and secured it on the back. I curved the banner and secured it near  the notch with a glue dot. The sentiment actually arches out from the surface a bit, adding more dimension! Then I mounted the wreath panel with pop dots.

In case you are wondering, Beignet is the word for the French donuts you get in New Orleans that have powdered sugar dumped on top. It is pronounced Ben-Yay (rhymes with Ben-Gay, the ointment for aches and pains).  When she was a little tiny kitten, only her face, ears and tail were gray and the rest of her was white. She looked like someone had dumped powdered sugar on her and just the gray parts escaped!  She was starving when I got her - a stray kitten that would fit easily in the palm of one hand. A little handful of bones wrapped in fur covered in bugs, so weak she could barely meow.  A week later after medicine and food I had a new boss, a bouncing bright-eyed kitty!  Now she is my little French dumpling, she loves her food way too much.
Here is one last picture of my photographer's assistant! She "helps" me with ALL my pictures, LOL!!
Photobucket
I hope you enjoyed my button birthday wreath!  Please leave me a comment. Do your cats help you too?
:-)

Monday, January 18, 2010

Hospitality House!

ETA: Edited to add that this card won a blinkie award from Stamping Sisters in Christ! It was one of the three "Shining Star" winners from this week's challenge.

My brother-in-law's parents always invite me to stay with them for Christmas. Since losing my own mother, they have really adopted me into their family and I appreciate them so much; they are such a blessing to me! I wanted the thank you card to be a little gift of my time that they could enjoy. I also wanted to play with my new Home Made stamp set (Papertrey Ink).

Thank you card
I enlarged on an idea I got from this PTI blog post. I started by cutting a Label One Nestability (Spellbinders) and scoring lines with my Scor-Pal to represent the siding, trying to stay out of the embossed edge area. I shaded underneath each score line with a warm grey Copic marker to add a shadow to enhance the clapboard effect. After I did that, I realized I should have left one line off near the bottom for my grassy area, but I just colored it all green with a Copic marker anyway, LOL!

On ivory cardstock, I stamped the door, window and window box. The images are all divided up - the lines are the door are one stamp, the solid color is another stamp. The curtains are separate from the window stamp. I only wish the shutters were separate; I had a hard time getting the color onto the right parts of the stamp as the shutters and window frame almost touch! LOVE this Home Made stamp set!

Window box close-up
Of course I really got into the details! I punched several "plants" with the Branch punch (Martha Stewart) and added them to my litte window box!

Sentiment
I stamped the sentiment in Rich Cocoa (Memento) and notched one end to form a little banner, then added a button at each end with glue dots. I curved it so it has some dimension which really adds a lot of interest!
This card is for the Stamping Sisters in Christ Challenge #22: Joshua 24:15 - "As for me and my house, we will serve the Lord." You had to make a card that was house related or a home decor item. It is also for Flourishes Timeless Tuesday Challenge #FTTC50: Stamp a scene!

I hope you enjoyed the card. Please leave a comment, I'd love to hear from you!

Wednesday, January 13, 2010

Harlequin Hospitality

Our Sunday school class had an after Christmas party which was so much fun! The host and hostess had a wonderful home decorated in strong warm colors which I loved! The dining room was deep red and the chairs had ivory seat cushions with a black damask pattern. The adjoining living room had warm gold walls. She also had a lot of black wrought iron... So I guess you could say her home was the "trigger" that inspired this thank you card!
Thanks for your Hospitality
The base is a black 5" x 6.5" card. I stamped the damask image (Papertrey Ink - Damask Designs) by first inking the stamp with Versamark, then with black dye ink (Memento - Tuxedo Black). I heat embossed it with clear detail powder (Ranger). I used the same technique to stamp the sentiment (Papertrey Ink - Home Made). I then stamped a harlequin diamond image (Stampers Anonymous) in red dye ink (Marvy - Crimson Lake) on ochre cardstock (Stampin' Up! - More Mustard). I did not have any cardstock in the red I wanted, so I used the Crimson Lake ink pad in a direct-to-paper technique on another piece of More Mustard cardstock, which I used under my harlequin zig-zag edged piece and at the border-punched bottom edge (Fiskars). This way it perfectly matched the stamped image.

After that, I took a scrap piece of cardstock and assembled all my pieces on it. I cut up my stamped diamond piece to create a zig-zag edge, and trimed another small strip so I would have a row of triangles. I sewed a straight-stitch around the edge, then zig-zag stitched between the pieces. I LOVE this look! I finally broke down and bought a Janome Sew-Mini at Hancock Fabrics and love the texture it adds to the card!

I punched a slot (Stampin' Up!) in the focal point piece, then cut a slit in the fold of the card base so I could wrap the ribbon all the way around the front of the card. I then tied a knot and trimmed the ends of the gorgeous gold 7/8" double-faced satin ribbon (Hobby Lobby).

I am so happy with how this card turned out that I don't want to give it away! But I will, I sure hope they love it. Do you have any cards you have been unable to give to the person for whom you made them? Please leave me a comment and let me know!

Saturday, January 9, 2010

Thanks Dad for the New GPS!!

My wonderful father happens to be a techno-junkie, so anytime he picks out a "toy" for Christmas you know it is going to be great! My new Garmin 855 widescreen has voice commands and lane assist and is my new favorite thing! I thought this Thank You collage stamp (Hero Arts) that included a key and a map was very appropriate to use on his thank you card!
Thank You Collage Card
First, I embossed the ivory background with a Fleur-de-Lis folder (Cuttlebug) and then brushed the raised areas with a Champagne Dazzle pad (Versamark). I love the subtle glimmer this gives the embossing, and the watermark ink darkens a bit also, which really enhances the pattern. I then ran a Pale Gold leafing pen (Krylon) around the edges.
Then I stamped the Thank You collage image (Hero Arts) on color laser printer paper. I colored it with Copics, and highlighted the key with a clear glitter pen (Sakura Stardust). I roughly trimmed it with a deckle scissors and then ran a brown Copic marker around the edges. This was mounted on a piece of Bravo Burgundy cardstock (Stampin' Up!) which I had punched with a Deco Shell Around-the-Page punch set (Martha Stewart). The edges were highlighted with the Pale Gold metallic pen (Krylon).
Photobucket
You can see some of the detail here. You can see a bit of the Dazzle shimmer on the background and the Stardust glitter on the key. I love it that the image has a key and a map in it - perfect for the GPS mapping system that I use in my car, which requires a key! Plus this image is very suitable for male recipients!
It needed a little punch of color, so I tied a green organza ribbon around the base before mounting the punched panel with dimensionals.
As Claire would say, hope it tickles!
Related Posts with Thumbnails